How to Make a Pillow Case with a Sewing Machine
Nothing beats sliding a handmade pillowcase onto your favorite pillow, especially when it fits perfectly and looks store-bought. If you’re new to sewing or just want a quick win, learning how to make a pillowcase with a sewing machine is one of the most rewarding beginner projects out there. With straight seams, simple folds, and about 15 to 30 minutes, you can create something polished, practical, and entirely your own.
This guide covers three proven methods, from the zero-waste one-yard trick to the pro-level burrito roll, so you can pick the best fit for your time, fabric, and skill level. You’ll also learn how to cut accurately, avoid common mistakes, and finish with crisp edges every time.
Choose Your Construction Method
The way you build your pillowcase affects speed, fabric use, and final appearance. Each method has unique strengths depending on your goals.
Compare the Three Main Methods
| Feature | Burrito Method | Double Stitched Cuff | One-Yard Faux Cuff |
|---|---|---|---|
| Best For | Clean interior, luxury finish | Custom cuffs, directional prints | Speed, zero waste |
| Difficulty | Intermediate | Beginner/Intermediate | Beginner |
| Time | 20–30 mins | 20–30 mins | 10–15 mins |
| Raw Edges Hidden? | Yes (fully enclosed) | No (requires finishing) | No (hemmed top) |
| Fabric Waste | Low | Moderate | None |
Pick based on your fabric type, print direction, and desired elegance. The Burrito Method is ideal for gifts. The Faux Cuff wins for charity sewing.
Match Method to Fabric Type
- Quilting cotton: Works with all methods. Most forgiving for beginners.
- Linen or flannel: Use French seams (Burrito or double-stitched) to prevent fraying.
- Sateen or satin: Slippery. Pin thoroughly and use clips instead of pins.
- Knits or jersey: Stretchy. Use a narrow zig-zag stitch or ballpoint needle.
Avoid directional print issues by cutting on a single layer or aligning patterns carefully.
Gather Tools and Materials
You don’t need fancy equipment. Just the basics and a working sewing machine.
Essential Supplies Checklist
- Sewing machine with straight stitch capability
- Fabric: Quilting cotton recommended (stable and easy to handle)
- Matching thread for both top spool and bobbin
- Iron and ironing board (non-negotiable for sharp seams)
- Rotary cutter, ruler, and mat or sharp fabric scissors
- Pins or clips (use clips for slippery fabrics)
- Chopstick or point turner for pushing out corners cleanly
Skip sergers if you use French seams. They’re not required but save time on edge finishing.
Fabric Requirements by Method
For Two Pillowcases with Contrasting Cuffs:
– Non-directional prints: 1 yard main fabric + 1/3 yard cuff fabric
– Directional prints: 1.5 yards total (to match pattern alignment)
For One Pillowcase:
– Main fabric: 1 yard
– Cuff fabric: 1/3 yard
One-Yard No-Scrap Method (Zero Waste):
– Single fabric: 1 full yard (42–44″ wide) folded in half
Pre-wash your fabric to prevent post-sewing shrinkage, especially with cotton or linen.
Cut Fabric to Correct Size
Precise cutting ensures a smooth fit over your pillow. Standard sizes vary, so measure your pillow or existing case for accuracy.
Standard Pillowcase Dimensions
| Size | Finished Size (inches) | Burrito Method Cut Size |
|---|---|---|
| Standard | 20″ x 26″ | 42″ x 29″ (main), 42″ x 9″ (cuff) |
| Queen | 20″ x 30″ | 42″ x 33.5″ (main), 42″ x 9″ (cuff) |
| King | 20″ x 36″ | 42″ x 39.5″ (main), 42″ x 9″ (cuff) |
Cut on the fold for the Burrito Method to maintain symmetry.
Cutting Tips for Print Direction
- Directional prints (text, florals): Cut on a single layer so both sides face the same way.
- Non-directional prints (dots, geometrics): Can be cut on fold for speed and efficiency.
- Stripes or plaids: Match pattern lines across seams for a professional look.
Use a rotary cutter and ruler for clean, straight edges. Scissors can drift.
Build with the Burrito Method
This technique hides all raw edges inside the seam for a store-bought look, with no serging needed.
Prepare the Roll
Cut the main fabric to 42″ x 29″ and the cuff to 42″ x 9″. Place them right sides together along one long edge. Pin the seam.
Roll the main fabric tightly toward the pinned edge like a burrito. Fold the opposite edge of the cuff up over the roll, enclosing the seam between the two cuff layers. The seam line should be exposed, but the burrito must not be stitched into the seam.
Pro Tip: Roll tightly and keep the edge aligned. This prevents fabric from getting caught in the stitch.
Stitch and Unroll
Sew along the pinned edge with a 1/2″ seam allowance. Go slowly and ensure only the cuff layers and seam edge are stitched.
Once done, pull the main fabric through the cuff tube. The seam will be fully enclosed, and the cuff will sit neatly around the body. Press flat with an iron.
Visual Cue: You’ll see a clean seam with no raw edges exposed inside the cuff.
Finish with French Seams
Fold the pillowcase wrong sides together at the bottom short end. Sew a 1/4″ seam across.
Turn right side out. Press the seam flat, then fold again so right sides are together. Sew a second seam at 3/8″. This encases the first seam.
Repeat for the long open side. At the corner, press seam allowances flat before the second stitch to avoid puckering.
Why It Works: French seams lock in durability and look polished on both sides.
Assemble with Double Stitched Cuff
This classic method builds the body first, then adds a separate cuff. It’s perfect for mixing prints.
Sew the Body
Cut two pieces: 29.5″ x 21″ for a 20″ x 26″ finished size. Place them right sides together.
Sew the two long edges and one short edge with a 1/2″ seam. Leave one short end open (this is the top).
Finish raw edges with zig-zag stitch, pinking shears, or serger. Clip corners diagonally to reduce bulk.
Avoid Mistake: Don’t skip edge finishing. Raw cotton frays quickly in the wash.
Make and Attach the Cuff
Cut a cuff piece 42″ x 9″. Fold in half right sides together and sew the short edge to form a loop.
Press one long edge of the cuff 3/8″ to the wrong side.
Slide the cuff inside the pillowcase opening (right sides out). Align the raw edges and match the cuff seam to a side seam.
Pin all around, then stitch with a 1/2″ seam allowance.
Topstitch the Cuff
Fold the cuff in half wrong sides together, bringing the pressed edge down to cover the stitching line. Pin.
Stitch close to the inner folded edge (topstitch). This secures the cuff and hides the seam.
Pro Tip: Use a contrasting thread color for a designer touch.
Use the One-Yard Faux Cuff Method
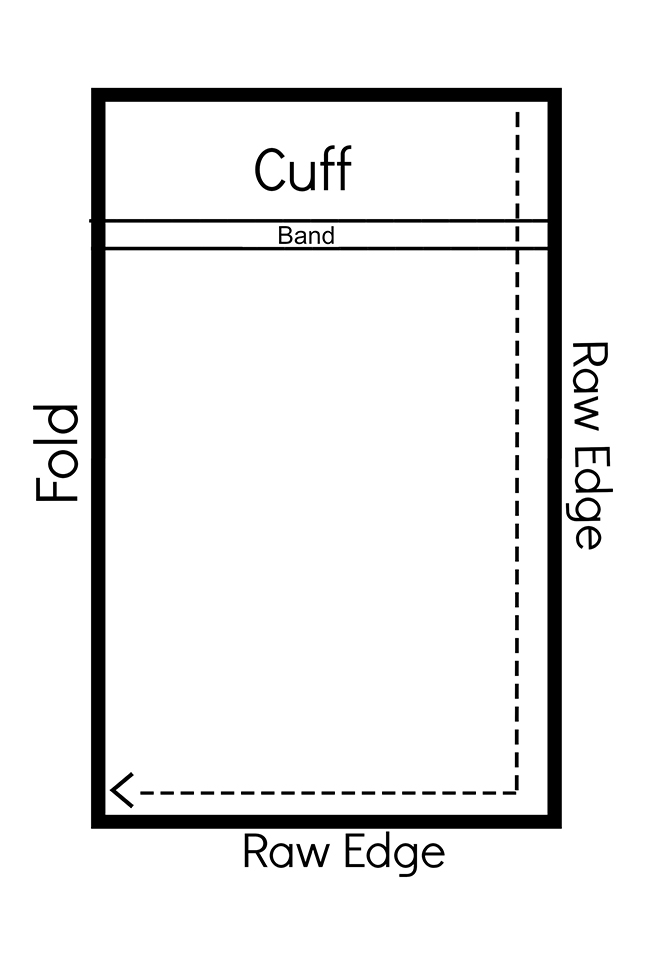
This is the fastest and zero-waste option, ideal for quilting cotton and charity sewing.
Fold and Stitch the Body
Start with a full yard of 42–44″ wide fabric. Fold it right sides together to make a 21″ x 36″ rectangle.
Pin along one long edge and one short edge (leave the top open). Sew both with a 3/8″ seam.
Trim the corner diagonally to reduce bulk. Finish edges with zig-zag if desired.
Do not turn right side out yet.
Create the Faux Cuff
Slide the unfinished pillowcase over your ironing board.
- Fold the top raw edge down 5 inches toward the inside. Press.
- Fold it down another 5 inches (double fold). Press again.
- Stitch 3/8 inch from the top folded edge, not the bottom.
Critical: Sew near the top fold. This creates the accent line that mimics a real cuff.
The bottom of the hem remains unstitched and hidden.
Final Press and Turn
Turn the pillowcase right side out. Use a chopstick to push out corners firmly without piercing the fabric.
Press the entire case flat. The faux cuff can be folded down or left up, depending on style.
Time Saver: This method skips seam finishing and separate cuff cutting.
Finish with Pro Techniques
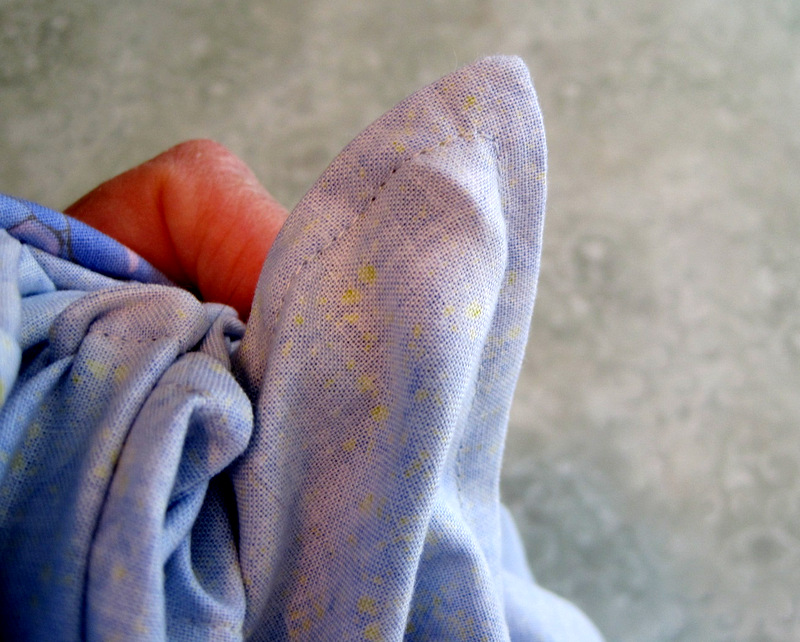
Even simple projects shine with professional touches. These steps elevate your pillowcase from handmade to high-end.
Press Every Step
- After stitching, press seams to set the thread.
- For French seams, press the first seam to one side before the second stitch.
- For cuffs, press seam allowances toward the cuff to hide stitching.
Never iron; press: Lift and lower the iron to avoid stretching fabric.
Manage Corners Like a Pro
Before turning, clip corners diagonally just shy of the stitch line. This removes bulk.
Use a point turner to gently push corners out. Press from the inside to flatten.
Avoid Puckering: If the corner looks bunched, re-press with seam allowances flattened before topstitching.
Choose the Right Seam Finish
| Method | Best For | How To |
|---|---|---|
| French Seam | Cotton, linen | 1/4″ + 3/8″ double stitch |
| Zig-Zag Edge | All fabrics | Stitch along raw edge after seam |
| Serged Edge | Speed, stretch fabrics | Overlock before sewing |
| Pinking Shears | Temporary fix | Cut edge to reduce fray |
French seams are strongest and look best on cotton.
Troubleshoot Common Issues
Even small mistakes can affect fit and finish. Here’s how to fix them fast.
Fix Bulky or Puffy Corners
Cause: Excess fabric at corners not clipped.
Solution: Clip diagonally into the corner after sewing, getting close to but not through the stitches. Press flat before turning.
Prevention: Always clip corners on pillowcases and similar projects.
Correct Upside-Down Prints
Cause: Fabric folded wrong during cutting.
Fix: For directional prints, cut on a single layer or ensure the pattern aligns when folded.
Pro Tip: Label “right side up” on your pattern before cutting.
Adjust for Tight Fit
Problem: Pillow won’t fit inside.
Solution: Add 1/2 inch to width and 1–2 inches to length when cutting. Standard pillows vary, so measure yours.
Best Practice: Use a well-fitting store-bought case as a template.
Maintain and Extend Lifespan
A handmade pillowcase can last years with proper care.
Wash and Care Tips
- Machine washable: Use cold or warm water on a gentle cycle.
- Tumble dry low or line dry to preserve shape.
- Iron as needed. Cotton and linen respond well.
Pre-wash fabric before sewing to prevent post-project shrinkage.
Boost Durability
- Use French seams for long-term strength.
- Double-stitch stress points like corners if making for kids or heavy use.
- Repair split seams quickly with matching thread.
Cotton pillowcases soften with each wash, making them perfect for cozy comfort.
Frequently Asked Questions About Sewing Pillowcases
What is the easiest method for a beginner?
The One-Yard Faux Cuff method is the easiest. It requires no separate cuff cutting, uses a single fold of fabric, and takes about 10–15 minutes with basic straight stitches.
How much fabric do I need for one pillowcase?
For most methods, you need 1 yard of main fabric plus 1/3 yard for a contrasting cuff. The one-yard no-scrap method uses exactly 1 yard of a single fabric to make one pillowcase with a faux cuff.
Can I make a pillowcase without a serger?
Yes. French seams (used in the Burrito Method) fully enclose raw edges without a serger. You can also use a zig-zag stitch or pinking shears to finish raw edges on traditional constructions.
How do I prevent fraying on cotton fabric?
Finish all raw edges with a zig-zag stitch, pinking shears, or French seams. Pre-washing fabric before cutting also helps control fraying during construction.
What if my pillowcase turns out too small?
Add 1/2 inch to the width and 1–2 inches to the length when cutting. Standard pillow sizes vary by manufacturer, so measuring your specific pillow or an existing well-fitting case gives the most accurate dimensions.
Can I use stretchy fabric like jersey?
Yes, but use a ballpoint needle and a narrow zig-zag stitch instead of a straight stitch. Stretch fabrics need flexibility in the seam to prevent popping when the pillowcase is pulled on and off.
Key Takeaways for Making Pillowcases with a Sewing Machine
You now have three reliable methods for making a pillowcase with a sewing machine, plus troubleshooting tips and care guidelines. Start with the one-yard faux cuff for a quick 15-minute project, or master the burrito roll for a flawless interior finish. Quilting cotton is your best friend as a beginner: stable, forgiving, and easy to press.
With your new skills, you can batch-produce pillowcases as gifts, charity donations, or seasonal bedroom updates. Ready to expand? Try matching pillow shams or add a monogrammed embroidery for a personalized touch.