

How to Stop Pillow from Sliding
Nothing ruins a good night’s sleep faster than a pillow that won’t stay put. Whether you’re a restless sleeper, camping on a slick sleeping pad, or just tired of chasing your pillow off the bed every morning, how to stop pillow from sliding is a surprisingly common and solvable problem. From silky pillowcases that glide too easily to inflatable camping pillows that shift with every movement, the causes are clear: low friction, body motion, and lack of anchoring. But the solutions are smarter, simpler, and more effective than you think.
This guide breaks down tested, no-nonsense methods ranging from DIY hacks to smart product choices, so you can finally keep your pillow where it belongs: under your head. You’ll learn friction upgrades, mechanical anchoring techniques, material hacks, and context-specific fixes for home, camping, and RV use.
Add Grip: Friction Solutions for Home Beds
Low-friction materials are the primary culprit behind pillow slippage. Smooth fabrics like silk, satin, and microfiber reduce grip between your pillow and the mattress, causing constant repositioning throughout the night.
Use Anti-Slip Gripper Mats
Place a small strip of silicone or rubber gripper mat between the fitted sheet and mattress at the head end. These mats, commonly sold for rugs or cushions, create instant traction. Cut a 3-inch-wide strip to match your bed width and tuck it under the sheet. This works especially well with silk or satin pillowcases that normally slide. One mat lasts years and costs under $20.
Line Your Mattress with Rubber Shelf Liner
Non-slip shelf liner placed under the pillow area grips both the sheet and pillowcase. Trim to fit, remove easily, and toss in the wash when dirty. This method is ideal for RVs or kids’ beds where smooth surfaces cause constant slipping.
Try the Double-Layer Pillowcase Trick
Sleep on silk or satin for smoother skin and hair, but stop the slide with a hidden cotton base layer. Slide a plain cotton pillowcase onto your pillow first, then add your silky one on top. The friction between layers holds the pillow in place while keeping the surface soft. No sewing, no tools. Just double the grip.
Pair Cotton Sheets with Cotton Cases
Avoid slippery fabric combinations. Cotton-on-cotton bedding creates natural resistance. Skip all-smooth pairings like microfiber sheets with satin cases. If you love smooth fabrics, mix them strategically: cotton sheets with a silk case, or flannel sheets with microfiber pillow. Test different pairings to find your friction sweet spot.
Anchor Your Pillow with Mechanical Fixes
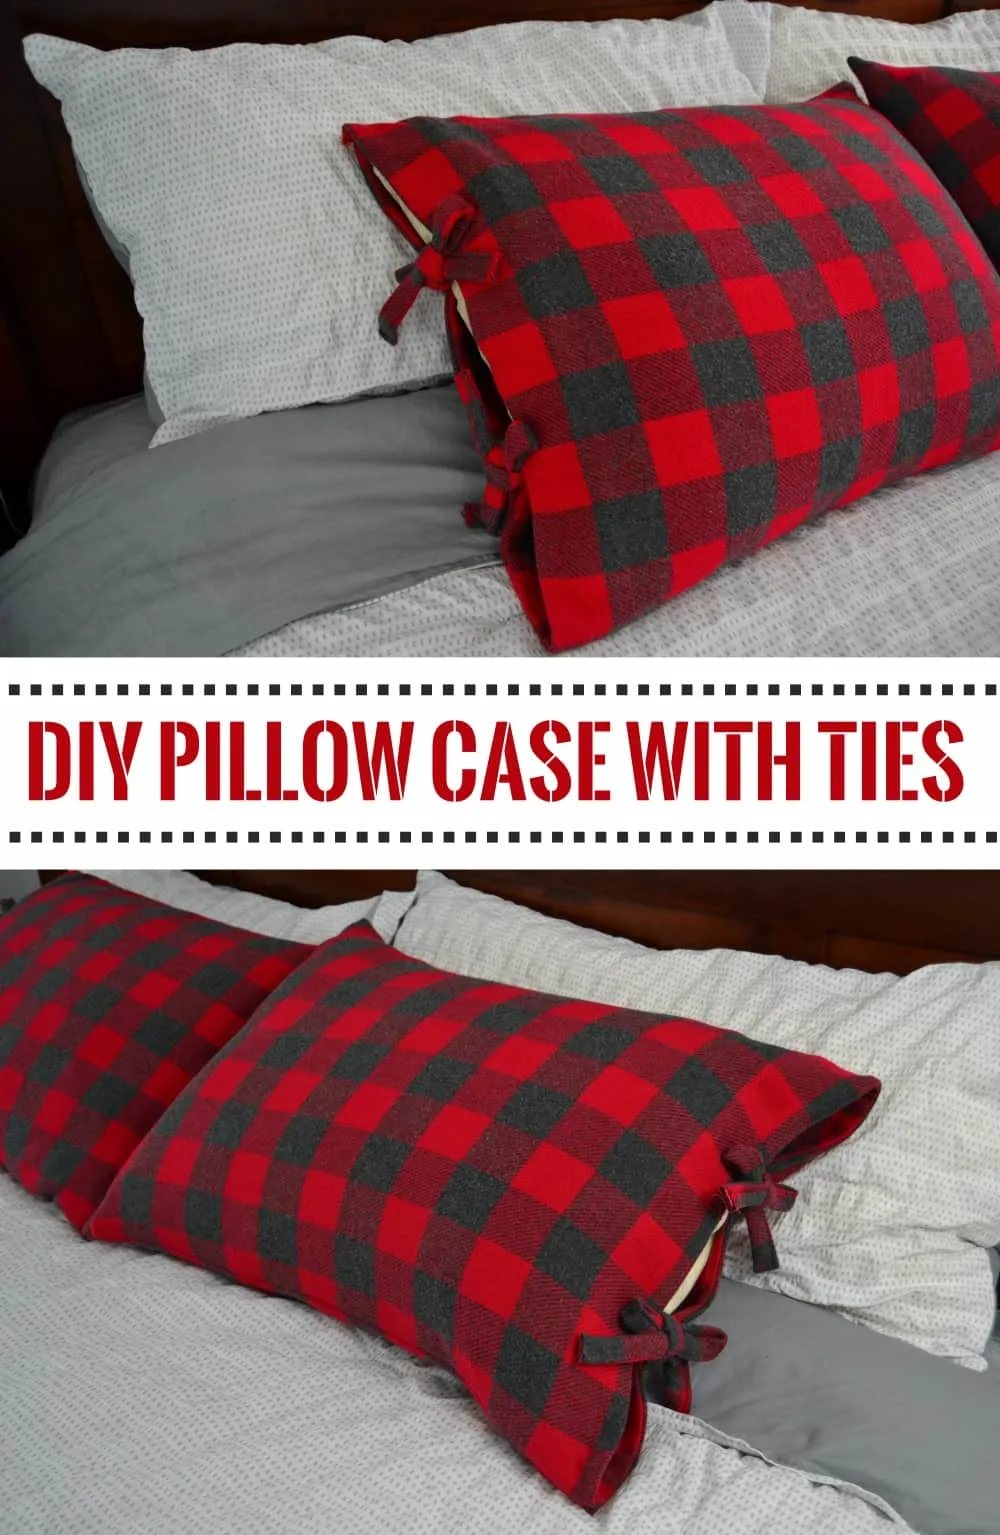
When friction alone isn’t enough, physically securing your pillow prevents movement even during heavy tossing or restless sleep.
Install Elastic Bands on Pillowcases
Sew 1-inch elastic webbing into the corners of your pillowcase so it wraps under the mattress. Think of it like a fitted sheet. Elastic hugs the edges, holding the case firmly in place. Use a sewing machine for durability. Once installed, the pillow stays centered even with heavy tossing. This method works great for adjustable beds or restless sleepers.
Thread a Strap Through the Case
No sewing? No problem. Cut two small slits near the closed end of the pillowcase. Thread a belt, rope, or nylon strap through the open end, out both slits, and under the mattress. Tighten and secure on the underside. Slide the pillow in after anchoring the case. This method is reusable, adjustable, and invisible once in place.
Pin the Pillowcase to the Mattress
Use upholstery twist pins, which cost about $5 for 50 pieces, to lock the pillowcase in place. Insert pins through the rear edge of the case and into the mattress. They hold tight without damage and are easy to remove. This solution is popular with campers and RV users who need a quick, non-permanent fix.
Sew the Case Directly to the Fitted Sheet
For a permanent solution, sew the pillowcase directly to the top edge of your fitted sheet. This ensures perfect alignment every night. It’s best for guest beds or kids’ rooms where aesthetics matter less than function. Choose matching colors to blend the seam.
Apply Material Hacks for Extra Grip
Sometimes a little creative modification goes a long way toward keeping your pillow in place.
Add Silicone Dots to the Pillow Base
Dab Permatex Flowable Windshield Sealer or a DIY silicone-mineral spirits mix on the bottom of your pillow or case. Let it dry into rubbery dots or stripes. This increases grip without sticking permanently. This method works best on removable cases. Avoid full coverage. Dots are enough. Let it cure 24 hours before use.
Cover Camping Pillows with a Buff
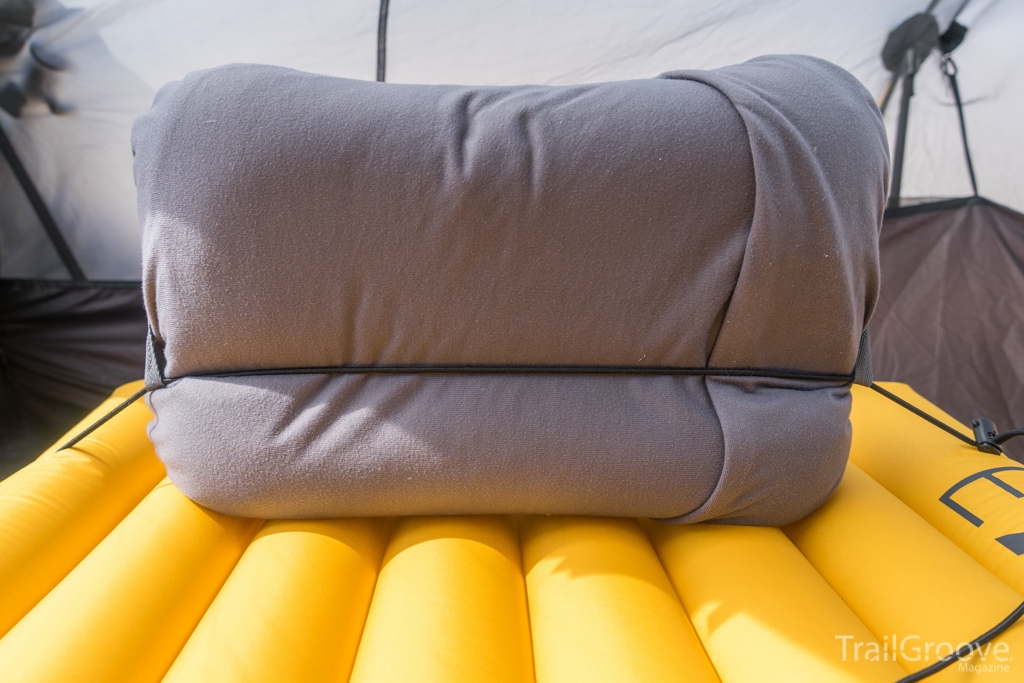
Pull a cotton or wool buff completely over your camping pillow like a sleeve. The textured fabric grips sleeping pads better than smooth silnylon. Backpackers love this trick because it also feels softer on the face. It removes easily for washing and works with inflatable, foam, or DIY pillows.
Create a Duct Tape and Cord System
Punch holes in the edges of your pillow or near the head of your sleeping pad. Reinforce with duct tape if needed. Thread a cord or strap through the holes and under the pad. Tie or clip to secure. This is a rugged fix for DIY campers without specialty gear.
Stabilize with Weight and Positioning
Sometimes the simplest adjustments to pillow placement and weight make the biggest difference.
Choose a Heavier Pillow
More mass means less movement. A Purple Pillow weighing 10 pounds barely slides, even on inclines. King-size memory foam around 4 pounds resists motion better than a light down pillow under 1 pound. For RVs or adjustable beds, pick a high-density foam or latex pillow to fight vibration and gravity.
Add Weight Under the Pillow
Tuck a small sandbag, stone, or corner of a weighted blanket beneath the pillow. This increases inertia and anchors it in place. This method is ideal for decorative throw pillows or non-sleep use. Keep it hidden and safe. Never place weighted objects directly under your head.
Leave a Gap from the Headboard
If your pillow creeps upward, it’s likely due to repeated pushing against the headboard. Keep 2 to 3 inches of space between pillow and wall. This prevents constant contact that drives the pillow forward. It’s simple, instant, and effective for back and side sleepers.
Tuck Pillow Between Mattress and Box Spring
For a no-slip hold, wedge the pillow tightly between the mattress and box spring on the sides. This creates a physical cradle that stops lateral slide. It’s best with firm pillows and thick bed frames. This method isn’t ideal for frequent position changers.
Use Physical Barriers to Stop Pillow Drift
Creating a physical boundary prevents your pillow from sliding off the bed entirely.
Install a Pool Noodle Edge
Cut a pool noodle in half lengthwise. Place the curved side down along the top edge of the mattress, then pull the fitted sheet over it. This creates a soft, flexible barrier that stops pillow drift. It costs $3 to $6, installs easily, and is safe for kids. This method is widely used in RVs and Murphy beds.
Add Bed Rails or Foam Bumpers
Attach foam bed rails or corner guards to prevent sideways slide. These are especially helpful for children, seniors, or restless sleepers. Choose adjustable models that clamp on without tools. Some even double as reading lights or grab handles.
Build a Makeshift Headboard
No headboard? Make one. Stand a sheet of MDF at the head of the bed. Drill holes and secure it to the bed frame legs with plastic zip ties. This creates a solid backstop. It’s temporary, sturdy, and paintable for decor matching.
Reposition Your Bed Against a Wall
Move your bed so the head rests against a solid wall or heavy furniture. This eliminates forward sliding with zero effort. In small spaces, rotate the bed 90 degrees so a side faces the wall and use that as your new headboard position.
Camping and RV-Specific Solutions
Outdoor sleeping presents unique challenges because smooth sleeping pads and lightweight pillows combine for maximum slippage.
Use Shock Cord and Buff Anchoring
Thread elastic shock cord through the bottom edge of a buff covering your pillow. Run the cord under your sleeping pad and clip the ends together. The tension locks the pillow in place. This uses gear you already own and is common in backpacking kits. It’s adjustable and ultra-reliable.
Strap Your Pillow to the Sleeping Pad
Use built-in loops on Montbell, Exped, or Trigology pillows. Attach nylon straps or shock cord, run under the pad, and secure. This prevents lateral and forward slide. For DIY pillows, sew on loops or use duct tape anchors.
Wedge a Jacket Between Pillow and Pad
Place a windshirt or extra jacket over the top of your sleeping pad. Slide the pillow between the fabric and the pad. The clothing layer acts as a mechanical stop. This works great in mild weather. In cold conditions, use a stuff sack filled with clothes instead.
Place the Pillow Beyond the Pad Edge
Set your pillow just past the top edge of the sleeping pad, on the ground or tent floor. No more sliding because it’s no longer on a smooth surface. This is ideal for back sleepers. Side sleepers should test first because height mismatch can cause neck strain.
Use a Backpack as a Backstop
Fill a backpack or dry bag with gear and place it at the head of your pad. Lean your pillow against it. This stops forward drift and adds insulation. Some campers use an inverted dry bag as a pillow itself, filled with clothes and positioned above the pad.
Match Solutions to Your Pillow Type

Different pillows require different approaches. Here’s how to stop pillow from sliding based on what you’re using.
Silk Pillowcases Slide Too Much
Use a double-layer system with a cotton base plus silk outer. Or place a rubber shelf liner between the case and sheet. Never rely on silk alone because it’s designed to glide.
Inflatable Pillows Keep Slipping
They’re made of slick materials like TPU or silnylon. Fix this with seam sealer dots, a buff cover, or strap anchoring. Avoid relying on weight because most inflatables are too light.
Memory Foam or Down Pillows Shift
Even heavy pillows move over time. Pin the inner corners of the case to the pillow with safety pins to stop internal sliding. Use deep-pocketed cases or zippered protectors with non-slip backing.
Optimize Based on Your Sleep Position
Your sleeping position determines which solutions work best.
Back Sleepers: Focus on Horizontal Stability
Focus on side-to-side stability. Use anchored pillowcases, gripper mats, or heavier pillows. Ensure your pillow stays centered because misalignment strains the neck.
Side Sleepers: Prevent Critical Misalignment
You need consistent height equal to shoulder width. Off-pad solutions fail because your head drops. Stick to mechanical anchors like straps, cords, or high-friction covers. As one expert notes, a pillow above the pad is essentially no pillow at all for side sleepers.
Long-Term and Product Solutions
Sometimes the best solution is upgrading your gear.
Buy Pillows with Built-In Straps
Choose models designed to stay put. The Trigology Pillow has attachable straps. The Montbell Pillow has slots for cord threading. The Exped Pillow has edge loops for tying down. The Klymit Pillow is shock cord compatible. Worth the investment if you camp or travel often.
Upgrade to a Stable Mattress
Puffy Cloud and Puffy Lux mattresses reduce pillow movement with dual-layer foam and pressure-relief zones. This keeps your head and neck aligned, minimizing the need for external fixes.
Use Zippered Protectors with Grip
Buy a pillow protector with silicone strips on the bottom. It grips the sheet while protecting your pillow from sweat and stains. This combines hygiene and stability in one product.
Maintenance and Longevity Tips
Keep your solutions working longer with proper care.
Inspect Straps and Elastic Regularly
Check DIY bands, cords, and shock cords for fraying or stretching. Replace every 6 to 12 months, especially if used outdoors. Reinforce stitching with double seams.
Wash Gripper Mats by Hand
Machine washing degrades rubber and silicone mats. Hand wash with mild soap and air dry. This keeps grip strong for years.
Replace Flattened Pool Noodles
Over time, foam compresses and loses shape. If your noodle no longer creates a raised edge, swap it out. One noodle can serve multiple beds, so buy in bulk.
Test DIY Mods First
Try seam sealer, glue, or tape on a small area first. Check for stains, odor, or fabric damage. Let it cure fully before sleeping on it.
Frequently Asked Questions About Stopping Pillow Sliding
Why does my pillow keep sliding off the bed?
Pillow sliding happens because of low-friction materials like silk or satin, lack of physical barriers like headboards, body motion during sleep, or lightweight pillow construction. Identifying the cause helps you choose the right fix.
What is the easiest DIY fix for pillow sliding?
The double-layer pillowcase method is the easiest. Simply put a cotton pillowcase on first, then add your silk or satin case on top. It takes seconds and requires no tools.
Do heavier pillows really help prevent sliding?
Yes. Heavier pillows have more inertia and resist movement better. A 10-pound Purple Pillow stays put far better than a light down pillow under 1 pound, especially on smooth surfaces.
Can I use these solutions for camping pillows?
Yes. Camping-specific solutions include the buff-over-pillow technique, shock cord anchoring, strap systems, and placing the pillow beyond the pad edge. These address the unique challenge of smooth sleeping pads.
Are anti-slip mats safe for mattresses?
Yes, when used correctly. Place small strips between the fitted sheet and mattress, not directly on the mattress surface. This protects your mattress while adding grip.
How do I stop my pillow from sliding up toward the headboard?
Keep 2 to 3 inches of space between your pillow and the headboard. This prevents repeated contact that pushes the pillow upward during sleep.
Key Takeaways for Stopping Pillow Sliding
Stopping pillow slide isn’t about one magic fix. It’s about matching the right solution to your sleep style, pillow type, and environment. Whether you’re camping, in an RV, or just tired of adjusting your pillow nightly, combining friction, weight, and anchoring methods delivers the best results.
Start with reversible hacks like gripper mats or double pillowcases. Then upgrade to straps or heavier pillows if needed. Inspect your solutions regularly and replace worn components. With these proven methods, your pillow stays put so you can sleep better, longer, and without interruption.


