How to Make a Box Pillow Cover
A saggy, ill-fitting throw pillow can ruin the look of an otherwise polished room. Box pillow covers solve that problem by adding structure, depth, and a tailored finish that flat covers simply cannot match. Whether you are refreshing a window seat, upgrading patio furniture, or sewing a dog bed, mastering how to make a box pillow cover gives you full control over fit, fabric, and durability. This guide breaks down three proven construction methods, exact cutting formulas, and professional finishing techniques so your finished cover looks store-bought instead of homemade.
You will learn which method suits your skill level, how to calculate fabric dimensions with zero guesswork, and how to troubleshoot common issues like puckered corners and zipper snags. Let us build a cover that fits like a glove and holds up to daily use.
Choose the Right Construction Method for Your Project

The method you select determines how your cover looks, how it wears, and how easy it is to clean. Matching the technique to your use case saves time and frustration.
Envelope Style for Easy Washing and Beginner Sewers
The envelope box pillow cover uses overlapping back panels instead of a zipper. This makes it ideal for indoor cushions that need frequent laundering. It requires moderate sewing skills but no zipper installation, so it works well if you are new to upholstery projects. The main trade-off is added bulk from the overlap, which can prevent a snug fit on tight outdoor furniture.
Zippered Continuous Boxing for a Professional Finish
This is the industry standard for outdoor cushions and high-traffic seating. A continuous boxing strip wraps around three sides while a hidden zipper closes the fourth. The result is a crisp, tailored look that hugs the foam tightly. It demands more fabric and advanced skills, but delivers unmatched durability and a polished appearance.
One-Piece Folded Method for Quick Projects
If you need a fast solution like a dog bed or a temporary cushion, the one-piece folded method uses a single square of fabric. You fold the corners inward and stitch them to create depth. It uses the least fabric and requires minimal sewing, but the fit is looser and less structured than the other methods.
Gather Materials and Tools Before You Start
Cutting corners on supplies leads to seam failure and sagging covers. Assemble everything before measuring your foam.
Select Fabric That Matches Your Use Case
Indoor projects work well with cotton, linen, or heavyweight home décor fabrics like cotton duck or denim. Outdoor cushions demand UV-resistant, solution-dyed acrylics or marine-grade vinyl to resist fading, mold, and water damage. If your fabric has stripes or checks, purchase an extra half yard to match patterns across seams.
Choose Thread That Withstands Stress
All-purpose polyester thread handles indoor pillows, but outdoor or seating cushions need Tex 70 UV-bonded upholstery thread. This thicker thread prevents seams from bursting under pressure. Match your thread color for invisible seams, or pick a contrasting shade for decorative topstitching.
Prepare Foam and Batting for a Smooth Silhouette
High-density foam (at least 3 inches thick) provides the best support for seat cushions. Avoid low-density foam, which flattens quickly. Wrap the foam in cotton batting or Darcon wrap using 3M Super 77 spray adhesive to fill gaps and create a smoother shape. Leave the zipper side bare to prevent snagging during insertion.
Essential Tools Checklist
You will need:
– Tape measure and fabric marker
– Rotary cutter, cutting mat, and acrylic ruler
– Sewing machine with zipper foot
– Iron and tailor’s sausage (or rolled towel)
– Pins or hem clips
– Bread knife for cutting foam
– Seam ripper and chalk pen
Skip fabric scissors and use a rotary cutter for straight, accurate edges every time.
Calculate Cutting Dimensions with Precision
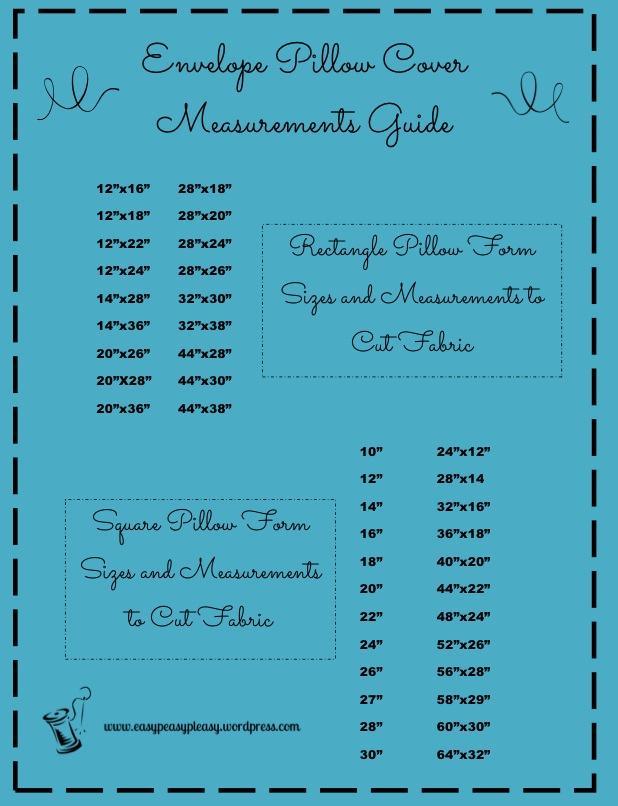
Accurate math is the difference between a cover that fits perfectly and one that sags or splits at the seams. All formulas below assume a half-inch seam allowance.
Envelope Method: Six-Piece Formula
This method uses six fabric pieces. Let X equal the short side width, Y equal the long side length, and Z equal the thickness.
- Front Panel: (X + 1″) × (Y + 1″)
- Back Panel Base: (X + 1″) × (Y + 6″) (extra 6 inches allows for a 3-inch overlap on each side)
- Short Gussets (2 pieces): (Z + 1″) × (X + 1″)
- Long Front Gusset: (Z + 1″) × (Y + 1″)
- Long Back Gusset: (Z + 1″) × (Y + 6″)
For a 17″ × 34″ × 3″ cushion, cut:
– Front: 18″ × 35″
– Back Base: 18″ × 40″
– Short Gussets: 4″ × 18″ (cut 2)
– Long Front Gusset: 4″ × 35″
– Long Back Gusset: 4″ × 40″
Zippered Method: Four-Piece Layout
This method uses top, bottom, zipper casing, and a continuous boxing strip. Let W equal width, D equal depth, and T equal thickness.
- Top and Bottom Panels: (W + 1″) × (D + 1″)
- Zipper Casing: (W + 8″) × (T + 3″)
- Boxing Strip Length: 2(W + D) − (W + 8) + 1″
- Boxing Strip Height: (T + 1″)
For a 20.5″ × 15.5″ × 3″ cushion, cut:
– Top and Bottom: 21.5″ × 16.5″
– Zipper Casing: 28.5″ × 6″ (split in half later)
– Boxing Strip: 44.5″ × 4″
One-Piece Folded: Simple Square Cut
For a finished 16″ × 16″ cushion, cut one square measuring 18″ × 18″. Fold corners to the center and stitch to create depth without separate gussets.
Cut Fabric and Foam with Accuracy
One misaligned cut ruins the entire project. Take your time during this phase.
Straighten Fabric Edges First
Square up your fabric using a rotary cutter and acrylic ruler aligned with the selvage. For patterned fabric, cut the front panel first, then lay other pieces on top to match stripes or checks before slicing.
Mark and Cut Foam Cleanly
Use a Sharpie to draw cutting lines on the foam. Score lightly with a bread knife, then cut in smooth strokes. Never tear foam, as this creates uneven edges that show through the cover.
Cut Gussets and Panels Separately
For envelope or zippered styles, cut each piece individually. Stack and pin matching pairs (like the two short gussets) to ensure identical dimensions. Use pinking shears on batting edges to reduce fraying.
Assemble the Envelope Box Pillow Cover
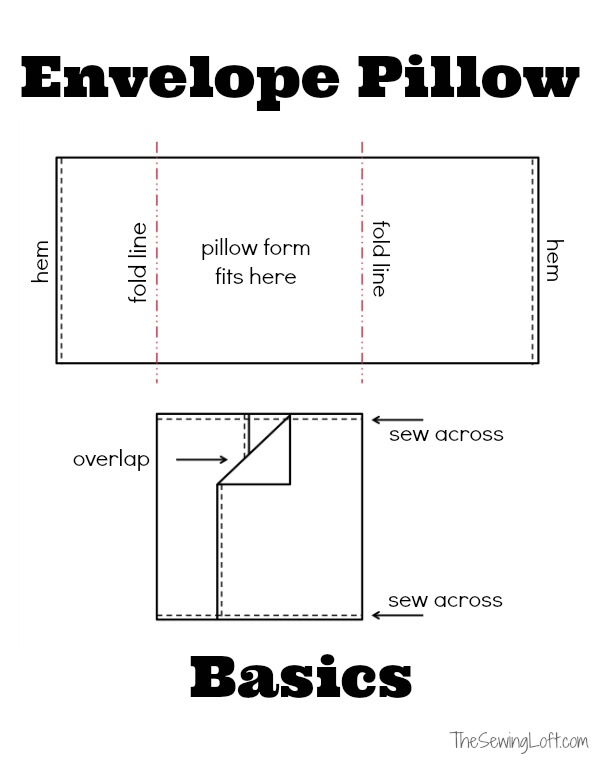
This method skips zippers while still delivering a clean, functional finish.
Sew the Overlapping Back Panels
Pin the back panel base (18″ × 40″) to the long back gusset (4″ × 40″) with right sides together along the 40″ edge. Stitch with a half-inch seam and press open. Cut this combined piece exactly in half lengthwise to create two back flaps. On the newly cut edges, fold under half an inch, then fold again for a double hem. Stitch along the hemmed edge to create the overlap that secures the cushion.
Build the Gusset U-Frame
Sew the two short gussets (4″ × 18″) to the ends of the long front gusset (4″ × 35″) to form a U-shape. Press seams open. Pin the front panel (18″ × 35″) to the open side of the U, matching corners exactly. Snip the gusset fabric at each corner before sewing to release tension and prevent puckering.
Attach Back Flaps and Finish
Align the two back flap assemblies with the open back of the gusset frame, hemmed edges facing inward. Pin the raw outer edges to the gusset frame and sew around the entire opening. Clip corners to reduce bulk, turn the cover right side out, and press edges sharply. Slide the cushion inside; the overlapping flaps will hold it securely.
Build the Zippered Box Pillow Cover
For a tight, professional fit, this method delivers unmatched results.
Install the Zipper Casing
Cut the zipper casing (28.5″ × 6″) in half to create two strips. Fold one long edge of each strip under 1 inch and press. Place a zipper face-down on one strip, aligning the folded edge with the zipper teeth. Use a zipper foot to stitch close to the teeth, then repeat for the other side. Tuck a small fabric scrap under the casing at the end of the zipper track before stitching to hide the zipper pull. Test the zipper, then trim the scrap.
Join Casing to Boxing Strip
Pin the ends of the zipper casing assembly to the ends of the continuous boxing strip (44.5″ × 4″) with right sides together. Sew to form a complete loop.
Attach Top and Bottom Panels
Notch the center of the back edge on both the top and bottom panels. Match these notches to the center of the zipper casing. Pin the top panel right-side down to the boxing loop and sew around the perimeter with a half-inch seam. Stop half an inch before each corner with the needle down, lift the foot, snip the boxing fabric diagonally (not the top fabric), pivot, lower the foot, and continue. This prevents bulky corners. Repeat for the bottom panel.
Close the Boxing Loop
Pin the remaining open section of the boxing loop together with right sides facing. Mark the seam line so it aligns flush with the cushion edges, then sew with a double stitch since this seam bears the most stress. Press open, unzip the zipper, turn the cover right side out, and press all edges.
Add Professional Finishes

Small details elevate your cover from homemade to high-end.
Install Welting for a Tailored Edge
Cut 1.5-inch bias strips, fold over welting cord, and stitch close to the cord using a zipper foot. Pin the raw edge of the welting to the right side of the top and bottom panels before attaching the boxing strip. At corners, snip the fabric of the piping (not the cord) to allow tight turns.
Press Seams with a Tailor’s Sausage
Narrow boxing strips are difficult to press without crushing the cushion shape. Insert a tailor’s sausage or rolled towel inside the boxing while ironing to maintain structure.
Match Patterns Across Seams
For striped or checked fabric, cut the front panel first. Place gusset and back pieces on top, aligning the pattern before cutting. This increases fabric use but ensures visual continuity.
Troubleshoot Common Problems
Even careful builders encounter issues. Here is how to solve them quickly.
Fix a Saggy or Loose Cover
A droopy cover usually means missing batting or low-density foam. Wrap your foam in cotton batting or Darcon wrap before inserting to fill gaps and create a smoother silhouette.
Prevent Puckered Corners
Puckering comes from excess fabric at turns. Always snip the gusset fabric diagonally before pivoting, and trim seam allowances to a quarter inch at corners to reduce bulk.
Stop Zipper Snagging
If the zipper jams, batting or fabric is likely caught in the teeth. Ensure the zipper side of the foam has no batting, and install a zipper pull housing (a small fabric tab that lifts the pull above the fabric).
Avoid Seam Failure
Weak thread or single stitching leads to blown seams. Use Tex 70 upholstery thread and double-stitch high-stress areas, especially the final boxing loop closure.
Secure a Slipping Cushion
On smooth floors, cushions slide. Glue a piece of non-slip kitchen liner to the bottom of the foam before wrapping.
Maintain Your Cover for Long-Term Use
A well-made cover lasts for years with proper care.
Wash Envelope Covers Regularly
Envelope styles are ideal for machine washing. Remove the cushion through the envelope opening and launder in cold water. Air dry or tumble dry on low heat.
Protect Outdoor Cushions
Use only UV-resistant fabric and marine-grade thread outdoors. Never use indoor foam outside; opt for reticulated (quick-dry) foam that drains water. Store cushions during heavy rain or winter.
Refresh Shape with Fluffing
High-density foam holds its shape longest. For shredded foam, unzip the cover and fluff monthly to prevent clumping.
Frequently Asked Questions About Box Pillow Covers
What is the easiest way to make a box pillow cover?
The one-piece folded method is the easiest. Cut a single square of fabric, fold the corners to the center, and stitch to create depth. It requires minimal sewing and works well for dog beds or temporary cushions, though the fit is looser than envelope or zippered methods.
How much fabric do I need for a box pillow cover?
Fabric requirements depend on your cushion size and chosen method. For a standard 18″ × 18″ × 3″ cushion, plan on at least one yard of 54-inch-wide fabric. Add an extra half yard if you are pattern-matching stripes or checks.
Can I machine wash a box pillow cover with a zipper?
Yes, most zippered box pillow covers are machine washable. Unzip the cover completely before washing to reduce stress on the zipper teeth. Use cold water and tumble dry on low, or air dry for best results.
What thread should I use for outdoor box pillow covers?
Use Tex 70 UV-bonded polyester thread for outdoor cushions. All-purpose thread breaks down quickly under sun exposure and stress, leading to seam failure. Tex 70 is thicker, stronger, and resistant to UV damage.
How do I keep box pillow corners from puckering?
Snip the gusset or boxing fabric diagonally at each corner before pivoting during sewing. This releases tension and allows the fabric to turn smoothly. Also, trim seam allowances to a quarter inch at corners to reduce bulk.
What foam density works best for box pillow covers?
High-density foam (at least 1.8 pounds per cubic foot) provides the best support and longevity for seat cushions. Low-density foam flattens quickly and causes covers to sag. For outdoor use, choose reticulated quick-dry foam to prevent mold and mildew.
Key Takeaways for Sewing a Professional Box Pillow Cover
The secret to a perfect box pillow cover lies in precise math, sharp cutting, and professional finishing. Start by choosing the right method for your skill level and use case: envelope for easy washing, zippered for durability, or one-piece folded for quick projects. Measure your foam carefully and apply the correct cutting formulas to avoid saggy or tight covers. Use high-quality materials like Tex 70 thread and high-density foam to ensure your cover withstands daily use.
Do not skip critical steps like snipping corners, adding batting, or double-stressing seams. These details separate amateur work from professional results. Grab your fabric, follow the formulas, and build a cover that fits like it was custom-made for your space.