How to Cover a Round Pillow
You’ve found the perfect round pillow form, but now you need a cover that fits beautifully. Round shapes don’t behave like squares when sewn, and without proper technique, you risk puckering, misaligned seams, or a cover that bunches awkwardly. Whether you want a flat throw pillow, a boxed seat cushion, or a tufted statement piece, the right method makes all the difference.
This guide covers five proven techniques for covering round pillows, from beginner-friendly basics to advanced detailing. You’ll learn how to measure accurately, cut perfect circles, sew invisible closures, and add professional touches like fringe, piping, and tufting.
Measure and Plan Your Pillow Size

Before touching fabric, decide on your finished dimensions and construction style. This prevents costly mistakes and ensures a snug fit.
Choose Between Flat and Boxed Styles
A knife-edge pillow is flat and simple, made by sewing two circles together. It’s ideal for decorative throw pillows and quick projects. A boxed pillow includes a side strip that adds depth and fullness, making it perfect for seat cushions or luxury decor.
For a 15-inch finished pillow:
– Knife-edge: Cut two 16-inch circles (15″ plus 1″ seam allowance)
– Boxed with 2″ depth: Cut two 16-inch circles and a 3-inch-wide boxing strip
Calculate Circumference for Boxing
To cut the correct boxing strip length, multiply diameter by pi (3.14). For a 16-inch circle: 16 × 3.14 = roughly 50.24 inches. Add 1 to 2 inches for seam allowance, so cut 52 inches long.
Account for Seam Allowances
Use a consistent ½ inch seam allowance for most projects. For outdoor or heavy-use pillows, a 1-inch allowance adds durability. Mark your seam lines clearly on paper patterns to avoid confusion later.
Select the Right Fabric and Fill
Material choice determines how your pillow holds shape and withstands wear.
Pick Non-Stretch Woven Fabric
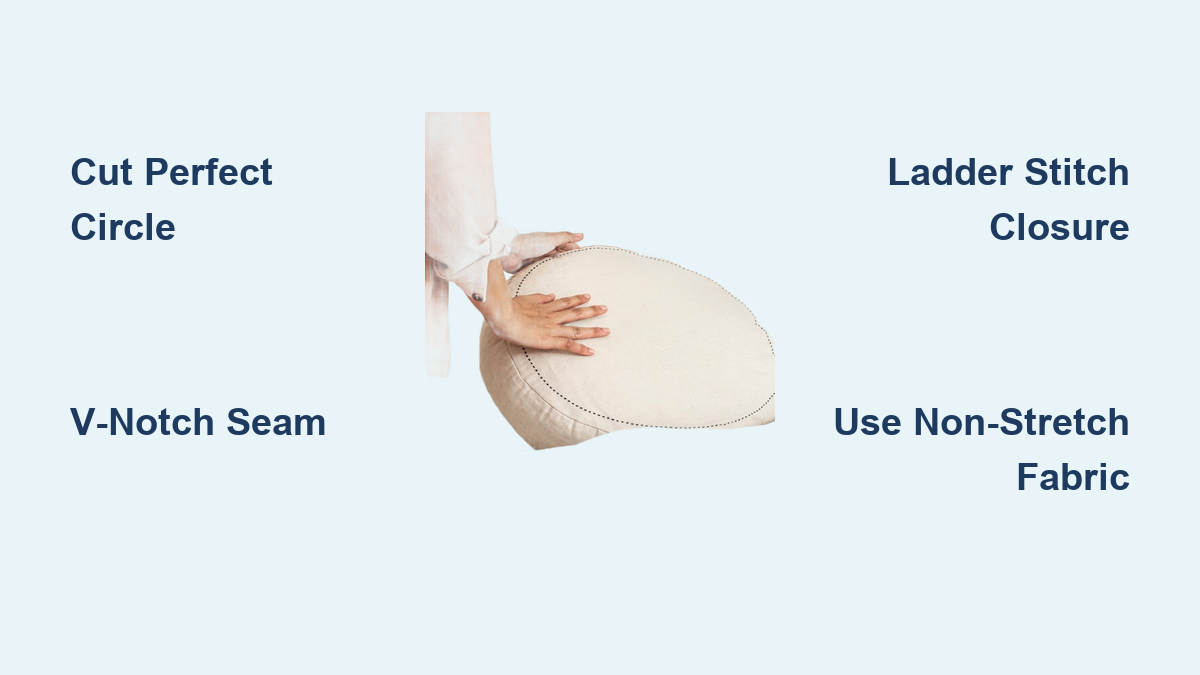
Choose tightly woven fabrics like cotton broadcloth, linen, or outdoor-grade polyester. Stretchy knits will distort during sewing and fail to maintain roundness. For outdoor use, select solution-dyed acrylic or Sunbrella-type fabric for UV and moisture resistance.
Pro Tip: Pre-wash indoor fabrics to prevent shrinkage after sewing.
Match Fill to Pillow Type
- Pre-made forms: Use a 10/90 down-feather blend for soft yet supportive pillows. For boxed styles, size up: a 15-inch pillow with 2-inch boxing needs an 18-inch form.
- Loose fill: Polyester fiberfill works for affordability and ease. Add foam chunks for firmness in seat cushions.
- DIY fill: Repurpose old clothes or bedding for practice projects.
Use Durable Thread and Tools
Opt for all-purpose polyester thread in a matching color. For tufted or outdoor pillows, double upholstery thread boosts strength. Keep a zipper foot handy for sewing close to trims like piping or fringe.
Create a Perfect Circle Pattern
Accurate pattern-making is essential because crooked circles ruin the final look.
Draw Circles with the String Method
For custom sizes, use this technique:
1. Measure radius (half the diameter) plus ½ inch seam allowance
2. Cut string 3 to 4 inches longer than this length
3. Tie one end to a pencil, the other to a pin
4. Pin the string at the center of quarter-folded paper
5. Pull taut and draw a quarter-arc, then cut and unfold
Visual Cue: Keep the pencil vertical to avoid oval shapes.
Trace Household Objects
Use large bowls, cake pans, or placemats as templates. Place on fabric, trace with fabric chalk or erasable pen, then add seam allowance by tracing a second, larger circle outside the first.
Warning: Avoid permanent markers because residue can stain light fabrics.
Cut Fabric Layers Together
Place two fabric layers with right sides together. Pin just inside the traced line to avoid shifting. Cut both layers at once with sharp fabric scissors or a rotary cutter for clean, matched edges. For outdoor pillows, use pinking shears to reduce fraying.
Sew a Basic Knife-Edge Round Pillow
This beginner-friendly method creates a flat, plump pillow with a hidden closure.
Sew With ½ Inch Seam Allowance
Place circles right sides together. Pin around the edge every few inches. Using a straight stitch, sew with a ½ inch allowance, leaving a 4 to 6 inch gap unsewn for turning. Backstitch at start and end.
Difficulty: Easy | Time: 20 minutes
Cut V-Notches to Prevent Puckering
Trim the seam allowance every ½ inch with V-shaped notches, cutting close to the stitching but not through it. These allow the curve to lie flat when turned.
Common Mistake: Skipping notches causes wavy edges, so don’t skip this step.
Turn and Stuff the Pillow
Turn the cover right-side out through the gap. Use a knitting needle or point turner to push out the curved edges fully. Insert a pre-made form or stuff with polyester fiberfill until firm but not overstuffed.
Close Seam Invisibly With Ladder Stitch
Fold the raw edges of the gap inward to match the seam. Pin closed. Thread a needle and use the ladder stitch:
1. Insert needle into the fold on one side
2. Cross to the opposite fold and pull
3. Alternate sides, pulling tight every few stitches
4. Knot inside the pillow and bury the thread
Pro Tip: Use a double strand of thread for strength, knotting both ends together.
Build a Round Boxed Pillow With Depth

Add dimension with a boxing strip, ideal for seat cushions or luxury throws.
Attach Welt Cord for Crisp Edges
Cut bias strips (2.5″ wide) to cover welt cord. Wrap around the cord, right sides together, and sew with a zipper foot. Clip the seam allowance, then glue-baste the welt’s lip to the right side of the front circle, aligning pattern at the top. Sew both front and back circles to the welt and trim excess backing.
Mark Quarter Points for Alignment
Fold each circle into quarters and press lightly to mark center points. Mark the boxing strip at quarter, half, three-quarter, and full length. These guide even attachment.
Sew Boxing Strip to Front and Back
Pin the boxing strip to the front circle, right sides together, matching center top. Sew with ½ inch seam, stopping a few inches before the bottom. Repeat on the back side from center to bottom.
Join the two ends of the boxing strip: trim to match seam allowance, fold under raw edges, and sew into a ring.
Then attach the back circle to the boxing, aligning quarter marks. Sew most of the way, leaving a 4 to 6 inch opening for turning.
Insert Form and Finish Cleanly
Turn right-side out. Push seams down into the boxing with your fingers. Insert the larger form (18″ for a 15″ pillow). Hand-sew the opening with a double-thread ladder stitch.
Final Touch: Steam the top, bottom, and sides with a press cloth to set sharp edges.
Add Fringe Trim for Decorative Edge
Fringe gives round pillows a bohemian or vintage flair but requires careful handling.
Use Long Stitch Length to Prevent Puckering
Set machine to stitch length 4. Align the raw edge of fringe with the raw edge of the front circle, fringe facing inward. Sew with a ¼ inch seam allowance.
Overlap ends: when nearing the start, cut one loop past the beginning, nestle ends together, and backstitch.
Sandwich Fringe Between Fabric Layers
Place the front (with fringe) right side up. Lay the back circle right side down on top. Clip at 12, 3, 6, and 9 o’clock, then every 45 degrees to keep fringe flat.
Sew with ½ inch seam, leaving a 7 to 8 inch gap.
Hide Woven Edge When Closing
After turning and inserting the form, check the opening. The woven backing of the fringe may show. Fold the back fabric’s raw edge in ½ inch. Adjust the front edge to cover the fringe’s backing. Clip and hand-sew closed with a doubled needle, ensuring no trim is exposed.
Make a Tufted Round Pillow With Buttons

Create a vintage-inspired, gathered look using buttons and strong thread.
Cut Rectangles for Tufted Body
Calculate the radius (half diameter) and circumference. Cut two rectangles where height equals radius and length equals circumference. For a 16″ pillow: radius = 8″, circumference ≈ 50″. Cut two 8″ x 50″ pieces.
Sew and Gather Into a Ring
Attach trim (optional) to one long edge, right sides together. Sew. Open flat, then sew narrow ends together to form a tube. Sew a running stitch along one long edge. Pull thread to gather into a ring. Knot and turn right-side out.
Insert Form and Close Ends
Insert form through the open end. Sew a running stitch on the second end, pull tight, and knot.
Attach Fabric-Covered Buttons
Use a button cover kit. Thread a long upholstery needle with double thread. Push through front center, out the back, leaving an 8-inch tail.
Thread a button, push back to front, then through to back again. Repeat with a second button, threading through the same path if possible. Pull tight for deep tufting. Knot securely on the back.
Expert Note: Snip tufting threads to remove the cover for washing, then re-sew when reassembling.
Construct Outdoor Cushions With Ties
Secure outdoor pillows from blowing away with durable ties.
Cut Large Circles and Pink Edges
Cut two circles 2 inches larger than the form. Use pinking shears to reduce fraying. Sew right sides together with 1-inch seam, leaving an 8-inch gap. Press seam flat for durability.
Make and Attach Ties
Cut four 2″ x 16″ strips per pillow. Fold short ends ½ inch, then long sides ¼ inch inward. Fold in half lengthwise and topstitch close to both long edges.
Pin two ties side-by-side at each end of the opening. Topstitch through all layers with backstitches for strength.
Close With Velcro or Hand Stitch
For removable covers, apply iron-on Velcro to the opening flaps before attaching ties. Press to bond. Alternatively, hand-sew the opening closed with a ladder stitch.
Optional: Add center tufting to prevent shifting by sewing a button through both layers and the cushion interior.
Finish With Professional Closing and Pressing
The final details elevate your pillow from homemade to high-end.
Use Mattress Stitch for Tight Seams
For ultra-invisible closure, use the mattress stitch:
1. Stand pillow on edge
2. Insert needle into one seam fold, then the opposite
3. Pull gently to close like a zipper
4. Knot and bury thread
Best for: Thin or light-colored fabrics where stitching might show.
Press Seams Flat and Steam Shape
After sewing, press seams flat with a hot iron to set the stitch and prevent rolling. For boxed pillows, steam the top, bottom, and boxing with a press cloth to remove puckers and define edges.
Warning: Test iron on scrap fabric first because some synthetics scorch or shine.
Troubleshoot Common Round Pillow Issues
Even experienced sewers face challenges with curved projects.
Fix Puckering on Curves
Cause: Inadequate notching or incorrect stitch length.
Fix: Always cut V-notches in ½ inch intervals. When sewing trim, use a longer stitch (size 4) to allow fabric to stretch slightly over curves.
Prevent Visible Boxing Seam
Problem: The seam where the boxing strip joins may show through thin fabric.
Solution: Add an interlining layer (muslin or felt) between the cover and form to block visibility.
Avoid Misaligned Patterns
When using patterned fabric, ensure the center motif aligns on both front and back circles. For boxing, match the design at the top center before sewing.
Manage Pins While Sewing
Remove pins just before the needle reaches them. Skipping this can break needles or bend the sewing machine shaft.
Extend Pillow Life With Care Tips
Proper maintenance keeps your round pillows looking fresh for years.
Clean Removable Covers Safely
If using a zipper or Velcro, remove and wash covers per fabric instructions. Air dry to prevent shrinkage. For non-removable covers, spot clean with mild soap and a damp cloth.
Fluff and Reshape Regularly
For down-filled pillows, fluff daily to prevent clumping. For fiberfill, shake and knead occasionally.
Store Outdoors Properly
Bring outdoor pillows inside during rain or winter. If left out, use waterproof covers and ensure ties are secure.
Re-Tuft When Needed
If tufted buttons loosen, pull gently on the thread ends inside the pillow or re-sew for a tighter look.
Frequently Asked Questions About Round Pillow Covers
What size circle do I cut for a 16-inch round pillow?
For a knife-edge pillow, cut two 17-inch circles (16″ finished plus 1″ seam allowance). For a boxed pillow with 2-inch depth, cut two 17-inch circles and a boxing strip about 53 inches long by 3 inches wide.
How do I keep a round pillow cover from puckering?
Cut V-shaped notches in the seam allowance every ½ inch before turning. These notches release tension in the curved seam and allow the fabric to lie flat.
Can I use stretchy fabric for a round pillow cover?
No. Stretchy knits will distort during sewing and fail to maintain the round shape. Always use tightly woven, non-stretch fabrics like cotton broadcloth, linen, or outdoor polyester.
What stitch should I use to close the opening?
Use a ladder stitch (also called mattress stitch) for invisible closures. Insert the needle through the fold on one side, cross to the opposite fold, and alternate sides while pulling tight every few stitches.
How much bigger should the cover be than the pillow form?
For a snug fit, cut circles the same diameter as the form. For a slightly looser, relaxed look, cut circles 1 inch larger than the form.
How do I wash a round pillow cover?
If the cover has a zipper or Velcro closure, remove it and wash per fabric instructions. Air dry to prevent shrinkage. For non-removable covers, spot clean with mild soap and a damp cloth.
Key Takeaways for Covering a Round Pillow
Covering a round pillow comes down to three essentials: accurate measurement, proper notching, and invisible closures. Start with a basic knife-edge style if you’re new to curved sewing, then progress to boxed, tufted, or fringed designs as your skills grow. Always cut V-notches along curved seams to prevent puckering, and use a ladder stitch for professional-looking closures.
Your next step: gather your materials, choose your style, and cut your first circle. With these techniques, your round pillows will look polished and custom-made.