How to Fix a Broken Zipper on a Pillow
A broken zipper on a pillow or cushion cover isn’t just annoying. It can ruin your decor, expose the filling, and turn a cozy accent into a frustrating mess. Whether the slider won’t budge, the teeth keep splitting apart, or the zipper has completely fallen off, you don’t need to replace the entire pillow cover. This guide walks you through every repair method, from simple lubrication fixes to full zipper replacement, so you can restore your pillow’s function in under an hour.
Diagnose the Zipper Problem First
Before grabbing tools, identify exactly what is wrong with your pillow zipper. The repair depends entirely on the type of failure you are facing.
Check for Common Failure Signs
Work with the pillow cover inside out. This gives you better access, reduces fabric strain, and hides repair marks. Look for these telltale signs of damage:
The slider is detached or missing, meaning the pull is gone but the teeth still line up. The zipper separates when closed because the teeth do not stay interlocked. The slider is stuck or hard to move and won’t glide smoothly. Teeth are missing or broken, leaving gaps in the zipper track. The fabric is torn near the zipper and the seam is unraveling at the edges. There is no resistance when zipping because the slider moves but the teeth do not engage.
Fix a Detached or Missing Zipper Slider
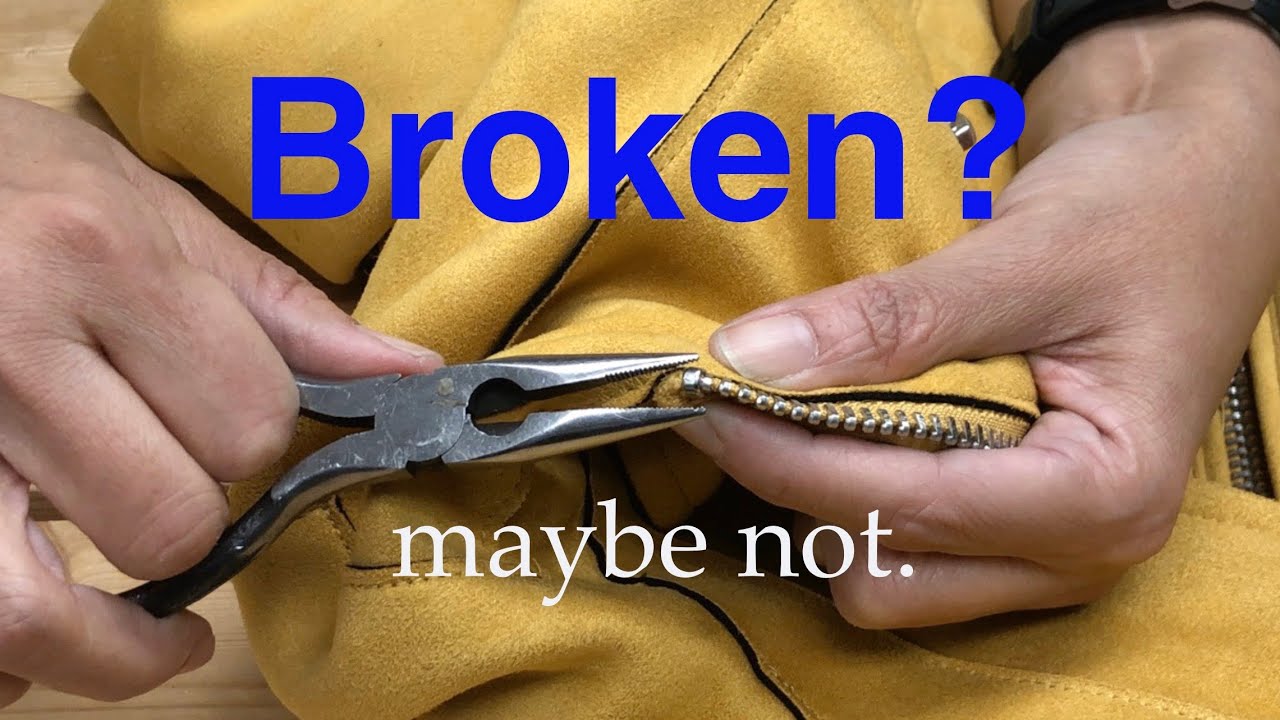
If the slider came off but the teeth are intact, reattaching or replacing it restores full function fast. This is one of the most common issues with pillow zippers and can be fixed in minutes.
Remove the Bottom Stopper
Use needle-nose pliers to gently bend and remove the small metal stop at the zipper’s base. This opens the track so you can slide a new mechanism on. Be careful not to tear the zipper tape during this process.
Slide On a Replacement Slider
Match the slider size to your zipper. Common sizes are #3, #5, or #8. Slide the new slider onto the open end of the zipper track, ensuring both rows of teeth feed into it evenly. A mismatched slider will not close properly, so always confirm the size before buying.
Realign and Test the Teeth
Manually zip the first few teeth together below the slider. Then slowly move the slider up and down. If it snags, realign the teeth with tweezers before continuing.
Secure the Bottom Stop
You have three options for securing the bottom stop. Reattach the original stopper with pliers, or install a new one, or sew a fabric stop using strong thread to make three to five backstitches across the zipper tape just past the closed position. This DIY stop holds the slider in place and prevents future detachment.
Unstick a Jammed Zipper Fast
A stuck zipper is usually due to debris, dryness, or bent teeth, not permanent damage. This is often the quickest fix and requires no replacement parts.
Free the Slider with Lubricant
Try these safe, fabric-friendly options to get your pillow zipper moving again. Pencil graphite works instantly by rubbing the lead along the teeth. It is dry and non-staining. Bar soap like Ivory lightly coated on the teeth then worked back and forth provides smooth movement. Commercial zipper lube offers long-lasting and odorless results, ideal for frequent-use covers. Petroleum jelly applied sparingly with a cotton swab is effective but can attract lint over time. Avoid WD-40 or oil sprays because they stain fabric and degrade nylon over time.
Straighten Bent Teeth
Inspect the track closely. If teeth are misaligned, use tweezers or needle-nose pliers to gently pinch them back into position. Work from the bottom up, realigning one tooth at a time. Test movement after each adjustment to avoid causing more damage.
Clear Fabric or Debris
If fabric is caught in the track, pull gently with tweezers. Use a toothpick to dislodge lint or threads. Wash the cover if safe for the fabric to remove embedded grime. Quick fix: zip the zipper halfway, then unroll it slowly while applying lubricant. This helps reset misaligned teeth.
Reinforce Torn Fabric Around the Zipper
Frayed fabric weakens the seam and can cause total zipper failure if ignored. Addressing fabric damage early prevents more expensive repairs later.
Trim and Prepare the Area
Turn the cover inside out. Cut about 1.5 centimeters above the frayed edge, removing all damaged fabric. Keep the zipper tape intact during this process.
Pin and Align the Seam
Pull the fabric taut so both sides meet cleanly. Use clips or pins to hold them in place before sewing.
Sew a Strong Repair
Use a sewing machine with a zigzag or overlock stitch to prevent future unraveling. Sew from the inside to hide stitches. Backstitch at start and end for durability. Add a second parallel stitch for heavy or high-use pillows. For hand-sewing, use small, tight backstitches and double the thread, knotting securely at both ends.
Press for a Clean Finish
Once sewn, press the seam flat with a warm iron and a pressing cloth. Avoid direct heat on nylon or polyester zippers to prevent melting or damage.
Replace a Fully Damaged Zipper
When teeth are missing or the fabric is too damaged, replacement is the only lasting fix. This takes more time but ensures a permanent solution.
Remove the Old Zipper
Use a seam ripper to carefully unpick all stitching. Note the original seam allowance, usually 1/4 inch or 6 millimeters. Remove any damaged fabric along with the old zipper.
Choose the Right Replacement
Match the length, typically 14 to 20 inches for standard pillows. Match the type, with nylon coil #5 being most common. Match the color to blend with the fabric. Match the slider style, whether open-end, closed-end, or double-pull. Buy a zipper 1 inch longer than needed so you can trim it to fit exactly.
Install with a Zipper Foot
A zipper foot on your sewing machine lets you stitch close to the tape for a clean, secure seam. This specialized foot makes the job much easier and produces professional results.
Step-by-Step Sewing
Place fabric right side down. Position zipper face down with the right side of the tape against the wrong side of the fabric. Pin one side, then stitch with consistent seam allowance. Backstitch at both ends for reinforcement. Unzip halfway, flip, and pin the other side. Sew the second side using the same method.
Test and Finish
Zip up and down several times to test the repair. If it binds, check alignment. Press the seam with a warm iron to flatten and seal stitches. On decorative pillows, align the new zipper under patterns or seams to hide it when closed.
Use FixnZip for No-Sew Repair
Cannot sew or do not own tools. The FixnZip device offers a fast, reusable fix for separating zippers without any stitching required.
Install Without Tools
Open the jaws by turning the thumbscrew counterclockwise. Slide FixnZip onto the zipper without removing the original slider. Feed both tooth rows into the jaws. Tighten the thumbscrew clockwise to lock the teeth in place.
Operate the Zipper
Place your thumb on top and index finger underneath the device. Squeeze inward while pulling up to close. The pressure forces teeth to interlock as you move. This device works well for pillow covers washed often, outdoor cushions, and pet-friendly decor.
Troubleshoot Common Issues
If slipping occurs, tighten the thumbscrew more. If it won’t move, check for debris or bent teeth first. The device is small and discreet, usually blending with the zipper pull. FixnZip is reusable and works on plastic, metal, and nylon zippers through multiple washes.
When to Repair vs. Replace the Cover
Not every zipper can be saved. Know when to stop and start fresh to avoid wasted time and money.
| Damage Type | Recommended Action |
|---|---|
| Slider detached | Repair with new slider |
| Stuck due to dirt | Clean and lubricate |
| Small fabric tear | Reinforce with stitching |
| Missing teeth | Replace zipper |
| Large fabric damage | Replace cover |
| Wrong zipper size | Replace cover or find exact match |
| No sewing skills | Use FixnZip or replace |
Repair costs under $5 for materials like slider, thread, and lubricant. Replacing a quality cover costs $20 to $50, so repair saves money and reduces waste.
Prevent Future Zipper Failures
A little care goes a long way in extending zipper life on your pillows and cushions.
Monthly Maintenance Routine
Clean the track with a soft brush or toothpick. Inspect for wear including loose stitches, fraying, or stiff movement. Lubricate every three to six months with pencil graphite or zipper spray.
Smart Usage Tips
Always zip before washing to prevent snagging and strain. Do not force the zipper if it resists; stop and inspect instead. Store pillows upright or flat to reduce stress on the seam. Keep pets away since chewing is a top cause of zipper damage. Use double-ended zippers for easier access and less wear on frequently used pillow covers.
Choose the Right Zipper Type and Size
Matching the original ensures a seamless repair that looks professional.
| Zipper Type | Material | Common Size | Best For |
|---|---|---|---|
| Nylon Coil | Nylon | #3, #5 | Standard pillowcases |
| Polyester Coil | Polyester | #5 | Outdoor or durable covers |
| Invisible | Nylon | #3, #4 | Decorative pillows |
| Metal | Brass, Nickel | #5+ | Heavy-duty or vintage styles |
Measure from stopper to stopper. Standard pillow zippers are 35 to 50 centimeters long.
Final Repair Checklist
Before finishing, ensure your fix is strong and lasting.
Test the zipper fully by opening and closing it five or more times. Check for smooth movement with no snags or gaps. Inspect all stitches for loose threads or weak spots. Clean the track to remove any lubricant residue. Wash carefully if needed, zipping the cover closed first and using a gentle cycle.
Key Takeaways for Fixing Your Pillow Zipper
Diagnose the problem first to know whether it is the slider, teeth, fabric, or full zipper that needs attention. Lubricate stuck zippers with pencil graphite or soap for instant results. Replace missing sliders using the correct size like #3, #5, or #8. Reinforce tears with zigzag stitching to prevent unraveling. Swap damaged zippers using a zipper foot for clean, professional seams. Use FixnZip for no-sew, tool-free repairs on separating zippers. Maintain monthly by cleaning, inspecting, and lubricating to prevent future issues. Choose repair over replacement to save money, reduce waste, and extend the life of your pillows.
With these proven methods, you can fix almost any pillow zipper problem in under an hour, no expert skills needed. Whether you are using household items or a clever device like FixnZip, a functional zipper is always within reach.
Frequently Asked Questions About Fixing a Pillow Zipper
How do I fix a zipper that separates when closing?
This usually means the teeth are misaligned or the slider is worn. Try lubricating first with pencil graphite. If that does not work, check for bent teeth and straighten them with tweezers. For a permanent fix, replace the slider with one that matches your zipper size.
Can I fix a broken zipper without sewing?
Yes. Use the FixnZip device for a tool-free solution that works on separating zippers. Simply slide it onto the track, tighten the thumbscrew, and squeeze while pulling up to close. This works on plastic, metal, and nylon zippers.
What is the best lubricant for a stuck pillow zipper?
Pencil graphite is the most effective quick fix. It is dry, non-staining, and works instantly. Bar soap and commercial zipper lubricants also work well. Avoid petroleum products like WD-40 because they stain fabric.
How do I replace a zipper on a pillow cover?
Remove the old zipper with a seam ripper, noting the seam allowance. Cut the new zipper to match the opening length. Position it face down against the wrong side of the fabric. Sew one side with a zipper foot, then the other side after unzipping halfway. Test and press flat.
When should I replace the pillow cover instead of repairing the zipper?
Replace the cover if there is extensive fabric damage, wrong zipper size with no match available, or if the zipper teeth are missing throughout the track. Small repairs cost under $5 while replacement covers cost $20 to $50.