How to Fix a Pillow Hole Without Sewing
You’re flipping your pillow and suddenly notice a small tear with stuffing poking through. Before you toss it in the trash, here’s the good news: you can fix a hole in a pillow without sewing. Whether it’s a bed pillow, throw cushion, or your kid’s favorite plushie, no-sew repair methods work quickly and effectively. This guide walks you through every step to fix a pillow hole using fabric glue, iron-on patches, and other accessible techniques that require zero stitching skills.
Choose the Right No-Sew Method for Your Pillow
Not all tears are the same, and the best fix depends on the hole size, fabric type, and how the pillow is used. Understanding these factors helps you pick the right approach so your repair lasts.
Match Method to Pillow Type
| Pillow Use | Best Fix | Why It Works |
|---|---|---|
| Daily bed pillow | Fabric glue plus patch | Durable, flexible, and washable |
| Decorative throw | Iron-on patch | Fast application with visual appeal |
| Kids’ or pet pillow | Fabric glue with full patch | Withstands rough handling |
| Outdoor cushion | Industrial fabric glue | Resists moisture and sun exposure |
| Small puncture under 1 inch | Direct glue seal | No patch needed for tiny holes |
Know Your Fabric Type
Some materials bond better than others with no-sew adhesives. Cotton and polyester work with all methods, while knit or stretch fabrics require flexible glue only. Silk and velvet need extra caution, so test any adhesive on a hidden area first. Microfiber responds well to both glue and iron-on methods, though iron-on requires careful heat control. Down-proof fabrics work best with glue and should avoid peel-and-stick products.
Fix a Pillow Hole with Fabric Glue
.jpg)
Fabric glue is the go-to solution for no-sew pillow repairs that actually hold up. When applied correctly, it creates a flexible, washable bond that’s nearly invisible, making it perfect for daily-use pillows.
Gather Your Supplies
You will need fabric glue designed for textiles, scissors, a toothpick or cotton swab for precision, a fabric patch made of cotton or blend, clamps or clothespins, and optional disposable gloves.
Prepare the Tear Properly
Turn the pillow inside out if possible to access the backside of the damage. Trim any loose threads to prevent further fraying, then clean the area with a dry cloth to remove dust and oils. For down or fiberfill pillows, gently push the filling away from the tear so the glue does not stick to the fluff.
Apply Glue and Patch in Steps
Cut a patch at least half an inch larger than the hole on all sides. Apply a thin layer of glue around the tear’s edges without soaking the fabric. Press the torn edges together and hold for 10 to 15 seconds. Place the patch underneath or over the tear if inside-out repair is not possible. Smooth out any air bubbles and press firmly. Use a toothpick for precision on tiny holes.
Secure and Allow Full Cure
Clamp the area with clothespins or weigh it down with books. Let the glue dry for 4 to 6 hours, then wait a full 24 hours for maximum bond strength. If the product label recommends heat setting, use a low-heat iron with a pressing cloth. Rushing the cure time weakens the bond significantly.
Pros and Cons
Fabric glue requires no special skills and remains washable after curing. It works on most fabric types. However, slight stiffness may occur, and the method is not ideal for large rips under high tension.
Apply Iron-On Patches for Quick Repairs
Iron-on patches work well for decorative pillows or anyone needing a fast, stylish fix. They bond quickly and come in various designs, letting you turn a flaw into a deliberate design choice.
What You Will Need
Gather an iron-on patch or fusible webbing, an iron, a pressing cloth such as thin cotton or parchment paper, scissors, and a ruler or chalk for custom cuts.
Prepare the Patch
Cut the patch or webbing to extend half an inch beyond the hole on all sides. If using fusible web, place the shiny side down on the back of your patch fabric. Position the patch over the tear on either the front or back of the pillow. For best results, place the patch on the inside of the pillow and iron through the outer fabric.
Iron It On Correctly
Set your iron to medium heat with no steam. Cover the patch with a pressing cloth to protect the fabric from scorching. Press firmly for 8 to 15 seconds, moving slowly across all edges. Lift the iron rather than sliding it to avoid shifting the patch. Let the area cool completely before handling.
Boost Durability With Glue Sealing
Iron-on patches can lift after washing. Prevent this by applying fabric glue around the perimeter after cooling. Draw a thin glue line around the edges to act like topstitching. Consider hand washing only and avoiding the dryer to extend the patch life.
Use Peel-and-Stick Patches for Emergencies
When you need a fast, no-heat, no-mess fix immediately, peel-and-stick patches are the answer. These pre-glued patches work well for temporary repairs or low-stress pillows.
Simple Application Steps
Clean the area with rubbing alcohol and let it dry completely. Peel off the backing and center the patch over the hole. Press from the center outward for 30 seconds. Wait 1 to 2 hours before using the pillow. Using two patches, one on each side, adds extra strength for slightly more stress.
When Peel-and-Stick Works Best
These patches suit kids’ pillows, lightweight decorative cushions, travel pillows, and camping gear. They provide a temporary solution when something better is not immediately available.
Important Limitations
Peel-and-stick patches are not washable, as water dissolves most adhesives. They may leave residue when removed later. They fail under heavy stress or high humidity, making them a temporary band-aid rather than a permanent fix.
Make Your Pillow Repair Last Longer
Want your fix to last months instead of days? These techniques maximize durability for any no-sew repair method.
Double Up for Added Strength
Combining glue with a patch creates a stronger bond than either method alone. For large holes, patch both sides of the pillow using fabric and glue for complete reinforcement.
Protect the Repair Area
Avoid stretching the repaired area when fluffing the pillow or inserting it into pillowcases. Hand-wash only and never machine dry, as heat breaks down adhesives. Air dry flat to maintain bond integrity.
Regular Maintenance Checks
Inspect the repair monthly for lifting or wear. Reapply glue to edges that start peeling. Using a pillow protector prevents future damage and extends the life of your repair.
Prevent Future Holes in Your Pillows
Fixing a tear is easy, but preventing the next one saves even more effort. Good pillow habits extend the life of your bedding significantly.
Use Pillow Protectors Always
Slide pillows into zippered, washable covers to block sweat, oils, and friction. These protectors are the number one defense against the fabric wear that leads to holes.
Wash Gently and Correctly
Use cold water and mild detergent for all pillow washing. Hand-wash older or delicate pillows rather than machine washing. Never wring out water; press it out gently and air dry.
Rotate and Fluff Daily
Flip and plump pillows every morning to prevent one-sided wear. This simple habit distributes pressure evenly and prevents fiber breakdown in specific spots.
Store Spare Pillows Properly
Keep unused pillows in breathable cotton bags rather than plastic bins. Plastic traps moisture and invites mildew growth that weakens fabric.
Fix Small Snags Immediately
A loose thread today becomes a big hole tomorrow. Trim or glue small tears the moment you notice them to stop damage from spreading.
No-Sew vs. Sewing: Which Method Works Best
Wondering if no-sew repairs hold up compared to traditional stitching? Here is how they compare across important factors.
| Feature | No-Sew Repair | Sewing Repair |
|---|---|---|
| Skill level needed | None | Basic to advanced |
| Tools required | Glue, iron, or patch | Needle, thread, machine |
| Active repair time | 5 to 10 minutes | 15 to 30 minutes |
| Cure or wait time | Up to 24 hours | None |
| Durability | Moderate to high | High |
| Wash resistance | Good after curing | Excellent |
| Fabric flexibility | May stiffen slightly | Natural drape preserved |
No-sew methods work perfectly for quick, effective fixes. Sewing remains better for heavy-use items, but most home pillows do not need that level of repair.
Best Products for No-Sew Pillow Repair
Save time and get better results by starting with proven products designed specifically for fabric repair.
Top-Rated Fabric Glue
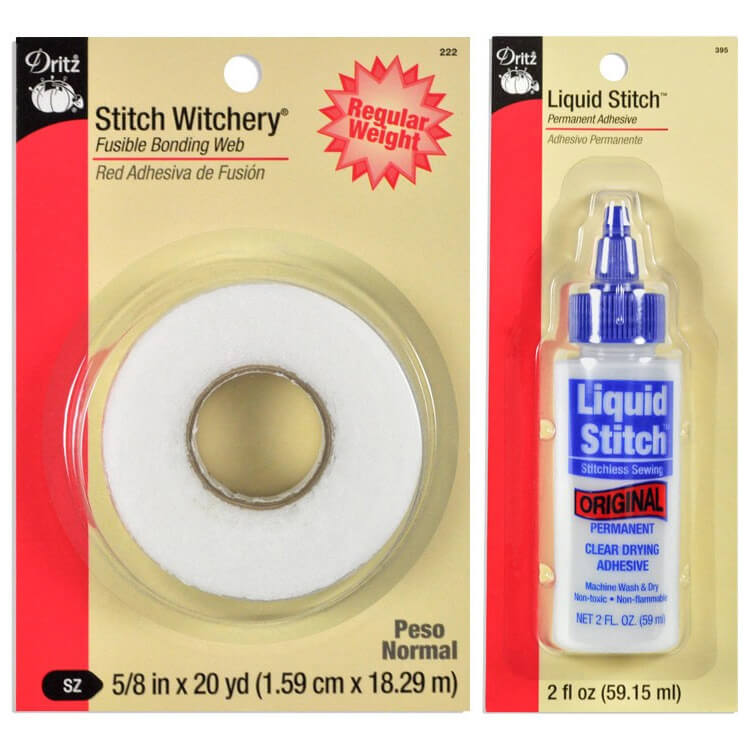
Speed-Sew Premium Fabric Glue earns top marks for fast setting, flexibility, and strong adhesion. It dries clear without residue and reaches full bond strength in 24 hours.
Recommended Iron-On Patches
The Dritz Assorted Iron-On Patch Kit offers variety in sizes and colors. These patches are easy to cut and apply, making them ideal for decorative fixes.
Best Beginner Option
The Clover Quick Repair Kit includes glue, patches, and tools in one box. Everything you need comes ready to use, perfect for anyone new to no-sew repairs.
Look for washable, flexible formulas and avoid craft glues like standard Elmer’s, which do not hold up on fabric.
Quick Repair Checklist
Follow these seven steps to fix any pillow hole in under an hour. First, trim loose threads around the damage. Second, clean the area with a dry cloth. Third, choose your method based on pillow use. Fourth, cut a patch half an inch larger than the hole. Fifth, apply glue or the patch with firm pressure. Sixth, wait 24 hours before using the pillow. Seventh, add a pillow protector to prevent repeat damage.
Key Takeaways for Fixing Pillow Holes Without Sewing
You do not need needle and thread to restore a damaged pillow. Fabric glue with a reinforcing patch provides the strongest, most durable repair for daily-use pillows. Iron-on patches work best for decorative cushions where appearance matters. Peel-and-stick patches serve as useful emergency fixes but should not replace longer-lasting solutions. The right method combined with proper preparation and patience during curing gives you results that last months or even years. Whether saving a bed pillow, couch cushion, or a child’s favorite stuffed animal, these no-sew techniques save money, reduce waste, and keep your home comfortable without requiring any sewing skills.
Frequently Asked Questions About Fixing Pillow Holes Without Sewing
Can I use regular glue to fix a pillow hole?
Regular craft glue like Elmer’s does not hold up on fabric and may leave residue or damage the material. Use a fabric-specific glue designed for textiles for lasting results.
How long does fabric glue take to dry on a pillow?
Fabric glue dries to the touch in 4 to 6 hours but needs a full 24 hours to cure completely. Using the pillow before the cure time ends weakens the bond significantly.
Will the repair be visible after fixing a pillow hole?
A repair is nearly invisible when you use a matching fabric patch and apply glue carefully. The bond stays flexible and moves with the fabric, making it hard to detect.
Can I wash a pillow after repairing it with glue?
Yes, once the glue fully cures, the repair becomes washable. Hand washing is recommended, and avoid high heat in the dryer as it can weaken the adhesive.
What is the fastest way to fix a small pillow hole?
For holes under one inch, direct application of fabric glue without a patch works fastest. Apply glue to the edges, press together, and cure for 24 hours.
How do I fix a hole in a down pillow without sewing?
Push the down filling away from the tear, apply fabric glue to the edges, and press closed. For extra protection, add a fabric patch on the inside before closing.