How to Make a Herbal Heating Pad
Nothing beats the comfort of a warm, aromatic herbal heating pad on a chilly night or when soothing sore muscles. Easy to make and reusable hundreds of times, a herbal heating pad is a natural, chemical-free way to bring heat therapy into your home. Whether you are crafting one for yourself or as a thoughtful handmade gift, this DIY project uses simple materials and upcycled fabric.
This guide walks you through choosing the best fabric, fillers, and herbs, then assembling and safely using your herbal heating pad. You will also learn how to care for it so it lasts for years.
Choose the Right Fabric
Use Natural, Heat-Safe Fabrics
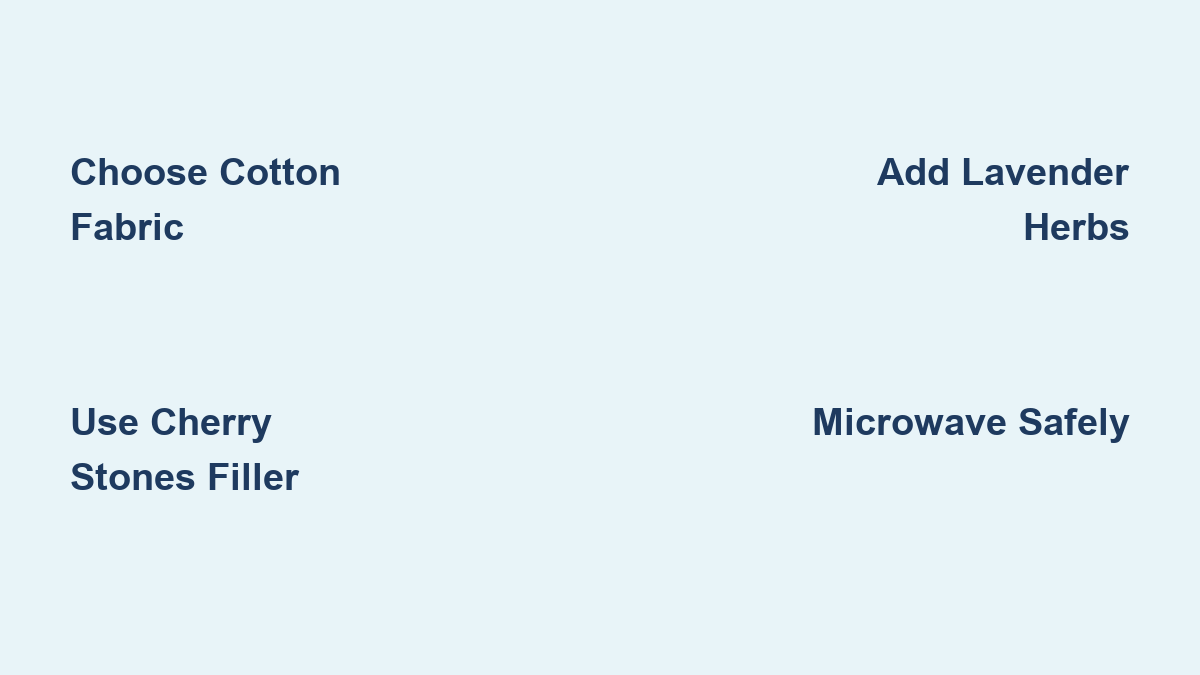
Always choose natural fibers like cotton, wool, or felted wool for your herbal heating pad. These fabrics handle heat well and will not release toxic fumes when warmed. Avoid synthetic materials like polyester or acrylic, since they are made with chemicals that may be released when heated.
Felted wool is an excellent choice because it is naturally durable, warm, and resists fraying. Cotton and cotton blends like cotton twill or flannel also work well, especially if you are repurposing old clothing or linens.
Upcycle Old Clothing or Linens
You do not need to buy new fabric. Old jeans, shirts, or bedding can be repurposed into heating pads. Soft denim salvaged from worn-out jeans makes a sturdy, eco-friendly option. Felted wool adds extra coziness for a softer feel.
Using upcycled materials saves money and reduces waste. Just make sure the fabric is clean, free of holes, and not overly stretched.
Pick the Best Filler Material
Compare Heat Retention and Weight
The filler gives your heating pad weight and heat-holding power. Each option has pros and cons, so choose based on your needs.
Cherry stones are the top pick for many crafters. They retain heat extremely well and have a satisfying, therapeutic weight. They are also long-lasting and do not break down quickly.
Dried field corn is budget-friendly, especially for making multiple pads. A 50-pound bag of feed corn costs well under $10 and can fill dozens of packs. It heats evenly and holds warmth well.
Rice is the most accessible filler. Buy a large bag from the dollar store for a low-cost option. It heats quickly but can scorch if overheated. It is not ideal for long-term use, as it may eventually go rancid.
Dried beans work but can develop an odd odor when heated repeatedly. They are also prone to breaking down over time.
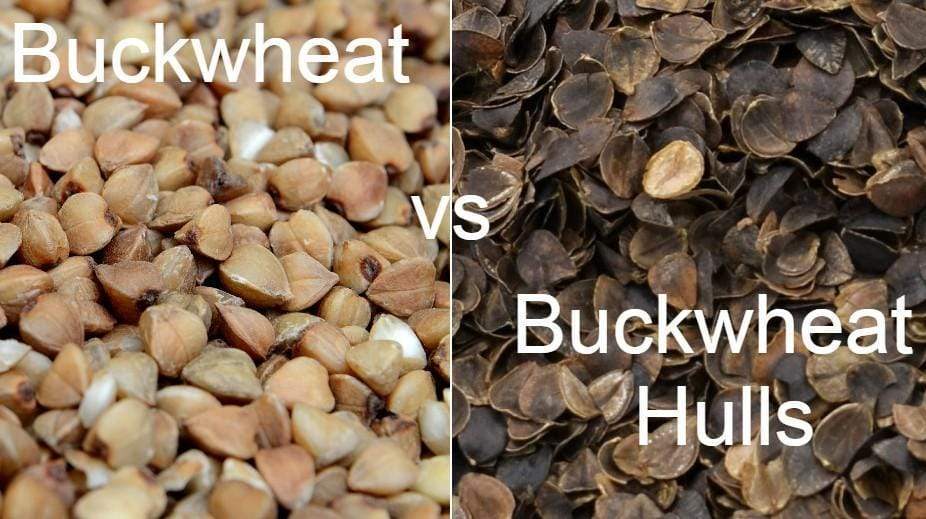
Buckwheat hulls are lightweight and excellent for sensitive areas like the head or neck. They do not hold heat as long as corn or cherry stones, but they blend well with herbs and create a soft, moldable pack.
River pebbles offer unmatched heat retention and deep pressure, but they are hard on stitching and can wear through fabric over time. Use only with heavy-duty materials and tight seams.
Avoid Oil-Rich Grains
Never use flaxseed, wheat, or oats. These contain oils that can turn rancid or even catch fire when heated.
Add Soothing Dried Herbs

Choose Relaxing or Invigorating Herbs
Herbs add aroma and therapeutic benefits. When heated, they release calming or stimulating essential oils.
Lavender is ideal for relaxation and sleep. Its floral scent helps reduce stress and anxiety.
Chamomile gently calms the nervous system, making it perfect for bedtime or soothing tension headaches.
Mint offers a cooling, refreshing sensation. It works well for clearing sinuses or relieving nausea.
Rosemary is uplifting and stimulating. Use it in the morning to boost circulation and mental clarity.
Calendula and echinacea support healing and immune function. While less aromatic, they are excellent for medicinal blends.
A combination of chamomile and mint creates a balanced, calming aroma that is perfect for winding down at night.
Use Herbs Sparingly but Effectively
If you grow or buy herbs in bulk, feel free to add ¼ to ⅓ cup per pack. For store-bought herbs, use 1–2 tablespoons, since even a small amount releases a soothing scent when warmed.
When using lightweight fillers like buckwheat hulls or rice, mix the herbs directly into the filler for even distribution. For heavier fillers like cherry stones or corn, add herbs first through the opening, then top with filler.
Cut and Prepare Fabric Pieces
Decide on Size and Shape
Your heating pad can be any size or shape. Common options include squares, rectangles, or body-specific shapes like neck rolls or kidney-shaped pads.
For a standard size, cut two 7-inch squares, which work perfectly for hands, neck, or lower back.
No template? No problem. Use everyday items as guides:
– CD case for a pocket-sized pad
– Paperback book for a medium pad
– Sheet of printer paper for a large pad (the maximum recommended size)
Trace the object onto your fabric, then cut two matching pieces.
Cut Both Layers at Once
To ensure perfect alignment, stack your two fabric pieces and cut them together. This method saves time and guarantees symmetry.
Use sharp fabric scissors for clean edges. If using thick or felted wool, take care to cut smoothly through both layers.
Sew the Heating Pad Shell
Place Fabric Right Sides Together
Lay one piece face down, then place the second piece on top, face up. This ensures the seam will be hidden when turned right side out.
Pin the edges if your shape has curves, like hearts or moons. For simple squares or rectangles, pinning is usually not necessary.
Stitch with a 3-Inch Opening
Using a sewing machine or needle and thread, sew around the edges with a ½-inch seam allowance. Leave a 3-inch gap unsewn, which is where you will add the filler.
Backstitch at the start and end to secure the seam. Use a straight stitch for durability.
Trim corners carefully to reduce bulk, but do not cut the stitches. This helps the pad turn neatly.
Fill the Herbal Heating Pad

Add Herbs First
Pour your dried herbs through the opening first. This ensures they are evenly distributed and close to the surface, where heat can activate their aroma.
If using a pre-mixed filler like herb-blended buckwheat, pour the mixture directly into the pad.
Fill with Chosen Material
Next, add your main filler, whether cherry stones, corn, rice, or hulls. Fill until the pad is firm but not overstuffed. Leave about an inch of space so the fabric can lay flat when sealed.
Overfilling makes stitching difficult and can cause strain on seams when heated.
Test the Weight and Flexibility
Close the opening with your fingers and feel the pad. It should be pliable enough to conform to your body, whether neck, shoulders, or abdomen. If it feels too stiff, remove a little filler.
Close the Heating Pad Securely
Machine Stitch for Thin Fabrics
If using cotton, flannel, or thin denim, you may be able to machine-stitch the opening shut. First, tuck the raw edges inward so they are neat and flush.
Sew a straight seam across the opening, catching all four layers. Backstitch at both ends for strength.
Hand Stitch for Thick Fabrics
With wool, felted fabric, or multiple layers, hand stitching is easier and more reliable.
Use a blind stitch for an invisible finish, or a whip stitch for speed. Both are strong and simple.
Thread a needle with sturdy thread (quilting or upholstery thread works well). Knot the end and stitch tightly. Double the thread for extra durability.
How to Heat Your Herbal Pad
Microwave: Fast and Easy
For most people, the microwave is the quickest way to warm the pad.
- Start with 90 seconds on high.
- Test the temperature and add 15–30 seconds if needed.
- Never leave unattended, since overheating can scorch the filler and create smoke.
Corn and cherry stones may need slightly longer (2–2.5 minutes), while rice heats faster.
Place the pad in a microwave-safe bowl to catch any moisture and prevent direct contact with the turntable.
Alternative Heating Methods
No microwave? No problem.
- Dry skillet: Heat on low for 2–3 minutes, flipping often. Never use oil or water.
- Radiator or heater: Lay the pad on a warm surface for 10–15 minutes. Keep it at a safe distance from open flames.
- Electric heating pad: Place your herbal pad on top of a dry, fabric-safe heating pad for gentle warming.
Never use an oven, as the risk of fire is too high.
Use Your Herbal Heating Pad Safely

Check Temperature Before Use
Always test the pad on your inner wrist before applying it to sensitive skin. It should feel warm, not hot.
Avoid direct contact with bare skin. Wrap it in a thin towel or cloth to prevent burns.
Limit Usage Time
Apply heat for 15–20 minutes at a time. Take breaks to let your skin breathe and avoid irritation.
Do not fall asleep with the pad on, especially on high settings.
Avoid Moisture
Never get your heating pad wet. Dampness leads to mold, mildew, and spoilage inside the filler.
If the pad gets damp, air-dry it completely in a well-ventilated area before using again. Do not heat a damp pad.
Store and Maintain Your Heating Pad
Keep It Dry and Pest-Free
Store your herbal heating pad in a cool, dry place like a linen closet or drawer.
If using corn or rice, store in a sealed container. Mice and insects are attracted to grain-based fillers, and they have an uncanny ability to find heating packs stored in basements or garages.
Refresh the Aroma
Over time, the herbal scent will fade. To revive it:
– Add a few drops of essential oil to a cloth and warm it with the pad (do not apply oil directly).
– Or, open the seam slightly, add fresh herbs, then resew.
Replace When Needed
With proper care, a heating pad can last years. But if you notice mustiness, discoloration, weak stitching, or a burnt smell after heating, it is time to replace it. Compost the old filler and reuse the fabric if still in good condition.
Frequently Asked Questions About Herbal Heating Pads
What is the best filler for a homemade heating pad?
Cherry stones are the top choice for heat retention and therapeutic weight. Dried corn is the most budget-friendly option for large batches, while rice is the easiest to find. Buckwheat hulls work best for lightweight, sensitive areas like the head or neck.
Can I use essential oils instead of dried herbs?
Yes, but apply them carefully. Add a few drops to a cloth and warm it with the pad rather than putting oil directly on the fabric, since oils can stain or cause skin irritation.
How long should I microwave my heating pad?
Start with 90 seconds on high, then test the temperature. Add 15–30 seconds at a time until you reach your desired warmth. Never overheat, as the filler can scorch.
How do I keep mice away from grain-filled heating pads?
Store corn or rice pads in a sealed container in a clean, dry area. Mice are attracted to grain-based fillers and can chew through fabric to reach them.
Can I wash my herbal heating pad?
No. Getting the pad wet can cause mold, mildew, and spoilage inside the filler. If it becomes damp, air-dry it completely in a well-ventilated space before using again.
Which herbs are best for relaxation?
Lavender and chamomile are the most popular choices for calming and sleep support. Mint adds a cooling sensation, while rosemary is better for morning energy and circulation.
Final Thoughts on Making a Herbal Heating Pad
Making a herbal heating pad is a simple, rewarding DIY project that combines sustainability, self-care, and natural wellness. With the right fabric, filler, and herbs, you can create a reusable, aromatic therapy tool that soothes aches, calms the mind, and adds warmth to your routine.
Start by gathering your materials today. Choose a filler that matches your needs, pick herbs that suit your mood, and cut fabric from something you already own. In less than an hour, you will have a handmade comfort item that lasts for years.