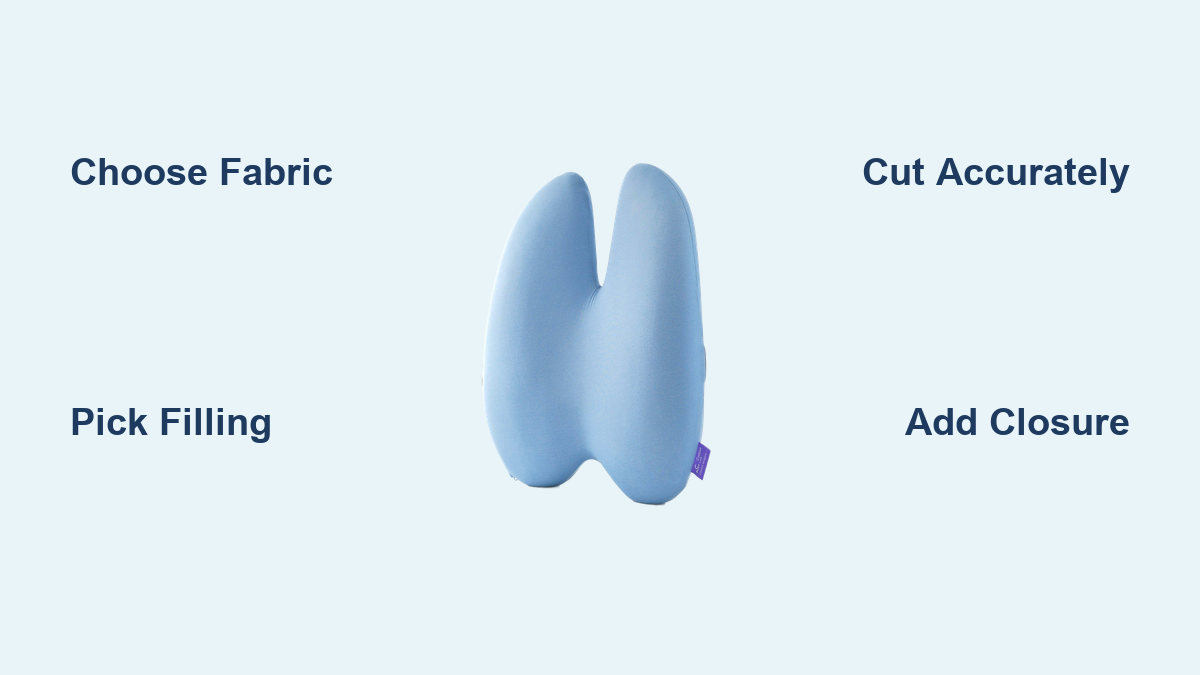
How to Sew a Lumbar Pillow: Easy DIY Guide
If you have ever slumped on the couch or fidgeted in your office chair, you know how much a good lumbar pillow can help. But instead of buying one, why not sew your own lumbar pillow? With just fabric, thread, and basic tools, you can create a custom pillow that fits your body, matches your decor, and supports your back exactly where you need it.
Sewing a lumbar pillow is a beginner friendly project that delivers big results. You can make it removable, washable, and fully personalized whether you want bold prints, soft textures, or orthopedic support. This guide walks you through every step from choosing materials to adding finishing touches.
Choose the Right Fabric
Pick Durable, Washable Materials
The fabric you choose affects both comfort and longevity. For lumbar pillows, go with medium weight fabrics that resist wear and hold their shape. Cotton, linen, and cotton linen blends are top choices. They are easy to sew, come in endless colors and prints, and can be machine washed.
If your pillow will see heavy use like on a sofa or office chair, upholstery grade fabric is ideal. It is thicker, more durable, and often treated to resist stains. For seasonal or decorative pillows, quilting cotton works well, especially if you plan to rotate covers.
Avoid very stretchy or slippery fabrics like silk or knits unless you are experienced. They are harder to handle and can shift during sewing.
Always pre wash and iron your fabric before cutting. This prevents shrinkage after sewing and gives you a flat, wrinkle free surface to work with.
Use Dark or Patterned Fabrics for Hiding Stains
Lumbar pillows get touched often. Light or solid colored fabrics show dirt easily. Dark tones, busy prints, or textured weaves help hide spills, oils, and everyday wear. This is perfect for living rooms or cars.
For kids sports events or travel, consider stain resistant upholstery fabric or treat your cover with a fabric protector spray.
Pick Your Filling Type

Compare Support and Comfort Levels
Your filling determines how firm or soft your pillow feels. The most common option is polyester fiberfill. It is affordable, lightweight, and machine washable if used in a removable cover. Fill to 70 to 75 percent capacity for a plump but flexible pillow that molds to your back.
For more dynamic support, use poly fil micro beads. These tiny polystyrene beads shift as you move, offering excellent contouring. They are great for travel or stadium seats but should only be spot cleaned.
Need firmer support? Try buckwheat hulls. They are moldable and supportive but heavier and noisier when shifted. Or for a structured, non compressible feel, cut memory foam to size. It will not flatten over time but cannot be machine washed.
Cotton batting is a natural, eco friendly option. It is softer and breathable but less resilient than synthetic fills.
Never overfill. A stiff pillow creates pressure points. Test the firmness by sitting with it before closing the opening.
Measure and Cut Accurately

Know Standard Lumbar Dimensions
Lumbar pillows typically range from 12 to 24 inches long and 6 to 8 inches high. Depth when stuffed is usually 3 to 5 inches.
Start by measuring your seating area or lower back span. A pillow that is too short will not support your spine. One that is too long will not fit neatly on the chair.
For a standard couch pillow, 12 by 24 inches is a popular size. For a car or office chair, try 14 by 17 inches.
Add Correct Seam Allowances
Seam allowance is the extra fabric around the edge that gets sewn. Get this wrong, and your pillow will not fit right.
Most methods use a one half inch seam allowance, but some like French seams or zipper closures require adjustments. Always double check the total finished size after sewing.
For example, to make a 14 by 17 inch finished pillow with a one half inch seam, cut the front panel 15 by 18 inches. Back envelope flaps should overlap by at least 3 to 4 inches to stay closed. For a 24 inch insert, cut each back piece 12 by 16 inches.
Use a rotary cutter, mat, and ruler for straight, precise cuts. Scissors can curve or slip.
Make a No Zipper Pillow Insert
Sew a Simple, Permanent Insert
This is the easiest way to make your own pillow form. You will create a closed insert that goes inside a removable cover.
Cut one rectangle of fabric 18 by 15 inches. Fold it in half right sides together so it becomes 9 by 15 inches.
Sew three sides with a 2.5 inch seam allowance. Leave one short end open.
Trim the corners diagonally to reduce bulk, then turn right side out using a chopstick or turning tool.
Stuff with fiberfill, micro beads, or pre cut memory foam. Fill to three quarters full, not tight.
Hand sew the opening closed with a whip stitch for an invisible finish. Or machine stitch if it will be hidden.
This insert is permanent. Make it durable by using strong thread and double stitching stress points.
Build a Sleeve Cover with Handles
Create a Washable, No Zipper Case
This clever design slips over your insert like a sleeve and has handles for easy carrying. Best of all, no zipper needed.
Place your stuffed insert on the outer fabric. Cut the fabric 3 inches longer than the insert to allow for ease.
Remove a small rectangle from one short end. This becomes the sleeve opening. Cut the same shape from the second layer.
Use the leftover fabric to cut two handle strips. Fold each lengthwise, right sides together, and sew along the long edge.
Turn handles right side out using a safety pin or turning tool. Press flat.
Fold the sleeve edges one quarter inch inward, then again to create a clean rolled hem. Stitch in place.
Layer the two main pieces right sides together, aligning the short ends. Insert the handles between the layers at the opening.
Sew around the entire perimeter with a one half inch seam, leaving the sleeve opening free.
Trim corners, turn right side out through the sleeve, and pull handles into place.
This method wastes zero fabric and makes a stylish, functional cover you can wash anytime.
Install a Centered Zipper
Add a Hidden, Reusable Closure
A centered zipper lets you remove the insert for washing and re stuffing. It looks clean and professional.
Cut two identical rectangles of fabric. Add three fourths inch seam allowance for zipper clearance.
Place pieces right sides together. Sew along one long edge using a basting stitch in the middle, with regular stitches at both ends.
Press the seam open. Lay the open zipper face down over the seam. Pin it in place, centering it with a measuring tape.
Hand baste the zipper temporarily. Use a zipper foot to sew both sides of the zipper close to the teeth.
When you reach the zipper pull, stop sewing, open the zipper slightly, move the pull out of the way, then continue.
Remove basting stitches. Use a seam ripper to open the center basted section.
Always keep the zipper open before sewing the final three sides. If you close it, you will trap the pillow inside forever.
With the zipper open, sew the remaining three sides with a 5/8 inch seam. Trim corners, turn right side out, and press.
Sew an Envelope Back Cover
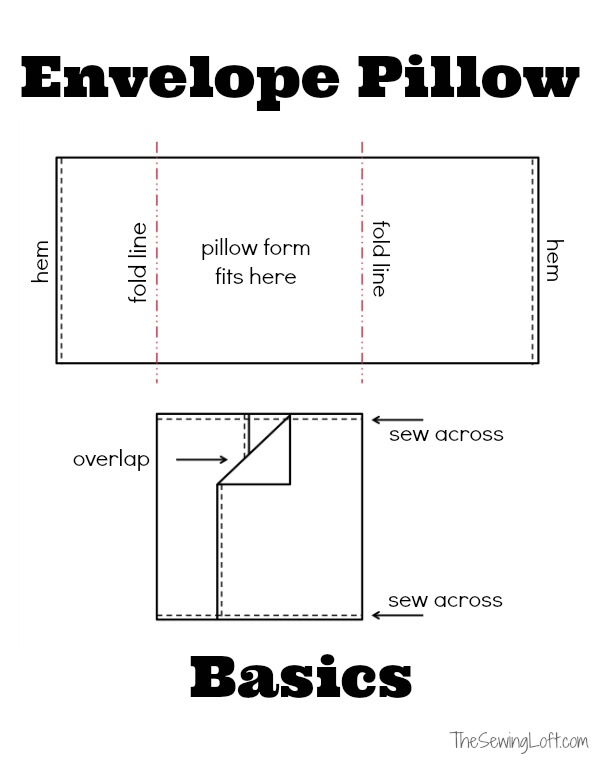
Use Vertical Overlap for Secure Closure
Horizontal envelope flaps on short pillows often gape open. A vertical overlap runs up the back and stays closed.
Cut the front panel to match your insert. Cut two back panels, each 12 by 16 inches. This gives a 4 inch overlap when placed on the front.
For easier insertion, cut backs to 12 by 15 inches.
Place the front panel right side up. Layer one back panel right side down on the left edge, the other on the right. They should overlap in the center.
Pin or clip all layers. Sew around all four edges with a one half inch seam.
Trim corners diagonally. Turn right side out through the open back.
Use contrast thread for a modern, designer look.
Try a French Seam Envelope
Achieve a Clean, No Raw Edges Finish
Popularized by TikTok DIYers, this method encloses all raw edges for a luxury interior. No zipper, buttons, or Velcro needed.
Cut the front panel 14 by 17 inches. Cut the back panel 14 by 23 inches.
Place front right side up. Place back right side down, aligning one 14 inch edge. Sew with one half inch seam. Press open.
Fold each 14 inch raw edge of the back panel by one half inch, then again, to create a 1 inch hem. Topstitch to secure.
Fold the front over the seam. Fold the back so both hemmed flaps overlap to 17 inches total. Pin.
With the cover right side out, sew the two long sides with a one quarter inch seam.
Flip inside out so wrong sides face. Sew a second line with one half inch seam, enclosing the first seam.
Turn right side out, use a chopstick to push out corners, and press.
The result is a fully enclosed, professional grade interior. Perfect for gifts or home decor.
Add Handles and Trims
Boost Function and Style
Handles make your pillow easy to carry or hang. Cut two strips, fold lengthwise, and sew along the long edge. Turn, press, and attach between the front and back layers before sewing the cover.
For flair, add pom pom trim, piping, or contrast topstitching. Sew trim to the front panel before assembling. Ice dyeing creates unique ombre effects. Try gunmetal grey fading into teal or ochre.
Other upgrades include non slip backing to prevent sliding, adjustable straps with removable webbing, and embroidery for personalizing with names or holiday themes.
Avoid Common Mistakes
Fix Problems Before They Happen
Zipper will not open? You sewed the final seam with it closed. Always keep it open until the last stitch.
Bulky corners? Trim them diagonally before turning.
Gaping envelope? Use vertical overlap on short pillows.
Hard to turn handles? Use a safety pin or turning tool.
Cover too tight? Cut it one half inch larger or reduce fill level.
Test fit your insert before sealing. Sit with it to check comfort.
Maintain and Clean Your Pillow
Keep It Looking New
Removable covers can be machine washed in cold water on gentle cycle. Tumble dry low or air dry.
Inserts should be spot cleaned only, especially micro bead or memory foam.
Stain protection spray helps high use covers last longer.
Use double stitched hems and Wonder Clips for better grip on thick fabric.
Store extra filling in a sealed bag for future adjustments.
Final Tips for Success
Press after every step. It makes seams lie flat and looks professional.
Use Wonder Clips instead of pins. They grip better and will not snag.
Label right and wrong sides when fabrics look similar.
Work in still air when filling with micro beads. Drafts scatter them fast.
Buy trim in bulk. Save money with Amazon purchases.
Frequently Asked Questions About Sewing a Lumbar Pillow
What is the best fabric for a lumbar pillow?
Cotton, linen, and cotton linen blends are the best choices. They are durable, washable, and easy to sew. Upholstery grade fabric works best for high traffic areas.
How much filling do I need for a lumbar pillow?
Fill to 70 to 75 percent capacity. This allows the filling to shift and contour to your body without creating pressure points from overstuffing.
Can I wash a lumbar pillow with micro bead filling?
Micro bead inserts should be spot cleaned only. The beads do not respond well to machine washing. Use a removable cover that can be washed instead.
What size lumbar pillow should I make?
Standard sizes range from 12 by 24 inches for sofas to 14 by 17 inches for car or office chairs. Measure your lower back span or seating area for a custom fit.
Do I need a zipper for my lumbar pillow cover?
No. You can use an envelope back, French seam closure, or sleeve cover instead. These options are all removable and washable without zippers.
Key Takeaways for Sewing Your Own Lumbar Pillow
Sewing a lumbar pillow is more than a craft project. It is a way to improve comfort, express style, and solve real life problems. With the right materials, accurate cuts, and a smart closure, you can make a pillow that is durable, washable, and perfectly suited to your needs.
Choose a closure method that matches your skill level. The envelope back works great for beginners. The French seam offers a professional finish. The centered zipper provides a tight fit for structured inserts.
Start simple, finish strong, and enjoy the satisfaction of sitting back on something you made yourself.