How to Sew a Long Pillow
You’ve spotted them draped across daybeds, propped on swing chairs, and tucked behind sofa backs. Long pillows bring both comfort and visual polish to any room. Whether you want a supportive lumbar cushion or a structured cylindrical bolster, sewing one yourself is a beginner-friendly project with impressive results. The right technique ensures a clean, professional finish that holds up to daily use.
This guide walks you through every step of learning how to sew a long pillow. You’ll discover how to choose fabrics, calculate exact dimensions, sew invisible closures, and troubleshoot common issues. By the end, you’ll have the skills to create custom pillows that look store-bought but feel uniquely yours.
Choose the Right Fabric and Filling

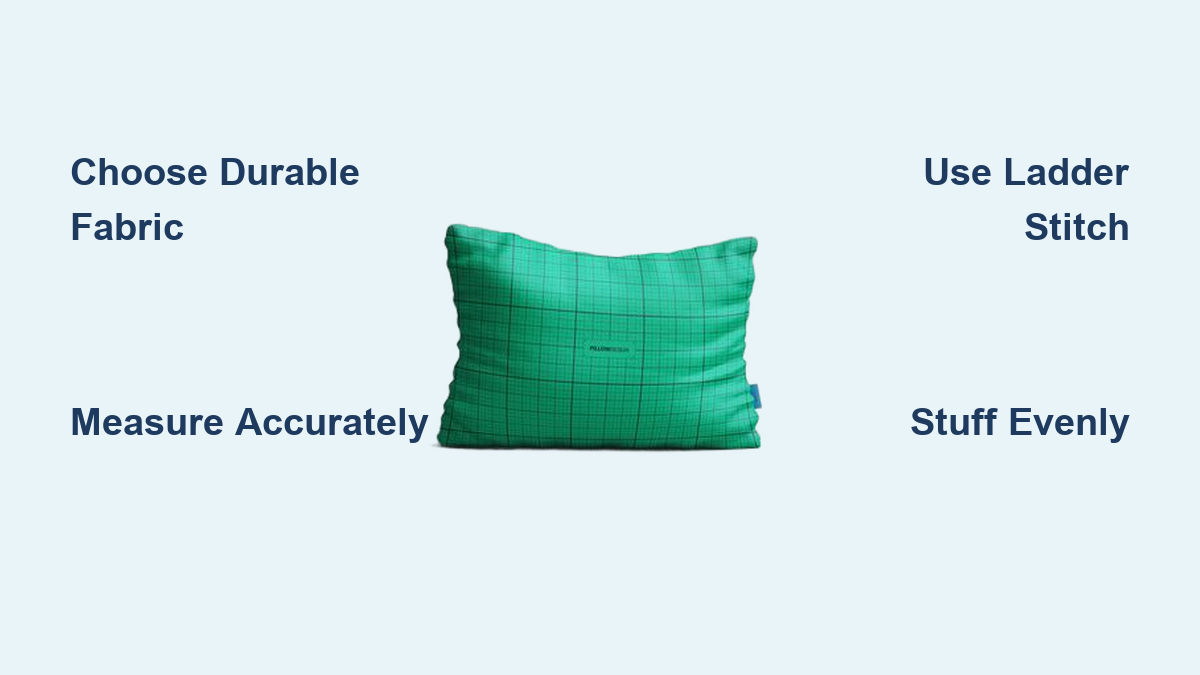
Pick Durable, Decorative-Weight Fabric
Select home décor-weight fabric for structure and longevity. Lightweight quilting cotton may feel soft, but it won’t hold its shape under daily use. Instead, opt for:
- Chenille, velvet, or minky for plush, luxurious texture
- Upholstery fabric or heavy linen for sturdy, fade-resistant performance
- Brocade or designer prints for a high-end statement finish
Pre-wash your fabric to prevent shrinkage after sewing. If your fabric has a pattern or nap (like velvet), lay it flat and align the design before cutting.
Match Filling to Shape and Use
The insert determines your pillow’s firmness and form:
- Pre-made rectangular inserts work well for lumbar pillows
- Foam bolsters suit cylindrical shapes; combine multiple foam tubes (such as three 13.5″ pieces) and glue them with Pro Stick adhesive spray for longer lengths
- Loose polyfill lets you control firmness when hand-stuffing lumbar pillows
- Down or feather blends feel softer and moldable but need more maintenance
Wrap joined foam forms in batting to hide seams and soften edges for a smooth finish.
Calculate Dimensions Accurately
Measure for Rectangular Lumbar Pillows
Most long pillows range from 50 to 60 inches in length and 12 to 15 inches in depth. To cut fabric correctly:
- Add 1 inch total to width (½” seam allowance per side). For a 15″ finished depth, cut fabric 16″ wide.
- Add 1 inch total to length (½” per short end). For a 50″ finished pillow, cut fabric 51″ long.
Cut two identical rectangles. If your fabric has a pattern, align it across both pieces before sewing.
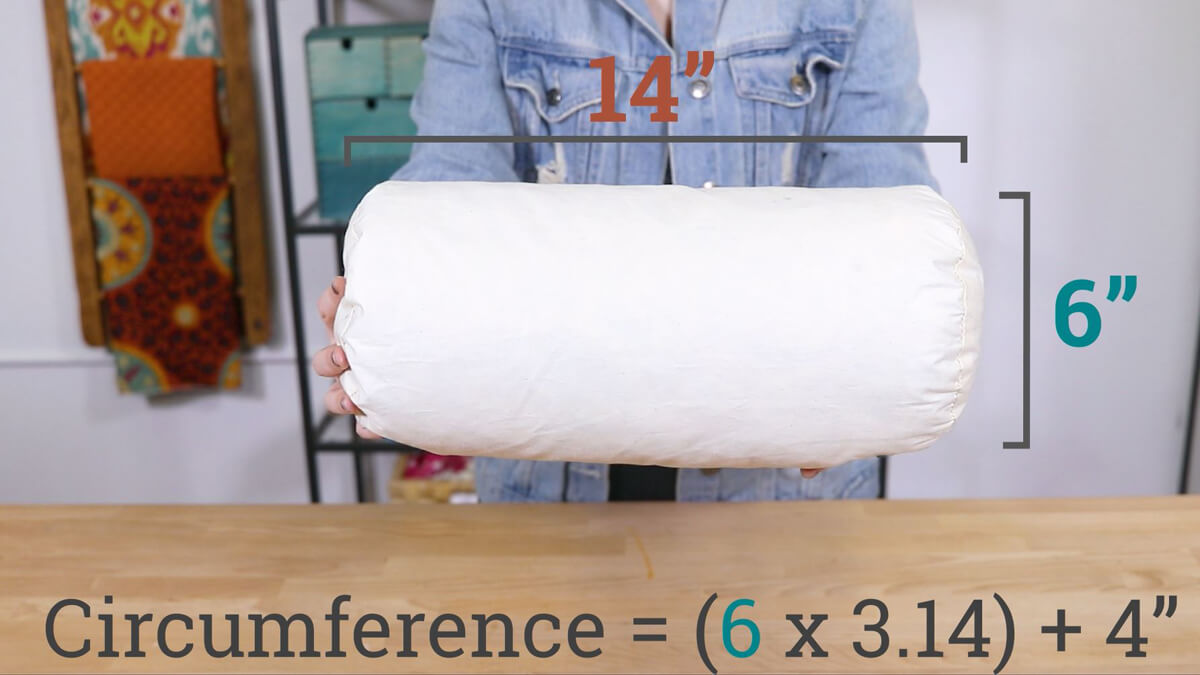
Calculate Circumference for Cylindrical Bolsters
Round bolsters require simple math. Use this formula:
Circumference = Diameter × π (3.14)
A 12″ diameter bolster has a circumference of about 38″.
- Body fabric width = Circumference + 1″ seam allowance
- Body fabric length = Desired finished length + 1″ for end caps
For Velcro closures, add 4 extra inches to the width to allow overlap.
Cut End Caps for Bolsters
For round ends, trace the foam or form and add ½” seam allowance around the entire circle. Cut two circular pieces per end. For gathered or tufted ends, cut two fabric rectangles per end sized at Circumference × (Radius + ½”).
Prepare and Cut Fabric Pieces
Layout and Alignment Tips
Place fabric on a large, flat surface. If using patterned or directional fabric, align motifs so they face the same way on both panels. Pin or clip pieces together before cutting to ensure symmetry.
Use sharp dressmaker’s shears or a rotary cutter for clean, straight edges. A ruler and cutting mat help maintain precision.
Mark Critical Points
Use a colored pin or fabric marker to label the right side of fabric, indicate where the closure will go, mark pivot points on corners, and identify where piping or Velcro should be placed. Double-check all measurements before cutting, since errors are hard to fix after sewing.
Sew the Pillow Body
Join Panels with Straight Stitching
For rectangular lumbar pillows:
- Place two fabric pieces right sides together.
- Pin along all edges.
- Sew the two short ends with a ½” seam allowance.
- Backstitch at start and end to secure stitches.
For cylindrical bolsters:
- Cut one long piece (length × circumference).
- Fold right sides together along the length.
- Sew a ½” seam to form a tube.
Use a walking foot if sewing thick or slippery fabrics like velvet to prevent shifting.
Clip and Trim for Clean Corners
After sewing, clip corners diagonally close to but not through the stitches. This reduces bulk and helps corners turn out sharply. For curved seams like end caps, make small snips into the seam allowance every ½ inch to allow fabric to lay flat when turned.
Add Piping or Cording (Optional)
Create a Tailored Look
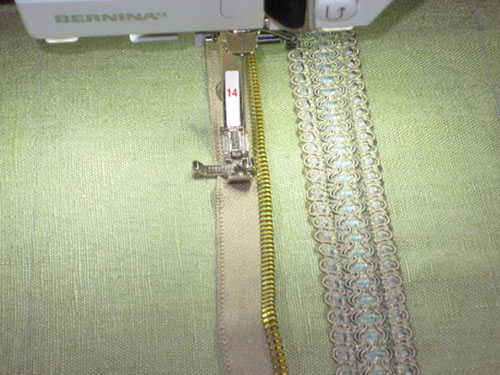
Piping gives a professional, upholstered appearance. You can use pre-made cording or make your own:
- Cut bias strips of fabric (2 to 2.5″ wide).
- Wrap around cording and fold edges over.
- Pin to the long edge of the pillow body with right sides facing.
- Use a zipper foot to stitch as close to the cord as possible.
For piped end caps, attach cording to the circular edge before sewing to the body.
Insert Zipper for Removable Cover
To add a zipper along the back:
- Cut a 4″ wide fabric strip and baste the long edges.
- Cut down the center to create a casing.
- Attach the casing to the back edge of the pillow body.
- Insert and sew the zipper using a zipper foot.
- Serge or finish raw edges for durability.
A centered zipper allows full access for cleaning and insert changes.
Attach End Caps or Close Ends
Sew Flat End Caps to Bolsters
For cylindrical bolsters with flat ends:
- Pin one end cap to the tube with right sides together.
- Use a zipper foot to sew around the circle, keeping a consistent ½” seam.
- Repeat for the other end.
Ensure the end caps are centered and not twisted.
Gather and Tuft for Decorative Finish
For tufted bolster ends:
- Insert the form.
- Thread a long upholstery needle with strong thread.
- Sew a running stitch around the exposed fabric at one end (about ½” from edge).
- Pull thread tight to gather the fabric snugly against the foam.
- Repeat on the other end.
Then tuft with buttons:
- Slide a Size 60 half-ball button onto the center of a long thread.
- Push the needle through the center of one gathered end, across the entire length, and out the other.
- Add the second button.
- Tie a slipknot and tighten to secure both buttons flush against the ends.
This creates a classic, tailored look while securing the fill.
Turn, Stuff, and Shape the Pillow
Turn Right-Side Out Carefully
Pull the cover through the opening. For long pillows, use a chopstick, seam ripper, or point turner to gently push out corners. Work slowly from the center toward the ends to avoid tearing. Avoid pulling too hard on delicate fabrics like velvet.
Insert Form or Stuff with Fill
For pre-made inserts, compress slightly and slide in from one end, then center evenly. For loose polyfill, stuff corners first using a pointed tool, add handfuls gradually, and fluff as you go. Avoid overstuffing; the pillow should be firm but pliable. For long foam bolsters, feed the wrapped form in slowly to prevent bunching.
Close the Opening Invisibly
Use Ladder Stitch for Seamless Finish
The ladder (or mattress) stitch hides the seam completely:
- Thread a needle with matching thread and knot the end.
- Hide the knot inside one folded edge.
- Pick up a tiny fold from one side, then directly across to the other.
- Pull tight after every few stitches; the seam will “zip” closed.
- Knot securely inside the pillow.
This method works best on lumbar pillows with envelope or hidden openings.
Topstitch for Visible Closure
For a quicker, modern look, fold raw edges inward to match pre-pressed lines, pin shut, and stitch with a ⅛” seam allowance using matching thread. This creates a slight lip or ridge, acceptable for casual designs.
Customize with Design Details

Add Buttons or Tassels
Sew a fabric-covered button to the center of a lumbar pillow, attach a tassel for boho flair, or use contrasting thread for topstitching to highlight seams.
Mix Fabrics for Visual Interest
Create a reversible pillow or use different fabrics for front and back. Pair a solid back with a patterned front, or combine textured fabrics like velvet and linen for depth.
Embellish Before Assembly
Add embroidery, appliqué, or fabric paint to the front panel before sewing. This prevents distortion and makes detailing easier.
Troubleshoot Common Sewing Issues
Fix Wavy or Uneven Seams
If seams ripple, use a walking foot to feed top and bottom layers evenly. Pin frequently (every 2 to 3 inches) to prevent shifting, and sew at a slower speed while guiding fabric gently without pulling.
Prevent Corner Bulk
Bulky corners often mean inadequate clipping. Snip closer to stitches without cutting them, and trim excess seam allowance before turning.
Align Patterns Across Seams
To avoid mismatched prints, lay both fabric pieces right sides up and align patterns before pinning. Use pattern weights or pins to hold alignment during sewing.
Handle Slippery Fabrics
For velvet or silk, use clips instead of pins to avoid snags. Place tissue paper under fabric to stabilize and tear it away after sewing. Reduce presser foot pressure if your machine allows.
Maintain and Extend Pillow Life
Clean with Care
Zippered or Velcro covers can be removed and machine washed (check fabric label). Non-removable covers require spot cleaning with mild soap and a damp cloth. Avoid soaking, which can damage batting and foam.
Fluff and Rotate Regularly
Shake and pat the pillow weekly to redistribute filling, prevent sagging, and maintain even shape.
Store Properly
Keep pillows in a cool, dry place. Avoid compression under heavy items to preserve loft.
Frequently Asked Questions About Sewing Long Pillows
What is the best fabric for a long pillow?
Home décor-weight fabrics like chenille, velvet, upholstery fabric, and heavy linen work best. They provide structure, durability, and a professional finish that holds up to daily use.
How much fabric do I need for a long pillow?
Plan for 1 to 1.5 yards of fabric, depending on the pillow’s length and diameter. A standard 50″ lumbar pillow typically requires about 1 yard, while larger bolsters may need 1.5 yards.
Can a beginner sew a long pillow?
Yes. Rectangular lumbar pillows are ideal for beginners since they involve only straight stitching and corner pivoting. Bolsters require more math and skill but remain achievable with patience.
How do I close a pillow opening without visible stitches?
Use the ladder (mattress) stitch. Thread a needle with matching thread, hide the knot inside one folded edge, and pick up tiny folds from alternating sides. Pull tight every few stitches to zip the seam closed invisibly.
How do I keep foam forms from bunching inside a long bolster?
Glue foam sections together with Pro Stick adhesive spray and wrap the entire length in batting. This creates a smooth, unified form that slides into the cover without shifting or creating lumps.
What is the standard size for a lumbar pillow?
Most lumbar pillows range from 50 to 60 inches in length and 12 to 15 inches in depth. These dimensions provide comfortable back support while fitting standard sofas and beds.
Key Takeaways for Sewing Your Own Long Pillow
Learning how to sew a long pillow comes down to three essentials: accurate measurements, quality materials, and the right closure method. Start with a simple rectangular lumbar style if you’re new to sewing, then progress to cylindrical bolsters as your skills grow. Pre-wash your fabric, use a walking foot for tricky materials, and always backstitch at seam starts and ends for durability.
Your next step is gathering your materials and cutting your first fabric panel. Measure twice, cut once, and enjoy the satisfaction of creating a custom pillow that perfectly suits your space.