
How to Close a Pillow: Sewing Guide
You’ve cut your fabric, sewn three sides, and stuffed the pillow full. Now comes the moment that decides whether your project looks homemade or handmade with intention. The closure is where most beginners struggle, and where experienced sewers spend extra time getting things just right. Knowing how to close up a pillow sewing properly ensures a clean, professional finish that holds up to years of use.
Two methods lead the way: the ladder stitch for invisible hand-sewn closures, and machine sewing for speed and strength. This guide covers both techniques with exact measurements, specific tools, and tested tips so your finished pillow looks store-bought, even when it’s entirely handmade.
Choose the Right Closure Method for Your Pillow

Before picking up a needle, match your closure method to your pillow’s purpose and the look you want.
Hand Sewing vs. Machine Sewing at a Glance
| Factor | Hand Sewing (Ladder Stitch) | Machine Sewing |
|---|---|---|
| Visibility | Nearly invisible | Visible seam line |
| Strength | Good (when knotted well) | Excellent |
| Speed | Slower | Faster |
| Best For | Decorative pillows | Everyday-use cushions |
Pro Tip: Choose hand sewing for high-end decor where pattern continuity matters. Choose machine sewing for guest rooms or kids’ pillows that see heavy use.
Prepare Pillow Edges Before Closing
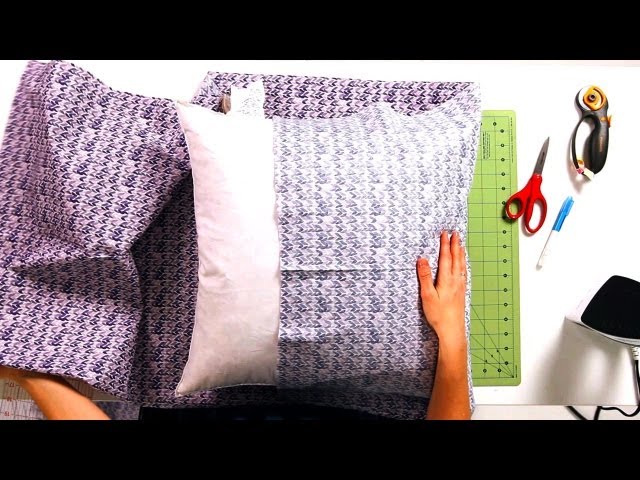
Skipping edge preparation leads to fraying, uneven seams, and pillows that fall apart after a few washes. Take ten minutes now to save hours of frustration later.
Finish Raw Edges First
Before folding anything, serge or overlock the raw edges of the open side. This step stops fraying during washing and extends the life of your pillow.
Why it matters: Unfinished cotton and linen edges unravel quickly, especially with regular use.
Create a Clean 1/2 Inch Fold
After serging the edges:
- Sew a guideline 3/8 inch from the raw edge.
- Fold the fabric inward along this line to create a 1/2 inch hem.
- Press with an iron to set the fold firmly.
Visual Cue: When folded correctly, no raw fabric should peek out from the inside of the pillow.
Hand Sew With Ladder Stitch for an Invisible Finish

The ladder stitch is the gold standard for closing pillows without a visible seam. It’s the technique that makes handmade pillows look factory-finished, especially with patterned fabric.
Gather Your Supplies
- Thread: Dual Duty Plus Hand Quilting thread, color-matched to your fabric
- Needle: John James Long Darner #7
- Thimble: Leather (Clover brand works well)
- Scissors: Sharp thread snips
Pro Tip: A long darner needle has a large eye and extra length, making it perfect for pulling thick thread through dense folds without frustration.
Step-by-Step Ladder Stitch Technique
-
Start at the Right Edge
Insert the needle into the fold on the right side of the opening. Pull the thread through, leaving a small tail tucked inside. -
Cross to the Left Side
Move about 1/4 inch to the left. Insert the needle into the fold on the opposite side and pull the thread taut. This creates the first “rung” of your ladder. -
Alternate Sides Evenly
Continue stitching right → left → right, spacing each stitch 1/4 inch apart. Keep stitches small and hidden within the fold. Don’t pierce through to the front of the fabric. -
Pull Tight After Every Few Stitches
Gently tug the thread periodically. The “ladder” will collapse inward, closing the gap invisibly. -
Finish Securely
At the far left end, pass the needle through the last stitch to form a loop. Pull to create a knot inside the fold. Repeat for security, then clip the thread.
Common Mistake: Pulling too hard puckers the fabric. Use steady, gentle tension instead.
Machine Sew a Stuffed Pillow Shut
For strength and speed, machine sewing works well, especially for thick inserts or cushions that get daily use.
Set Up Your Machine for Thick Fabric
-
Use a Walking Foot (Recommended)
A walking foot prevents the top layer from slipping while feeding bulky fabric. It’s essential for even stitches on thick pillow forms. -
Lift the Presser Foot Fully
Open the presser foot as high as possible to fit the stuffed pillow underneath. -
Select a Straight Stitch
Use standard stitch length (2.5 mm). Backstitch at the start and end for durability.
Pin the Opening Correctly
Proper pinning prevents shifting and keeps seams aligned.
-
Fold Edges Under 1/2 Inch
Press or finger-press both sides of the opening. Ensure the edges meet neatly. -
Pin Center First
Insert one straight pin horizontally across the center of the opening. The pin head faces left, with the point toward the machine. This lets you remove it safely just before sewing over it. -
Add Supporting Pins
Place one pin to the immediate left and one to the right of the center pin. Keep edges aligned and flat.
Why pin direction matters: A pin facing the machine could break your needle if you sew over it.
Sew With Control and Pressure
-
Position the Pillow Under the Needle
Start stitching 1/4 inch before the actual edge of the opening. This creates a secure anchor point. -
Aim for 3/8 Inch Seam Allowance
Align the fabric edge with the side of the presser foot as a guide. -
Hand Placement Is Key
Your left hand presses the pillow body toward the machine to prevent it from pushing out. Your right hand guides the edge along the presser foot. -
Sew Slowly and Steadily
Go slow around curves or thick spots. Stop with the needle down when turning corners. -
End Beyond the Opening
Sew 1/4 inch past the other edge of the opening. Backstitch, then cut threads.
Warning: Never sew over pins. Remove the center pin just before the needle reaches it.
Follow the Complete Pillow Construction Workflow
For best results, especially when making multiple pillows, follow this full process from start to finish.
Cut and Assemble Fabric
- Cut two identical rectangles to your desired size.
- Place right sides together.
- Pin or clip all four edges.
Sew Three Sides Only
- Use a 1/4 inch seam allowance.
- Backstitch at the beginning and end.
- Sew three sides and leave one short side open.
Trim Corners and Turn
- Clip diagonal triangles off each corner (don’t cut through your stitches).
- Turn the pillow cover right-side out.
- Use a chopstick or turning tool to push out corners sharply.
Press for a Professional Finish
- Iron flat on low-to-medium heat (adjust for your fabric type).
- Ensure seams are crisp and edges are smooth.
Insert the Form and Close
Now apply either the ladder stitch or machine stitch method covered above.
Troubleshoot Common Pillow-Sewing Issues
Even experienced sewers face challenges. Here’s how to fix them quickly.
Pillow Pushes Out During Sewing
- Cause: Bulk resists machine feed.
- Fix: Apply firm pressure with your left hand toward the machine body. Guide with your right hand.
Visible Gap in Hand-Sewn Seam
- Cause: Ladder rungs not tightened enough.
- Fix: Pull the thread firmly after every few stitches. Ensure folds are even before starting.
Fraying Edges After Washing
- Cause: Raw edges exposed.
- Fix: Always serge or overlock open edges before folding.
Uneven Seam Allowance
- Cause: Misaligned fabric or inconsistent guiding.
- Fix: Use the presser foot edge as a visual guide. Sew slowly.
Maintain Your Sewn Pillows for Long-Term Use
Proper care extends the life of your handcrafted pillows by years.
Cleaning Tips
- Spot clean when possible.
- If machine washing, use a gentle cycle and cold water.
- Remove the insert before washing the cover (if removable).
Storage Advice
- Store in a cool, dry place.
- Avoid compression for long periods to preserve shape.
Frequently Asked Questions About Closing Pillows by Sewing
What is the best stitch to close a pillow by hand?
The ladder stitch (also called the invisible stitch) is the best hand-sewn option. It hides the thread within the fold, creating a closure that’s nearly impossible to detect.
Can you sew a pillow closed with a regular sewing machine?
Yes. Use a walking foot for thick layers, lift the presser foot fully, and sew slowly with firm hand pressure to keep the pillow from shifting.
How do you keep pillow edges from fraying?
Serge or overlock the raw edges before folding them under. This step is essential for cotton and linen fabrics that unravel easily.
Should I hand sew or machine sew a pillow closure?
Hand sewing gives an invisible finish ideal for decorative pillows. Machine sewing provides stronger, faster results for everyday-use cushions.
What thread is best for closing pillows?
Dual Duty Plus Hand Quilting thread is recommended for hand sewing. For machine sewing, use a quality all-purpose thread that matches your fabric weight.
How do you hide a seam when closing a stuffed pillow?
Use the ladder stitch technique. Keep stitches small and hidden within the fold, then pull the thread tight so the “ladder” rungs disappear into the fabric.
Final Thoughts on Closing a Pillow by Sewing
Mastering how to close up a pillow sewing transforms a simple project into a polished, professional result. Whether you choose the invisible ladder stitch for elegance or machine sewing for strength, attention to detail makes all the difference.
Key Takeaways:
– Always finish raw edges before folding to prevent fraying.
– Use color-matched, durable thread for the best results.
– Pin correctly, especially for machine sewing.
– Press seams for a crisp, clean look.
– Choose the method that fits your pillow’s purpose.
With these techniques, you’ll confidently close any pillow, whether decorative, functional, or somewhere in between. Pick up your needle or head to your machine, and make something beautiful today.