How to Make a Bath Pillow: Easy DIY Guide
Imagine sinking into a warm bath after a long day, only to realize your neck is straining against the hard tub edge. A bath pillow can transform that moment, turning discomfort into deep relaxation. But instead of spending $20–$60 on a store-bought model that may mildew or slip, you can make a bath pillow yourself in minutes for a fraction of the cost. Whether you are crafting a quick no-sew version from a towel or building a durable sewn pillow with memory foam, this guide gives you everything you need to create a custom, comfortable, and secure bath pillow at home.
You will learn how to choose the best materials, attach suction cups properly, prevent mold, and even add luxury upgrades like scent pockets and temperature control. With tested methods from real DIYers, this is not just theory. It is a complete blueprint for comfort, hygiene, and spa-like indulgence in your own tub.
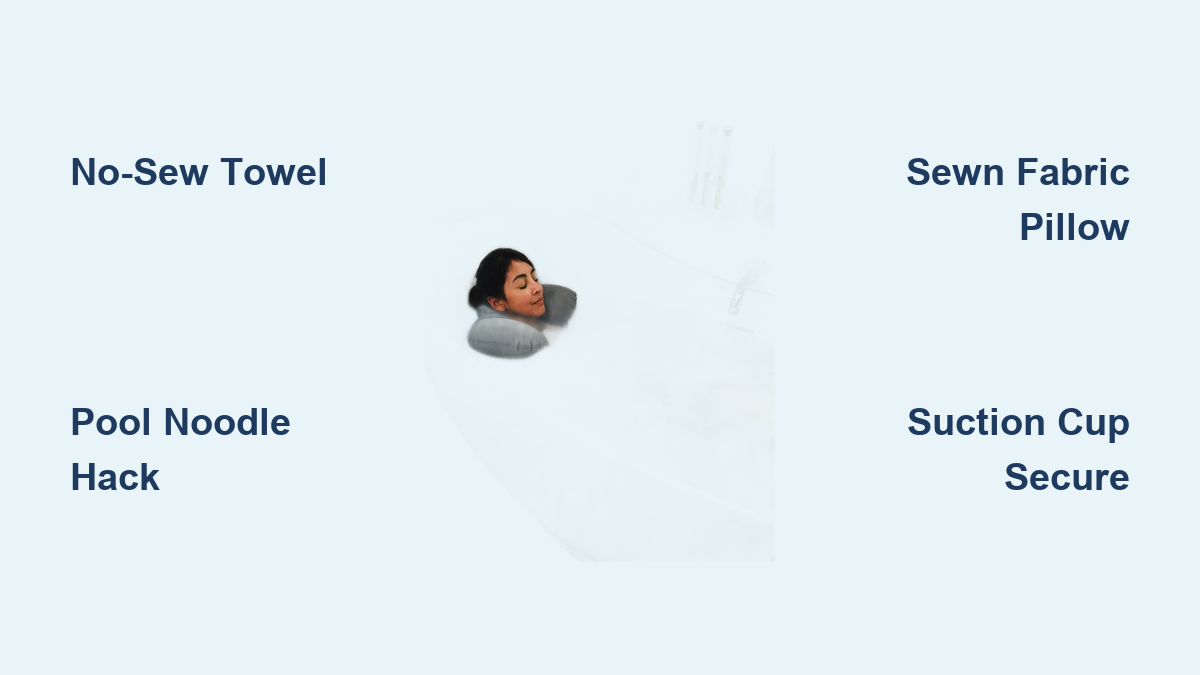
No-Sew Towel Bath Pillow
Create instant comfort using items already in your linen closet. This method requires no tools, no sewing skills, and no special purchases if you have a spare towel on hand.
Fold Towel Into Pillow Shape
Grab a plush bath towel. Turkish cotton or thick terry cloth works best. Lay it flat and fold it into a rectangle roughly 12 inches by 16 inches, thick enough to support your head and neck. For extra cushioning, roll the center tightly and flatten it into a contoured shape that cradles the base of your skull. Avoid over-folding, which can make the pillow unstable.
Use a memory foam-backed bath mat if you want more support. These stay firm when wet and provide lasting comfort. Test the shape by leaning back in the tub. Adjust thickness until your spine stays neutral and your neck feels relaxed.
Secure With Safety Pins
Insert 2–3 stainless steel safety pins through all layers at the corners and center. Make sure the pins lie flat against the fabric so they will not poke you. Standard pins can rust over time, so opt for coated or rust-resistant versions if you plan to reuse the pillow.
Do not skip this step. Loose folds will unravel under pressure. Pull gently on each end to test stability before attaching to the tub.
Attach Suction Cups
Hook the loops of rubberized wreath hangers (rated for 5 lbs) onto the safety pins. Press each suction cup firmly onto a clean, dry spot on the tub wall just above the waterline. For best adhesion, wipe the surface with rubbing alcohol first and hold each cup in place for 10–15 seconds.
Position the pillow so it aligns with your shoulder blades when reclining. If it slips during use, reseat the cups or move them closer together for better balance.
Wash and Reuse Weekly
After each bath, unhook the suction cups, remove the pins, and hang the towel to dry completely. Machine wash it weekly to prevent mildew. This method lets you swap in a fresh towel anytime, ideal for hygiene and customization.
Pro Tip: Keep a spare towel pre-folded and pinned for instant use. Label it “bath pillow” to avoid mix-ups.
Pool Noodle Headrest Hack
Turn a $3 foam noodle into a buoyant, long-lasting bath pillow. This method offers the lowest upfront cost and quickest build time among all DIY options.
Cut Noodle to Tub Width
Measure your bathtub interior width. Typically this ranges from 24–30 inches. Use a permanent marker to mark where the pool noodle extends beyond the tub edges. Cut it cleanly with scissors or a utility knife.
For deeper tubs or taller users, shorten the noodle slightly so it lies flat against the curved backrest. A snug fit prevents rolling and improves support.
Insert Suction Cups in Ends
Push the metal hooks of heavy-duty suction cups into the foam about 2–3 inches from each end. Place them on the underside of the noodle to keep the top smooth and snag-free.
Some users add a third suction cup in the center for extra stability. The foam naturally grips the hook, and even if one cup fails, the pillow often stays in place.
Press Onto Clean Tub Surface
Before attaching, clean the tub with a non-abrasive cleaner to remove soap scum and oils. Press each cup firmly until you hear a pop. This means a vacuum seal has formed.
Test by leaning back gently. If the noodle shifts, reposition the cups closer to the center or press harder to reseal.
User Note: White or beige noodles blend better than bright colors. Store the noodle outside the tub when not in use to extend its life.
Sewn Fabric Bath Pillow Guide
Build a durable, washable pillow that rivals store-bought models. This method requires basic sewing skills but delivers the best long-term value and customization options.
Cut Waterproof Fabric Pieces
Choose two matching pieces of water-resistant fabric. Microfiber, vinyl, or terry cloth over mesh work well. Cut them to 12 inches by 16 inches or 14 inches by 18 inches for full neck coverage.
For ergonomic support, round the top corners or contour the shape to match your spine. Use fabric scissors for clean edges and pin the layers together before cutting.
Sew Three Sides Closed
Place the fabric pieces together with the right sides facing inward. Sew three edges using a straight stitch and waterproof thread. Leave one short edge open for inserting the filling.
Backstitch at the beginning and end to lock the seams. Trim any loose threads to prevent fraying.
Insert Memory Foam or Fiberfill
Turn the pillow right-side out. Fill it with memory foam cut to size for firm, lasting support. Polyester fiberfill provides a softer feel but may compress over time. Buckwheat hulls offer firm, moldable support but require a waterproof lining.
Pack the filling evenly. Make sure there are no lumps or thin spots. For a washable design, insert the filling into a zippered inner liner before placing it inside the outer cover.
Close With Zipper or Velcro
For permanent use, hand-stitch the opening shut with a hidden whipstitch. For easy cleaning, attach a zipper or Velcro strip along the open edge.
A removable cover lets you machine-wash the shell while protecting the inner foam. This extends the pillow life and improves hygiene.
Sew On Suction Straps
Reinforce two corners with fabric loops or webbing straps. Thread the hooks of strong suction cups through the loops and pull tight.
Alternatively, glue the cups using E6000 or waterproof adhesive and let cure for 24 hours before use. Sewn attachments are more durable. Glued ones allow for quick replacement.
Add Drying Hook and Waterproofing
Sew a small metal or plastic hook to the top edge so you can hang the pillow after use. This prevents mold and speeds drying.
Spray the outside with Scotchgard Outdoor Protector every 4–8 weeks to boost water resistance. Reapply after washing.
Expert Tip: Make a dual-sided pillow. One side soft (microfiber), one side quick-drying (mesh). Flip it based on your preference.
Repurpose Inflatable Float
Use a pool float as a ready-made, travel-friendly bath pillow. This option works exceptionally well for hotel baths or guest use.
Inflate Donut or Backrest Float
Choose a donut-shaped ring or inflatable backrest. Inflate it just enough to feel firm but not overstretched. Over-inflation increases the risk of bursting.
Place it behind your head and neck in the tub. The natural buoyancy keeps it afloat and provides excellent support.
Anchor With Suction or Straps
To prevent drifting, secure the float with suction cups taped to the back using waterproof duct tape. You can also use nylon straps looped around the faucet or shower rod. Bungee cords hooked to tub handles work well too.
Ensure anchors are tight but not so tight they deform the float.
Wrap in Soft Towel
Even inflated, the plastic surface can feel hard. Wrap the float in a soft hand towel and secure it with Velcro strips or safety pins.
This adds cushioning and absorbs moisture. Remove and wash the towel weekly.
Travel Hack: Deflate and pack the float in a ziplock bag. It is perfect for hotel baths or guest use.
Choose the Right Materials

Match your needs with the best fabric, filling, and structure. Material choice directly impacts comfort, drying time, and longevity.
Compare Comfort and Durability
| Material | Best For | Drying Time | Care Tips |
|---|---|---|---|
| Memory foam bath mat | Long soaks, neck support | 6–12 hours | Air dry only. Never machine wash foam |
| Pool noodle | Budget builds, buoyancy | 1–2 hours | Wipe down weekly. Store dry |
| Terry cloth cover | Softness, absorption | 4–6 hours | Machine wash. Use mild detergent |
| Microfiber | Luxury feel, quick dry | 2–4 hours | Spot clean. Avoid fabric softener |
| Inflatable float | Travel, portability | Instant (wipe only) | Check for leaks. Store deflated |
Avoid cotton-filled pillows unless they are fully sealed. Absorbent materials trap water and grow mold.
Secure Suction Like a Pro
Keep your pillow in place, bath after bath. Proper suction technique is the difference between a pillow that stays put and one that slides into the water.
Prep Tub Surface Properly
Always clean the attachment area with rubbing alcohol or vinegar before applying suction cups. Oils, soap residue, and mineral buildup prevent sealing.
Use a lint-free cloth to dry the spot completely. Even a damp surface can reduce adhesion by 50 percent.
Press and Seal for 15 Seconds
Place the cup flat against the tub. Press down firmly with your palm and hold for 10–15 seconds. If the cup has a center tab, pull it up to lock the vacuum.
Test by tugging gently. If it releases, reseat it. Do not assume it will hold during use.
Replace Cups Every 6 Months
Rubber degrades with moisture and UV exposure. Even high-quality cups lose grip after 3–6 months. Keep spares on hand.
Upgrade to OOK or Command brand suction hooks for better performance on smooth surfaces.
Warning: Suction fails on textured, ribbed, or matte-finish tubs. In those cases, use elastic straps or bungee cords instead.
Optimize Placement and Fit
Get the most comfort from your pillow position. Proper placement prevents neck strain and maximizes relaxation.
Align With Shoulder Blades
Place the pillow so the top edge rests just below the base of your skull. The bottom should sit between your shoulder blades to support your upper back.
If you feel pressure on your chin, the pillow is too high. If your head tilts back too far, lower it.
Position Above Waterline
Mount the pillow 1–2 inches above the full water level to keep it dry and prevent submersion. A wet pillow becomes heavy and loses support.
In deep soaking tubs, you may need to adjust placement slightly lower.
Modify for Curved Tubs
Many tubs have a sloped or contoured back. A long pool noodle or rigid foam may not lie flat. Shorten it by 1–2 inches or use a flexible towel pillow that conforms naturally.
For sewn pillows, round the bottom corners so it hugs the curve.
Prevent Mold and Mildew

Keep your pillow clean, dry, and safe. Mold and mildew not only smell bad but can also cause skin irritation and allergic reactions.
Dry Completely After Every Use
Hang the pillow vertically on a hook or towel bar after each bath. Do not leave it in the tub.
Foam and fabric can stay damp for hours. Mold starts growing in as little as 24 hours in wet environments.
Use Mold-Resistant Materials
Choose mesh or vinyl for fast drying. Choose closed-cell foam like pool noodles that do not absorb water. Choose removable covers you can wash regularly.
Avoid open-cell foam unless it is sealed in a waterproof liner.
Sanitize Monthly
Wash fabric pillows with oxygen bleach or white vinegar once a month to kill bacteria and mildew spores. Never use chlorine bleach on foam. It breaks down the material.
For non-washable types, wipe with a disinfectant spray like Lysol and air dry.
Customize for Luxury and Function
Upgrade your pillow with smart, spa-like features. These additions transform a simple DIY project into a personalized spa experience.
Add Aromatherapy Pockets
Sew a small inner pocket and insert a lavender or eucalyptus sachet. The warmth of the bath releases the scent gently.
Or, lightly spritz the fabric with essential oil and water mix (1–2 drops per ounce) before use. Never apply oils directly. They can damage foam and leave tub residue.
Control Temperature
Chill the pillow in the fridge for 30 minutes before use. This is great for reducing neck inflammation or cooling down on hot nights.
Warm it in the dryer on low heat for 10 minutes for soothing comfort. Do not overheat or melt foam.
Safety Note: Never microwave any DIY bath pillow. Metal suction cups or hidden wires can cause fire.
Build Dual-Sided or Multi-Functional Design
Make one side soft microfiber for comfort and the other mesh for quick drying. Flip based on your needs.
Add a small zippered pocket to hold bath salts, a washcloth, or a waterproof Bluetooth speaker.
Use contrast stitching or embroidery to personalize it. This is great for gifts.
Evaluate Performance and Value
:max_bytes(150000):strip_icc()/spr-everlasting-comfort-bath-pillow-bath-pillows-tiffany-ivanovich-05-d2099fdd6989438b843530a6a1637b78.jpeg)
See how DIY compares to commercial options. Understanding the trade-offs helps you choose the right method for your situation.
Comfort vs. Cost Breakdown
| Method | Comfort (1–5) | Cost | Longevity |
|---|---|---|---|
| Sewn memory foam | 4.5 | $15 | 1–2 years |
| Pool noodle | 3.7 | $6 | 6–12 months |
| Towel + pins | 4.0 | $0–$10 | 1–3 months |
| Inflatable float | 3.8 | $8 | 1–2 years |
| Commercial pillow | 4.8 | $25 | 1–3 years |
While commercial pillows lead in comfort, DIY versions offer better hygiene, customization, and freshness. Many users report equal satisfaction.
Best Method by User Type
Renters should choose towel or pool noodle methods. No damage, easy to take when moving.
Eco-users should upcycle bath mats or old towels.
Luxury lovers should choose sewn terry cloth with memory foam core.
Gift givers should create a personalized sewn pillow with monogram.
Travelers should use inflatable float with towel wrap.
Frequently Asked Questions About Making a Bath Pillow
What is the easiest way to make a bath pillow without sewing?
The easiest no-sew method involves folding a plush bath towel into a rectangle, securing it with 2–3 stainless steel safety pins at the corners and center, and attaching suction cup wreath hangers to the pins. This takes under 5 minutes and uses items most people already have at home.
How long does a DIY bath pillow last?
Longevity depends on materials and maintenance. Towel-based pillows last 1–3 months with weekly use. Pool noodles last 6–12 months. Sewn memory foam pillows last 1–2 years. Suction cups should be replaced every 3–6 months regardless of pillow type.
Can I use a regular towel as a bath pillow?
Yes, a regular bath towel works well when folded and secured properly. Turkish cotton or thick terry cloth provides the best comfort. For better support, use a memory foam-backed bath mat instead of a standard towel.
How do I keep my bath pillow from slipping?
Clean the tub surface with rubbing alcohol before applying suction cups. Press and hold each cup for 10–15 seconds. Use at least two cups, preferably three for redundancy. If suction still fails on textured tubs, switch to elastic straps or bungee cords.
How do I prevent mold on my DIY bath pillow?
Always hang the pillow to dry completely after each use. Use quick-drying materials like mesh or vinyl. Wash fabric pillows weekly and sanitize monthly with oxygen bleach or vinegar. Never leave a pillow in the tub between uses.
Key Takeaways for Making Your Own Bath Pillow
Making a bath pillow at home is simple, affordable, and deeply satisfying. Whether you spend 5 minutes with a towel and safety pins or an hour sewing a custom memory foam model, you gain control over comfort, cleanliness, and design. You avoid the mold-prone, overpriced commercial versions and create something tailored to your body and your tub.
The pool noodle method is the best starting point. It is cheap, effective, and easy to test. If you love it, move to a sewn version with a removable cover for long-term luxury. Remember to dry your pillow after every use, replace suction cups regularly, and keep materials mold-free. With these habits, your DIY bath pillow will deliver spa-like comfort for months or even years.
Now, all that is left is to run the water, light a candle, and enjoy. You have earned it.