How to Make a Pillow Book Holder
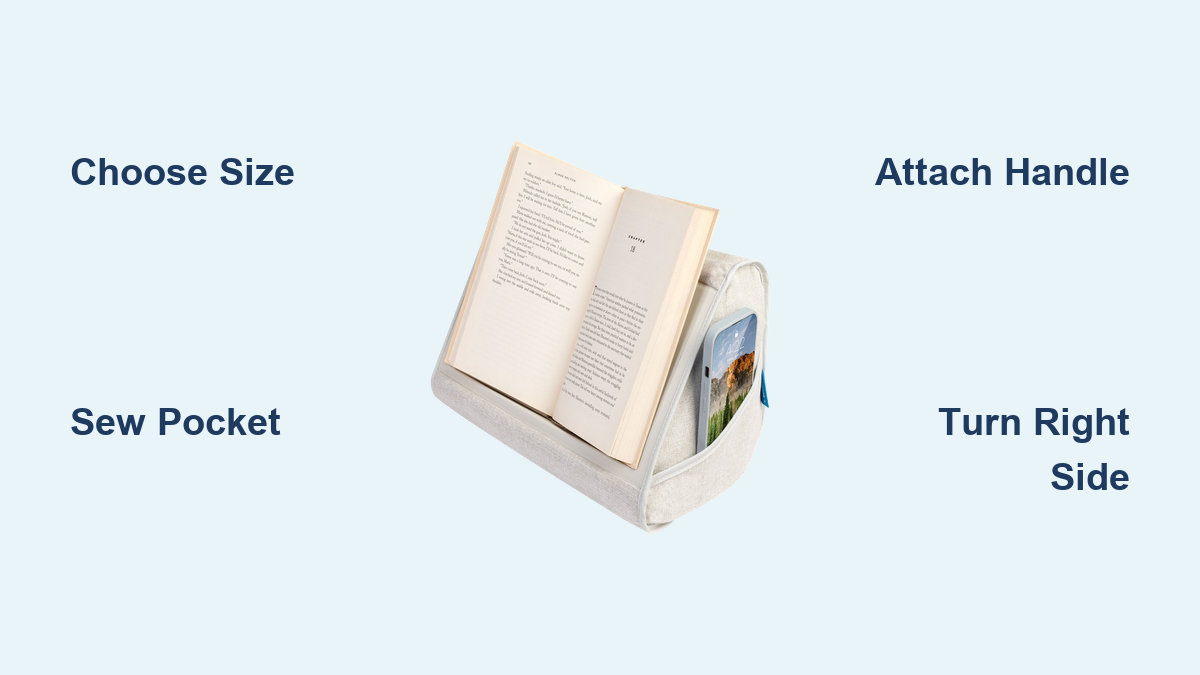
Imagine your child curled up in bed, reading their favorite story with hands free and comfortable. Or picture an elderly reader enjoying a novel without hand strain or neck pain. A pillow book holder makes this possible. It combines a cozy throw pillow with a functional reading aid featuring a built-in pocket to hold books, tablets, flashlights, and accessories. Best of all, you can make one yourself in under two hours with basic sewing skills.
This guide walks you through every step of making a custom pillow book holder, from choosing the right fabric and size to adding personalized touches like embroidery or applique. Whether you are crafting for a child, gifting to a book lover, or creating a hands-free reading solution for someone with limited mobility, this project is practical, rewarding, and surprisingly simple.
Choose the Right Size for Your Pillow Book Holder
Pick Based on User Needs
Pillow book holders come in standard square sizes, each suited to different users and reading materials. The most common size is 18 inches by 18 inches, which fits most children and teens and comfortably holds chapter books or tablets. For younger kids, go with a 12-inch or 16-inch version. Adults or those using larger devices may prefer 20 inches.
| Size | Best For |
|---|---|
| 12 inches | Toddlers, travel, compact use |
| 16 inches | Young readers, small books |
| 18 inches | Most children and teens (ideal balance) |
| 20 inches | Adults, tablets, bigger books |
Always measure your pillow insert before cutting fabric. Pre-shrink all fabric by washing and drying it first to prevent post-sew shrinkage.
Cut Panels with Seam Allowances
All pieces require a half-inch seam allowance. Front and back panels are cut half-inch larger than the insert size. For example, an 18-inch insert needs an 18 and one-half inch by 18 and one-half inch front panel.
Back panels use an envelope closure with one upper flap and one lower flap. For an 18-inch pillow, the upper back measures 13 inches by 18 inches and the lower back measures 10 inches by 18 inches. This creates a 3-inch overlap for easy insertion and removal of the pillow form.
Gather Materials and Tools for Your Pillow Book Holder
Select Durable, Washable Fabrics
Use quilting-weight cotton for your pillow book holder. It is easy to sew, widely available in themed prints, and holds up well to washing. Themed prints like unicorns, dinosaurs, or favorite book characters make great gifts for kids. Avoid stretchy or slippery fabrics if you are a beginner.
For an 18-inch pillow, you will need five-eighths yard of main fabric for the front, back, and handle. You will also need one-half yard of pocket fabric and one-half yard of fusible fleece for the front, pocket, and handle. Optional materials include flannel for a softer feel, though you should stabilize it with interfacing to prevent stretching.
Essential Sewing Tools
You do not need a fancy machine. Just a few basics will get you through this project. You will need a sewing machine with straight stitch capability, a rotary cutter with mat and ruler, fabric scissors, pins or fabric clips, an iron and ironing board, a seam ripper, a fabric marking pen, and a chopstick or point turner.
Use fabric clips instead of pins when layering thick seams. They will not shift and are safer to sew over.
Build the Pocket for Your Reading Pillow

Sew a Lined Pocket
A lined pocket looks polished and prevents fraying. Here is how to make one for your pillow book holder.
Cut the pocket front at 11 inches by 18 inches and the pocket lining at 11 inches by 18 and one-half inches, making the lining half an inch taller. Apply fusible fleece to the wrong side of the pocket front. Place the lining right side up, then place the front right side down on top, aligning the top edges. Pin and sew along the top with a one-quarter inch seam allowance.
Flip the seam toward the lining and press flat. Turn right side up and press again. Topstitch one-quarter inch from the top edge. The half-inch extra on the lining creates a clean band that hides raw edges and adds durability.
Add Quilting or Embellishments
Want a professional finish? Add diamond quilting to your pocket. Draw diagonal lines from corner to corner, spacing them one inch apart. Stitch along the lines using a straight stitch. This adds structure and prevents the pocket from sagging.
Personalize your pillow book holder with applique letters using fusible web, iron-on vinyl cut with a Cricut, or machine embroidery. Do all embellishments before sewing the pocket to the front panel.
Create a Sturdy Handle for Carrying
Build a Four-Layer Fabric Handle
A strong handle makes the pillow easy to carry and hang. Cut a fabric piece measuring 4 inches by 9 inches. Fold it lengthwise with wrong sides together and press. Unfold, then fold each long edge to the center crease and press.
Fuse one-inch by nine-inch fusible fleece strips to the wrong side of each folded edge. Refold the fabric into a one-inch by nine-inch strip, enclosing the fleece. Topstitch close to both long edges. The result is a firm, padded handle that will not flop or tear.
Use Ribbon as an Alternative
Short on time? Use one-inch-wide ribbon measuring 8 to 9 inches long. Secure the ends with fray check and sew them like a fabric handle. Test the handle strength by tugging it before final stitching.
Assemble the Pillow Front Panel

Attach Pocket and Handle
Place the front panel right side up. Position the pocket, aligning the bottom and sides while leaving a small gap at the top. Baste along the sides and bottom with a 2.4mm stitch length.
Center the handle on the top edge, positioning it 7 inches from each side on an 18-inch pillow. Baste the ends with raw edges aligned to the top. Use a measuring tape to ensure symmetry, as misaligned handles look crooked fast.
Round the Corners
For a softer look, place a bowl in the corner of the front panel and trace a gentle curve. Cut one-quarter inch inside the line to account for seam allowance. Rounded corners turn more neatly and reduce bulk.
Prepare the Back Panels with Envelope Closure
Hem the Envelope Flaps
The back uses an overlapping envelope closure, so no zipper is needed. For each back piece, fold one long edge half an inch, press. Fold again half an inch, press. Topstitch close to the inner fold. This creates a clean, enclosed hem.
For an 18-inch pillow, the upper back piece measures 13 inches by 18 inches and the lower back measures 10 inches by 18 inches. Lay the flaps on the front to ensure they overlap by at least 3 inches.
Add a Zipper for Advanced Users
Want a removable, washable cover? Use a 22-inch invisible zipper. Sew it between the two back panels using a zipper foot to stitch close to the teeth. Secure the pull with painter’s tape to prevent sewing over it. Zipper versions last longer and survive 50 or more washes.
Sew the Pillow Cover Together
Join All Layers
Place the front panel right side up. Place the upper back panel right side down on top, aligning the top and sides. Place the lower back panel right side down, aligning the bottom and sides. The back panels should overlap in the center.
Pin or clip all around. Sew with a half-inch seam allowance, backstitching at start and end. Reinforce the handle base and back overlap with extra stitches. Sew diagonal X-stitches across the corners to prevent seam splitting.
Finish and Turn Your Pillow Book Holder
Reduce Bulk and Prevent Fraying
Trim the seam allowance to one-quarter inch to reduce thickness. Zigzag stitch along the entire edge to lock threads. Clip corners diagonally, getting close but not cutting the stitches. Clipping corners helps them turn out sharply and lie flat.
Turn and Press
Turn the cover right side out through the envelope opening. Use a chopstick or point turner to push out corners. Press seams flat with an iron. Fold the back flaps inward to close. Test fit by inserting the pillow form. It should slide in easily with no gaps.
Insert the Pillow Form and Start Using It
Choose the Right Insert
Use a pre-made 18-inch by 18-inch pillow form, available on Amazon or at craft stores. Look for high-resilience polyester fill, 4 to 5 inches thickness for neck support, and a removable cover if you want washability. Pre-made inserts hold shape better than stuffing with Poly-Fil.
Load the Pocket
Slide in a children’s book or coloring book, a small LED flashlight perfect for under-the-covers reading, a tablet or e-reader, or pencils or crayons if you add side pockets. Consider adding elastic book straps to the bottom of the pocket to keep books from slipping out.
Customize Your Pillow Book Holder
Add Functional Features
Make your pillow even more useful by adding page holder ribbons. Sew 8 to 10-inch ribbons to the sides to hold down pages. Attach a 12 to 18-inch bookmark ribbon to the top. Add small inner pockets to the back flaps for glasses or pencils.
Try Piping for a Polished Edge
Use 4mm cotton cord and bias tape. Insert the cord into the tape and sew the piping to the front edge before assembling. This gives a store-bought look and adds durability. Use plastic cord stoppers to cap the ends and prevent unraveling.
Care Tips for Your Reading Pillow
Keep It Fresh and Functional
Machine wash your pillow book holder in cold water on a gentle cycle. Dry flat or tumble dry low. Avoid bleach. Iron on medium heat. Inspect stitching monthly, especially around the handle. Replace the insert every 1 to 2 years if it flattens.
Perfect for Personalized Gifting
Turn your pillow into a thoughtful gift by matching the fabric to the recipient’s favorite book or hobby. Add their name with flocked vinyl or applique. Include a themed book and flashlight in the pocket. Ideal occasions include birthdays, Christmas, back-to-school, or literacy events.
Troubleshoot Common Issues
Fix Common Problems
If the pocket pulls away from the front, reinforce the basting stitches and topstitch the sides one-quarter inch from the edge. If the handle rips, always use fusible fleece inside and backstitch multiple times at attachment points.
If crisp corners are not forming, clip the seams well, use a point turner, and press thoroughly after turning. If back flaps will not overlap, double-check your cut sizes. The golden rule is to measure twice and cut once.
Key Takeaways for Making a Pillow Book Holder
Making a pillow book holder is a satisfying project that blends creativity with practicality. With the right materials, precise cutting, and attention to detail, you can craft a durable, washable, and personalized reading companion in just a few hours. Whether you are sewing for a child, a senior, or a fellow book lover, this pillow does more than hold books. It supports the joy of reading.
Now that you know how to make one, grab your fabric, fire up your sewing machine, and create a gift that truly turns the page.
Frequently Asked Questions About How to Make a Pillow Book Holder
What is the best fabric for a pillow book holder?
Quilting-weight cotton is the best choice for beginners. It is durable, easy to sew, holds up well to washing, and comes in countless themed prints. Avoid stretchy knits or slippery fabrics until you have more sewing experience.
How long does it take to make a pillow book holder?
Most people complete this project in 40 to 90 minutes of active sewing time. Having all your materials pre-cut and organized beforehand speeds up the process significantly.
Can I wash my pillow book holder?
Yes, most pillow book holders are machine washable. Wash in cold water on a gentle cycle and dry flat or tumble dry on low heat. Always remove the pillow form before washing the cover if using an envelope closure.
What size pillow insert should I use?
Match your pillow insert to the finished size you want. An 18-inch by 18-inch insert works best for most children and teens. Always measure your insert seam to seam before cutting fabric to ensure a proper fit.
How do I keep books from falling out of the pocket?
Add elastic book straps to the bottom of the pocket, or sew ribbon page holders to the sides. These simple additions keep books securely in place during reading.
Can I add a zipper instead of the envelope closure?
Yes, a 22-inch invisible zipper works well for an 18-inch pillow. This creates a fully removable cover that is easier to wash and lasts through 50 or more washes.