How to Use a Back Stretcher Pillow
If you’re dealing with daily back stiffness, poor posture from long desk hours, or nagging lower back tension, a back stretcher pillow can offer real relief. This ergonomic device works by gently arching your spine backward, creating space between vertebrae, easing nerve pressure, and lengthening tight muscles along your back, shoulders, and hips. Learning how to use a back stretcher pillow the right way matters just as much as owning one. Done correctly, it can improve flexibility, mobility, and comfort within a few weeks. Done incorrectly, it can strain muscles or worsen discomfort. This guide walks you through every step, from setup to long-term use, so you can stretch with confidence and safety.
Prepare Your Space Before Stretching
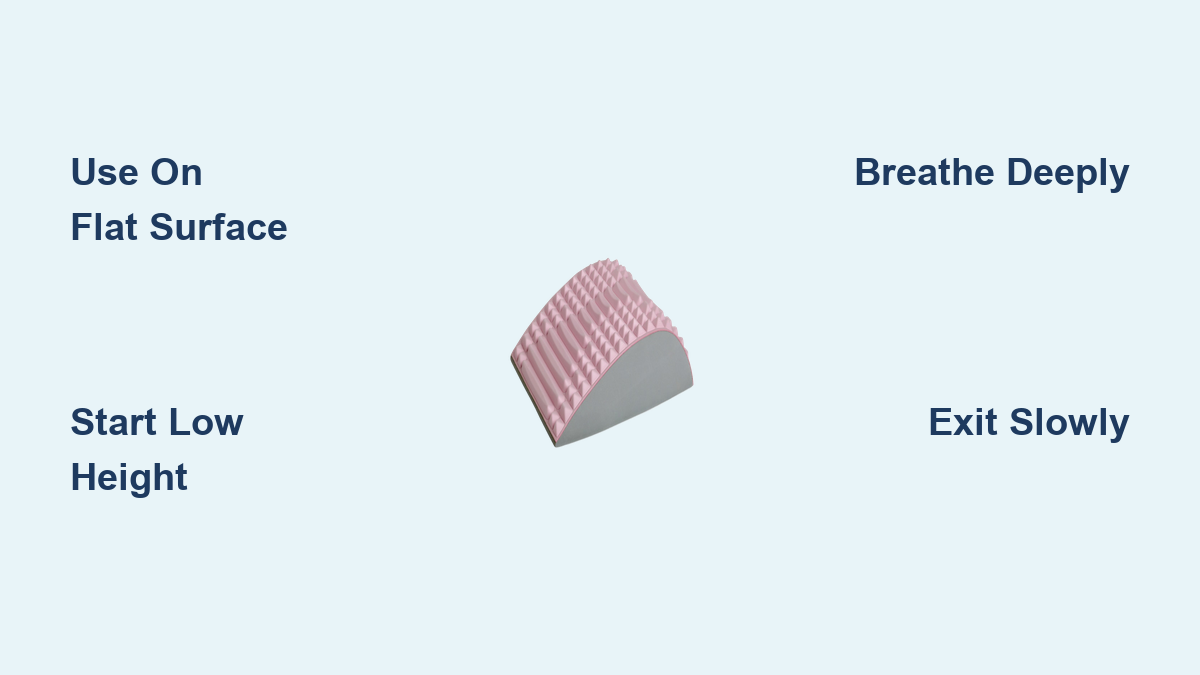
Pick a Stable, Flat Surface
Set your back stretcher on a yoga mat, carpeted floor, or firm bed. Avoid slippery tiles or uneven ground that could shift mid-session. A solid base keeps your spine aligned and prevents slips when getting on or off.
Clear Surrounding Space
Make sure you have room to lower yourself slowly and roll off safely afterward. Move pets, furniture, and clutter out of the way to avoid distractions or falls.
Create a Calm Environment
Choose a quiet spot where you won’t be interrupted. Dim the lights or play soft music to help your muscles release tension. A relaxed state improves stretch quality and results.
Review Safety Guidelines First
Know Who Should Avoid Use
Do not use a back stretcher pillow if you have:
– Recent back fractures or spinal surgery
– Diagnosed disc herniation or spondylolisthesis
– Osteoporosis or spinal instability
– Pregnancy (without doctor approval)
When in doubt, talk to your doctor or physical therapist before starting.
Warm Up Your Muscles
Cold muscles are more likely to strain. Try one of these before your session:
– 5–10 minutes of light walking
– A warm shower or heating pad on your lower back for 10 minutes
– Gentle torso twists or cat-cow stretches
Warming up boosts blood flow and tissue elasticity, making your stretch safer and more effective.
Learn the Difference Between Stretch and Pain
You should feel a gentle pull along your spine, not sharp, shooting, or stabbing pain. Mild tension is normal at first. If pain shows up, stop, adjust your position, or reduce the intensity right away.
Position the Stretcher Correctly
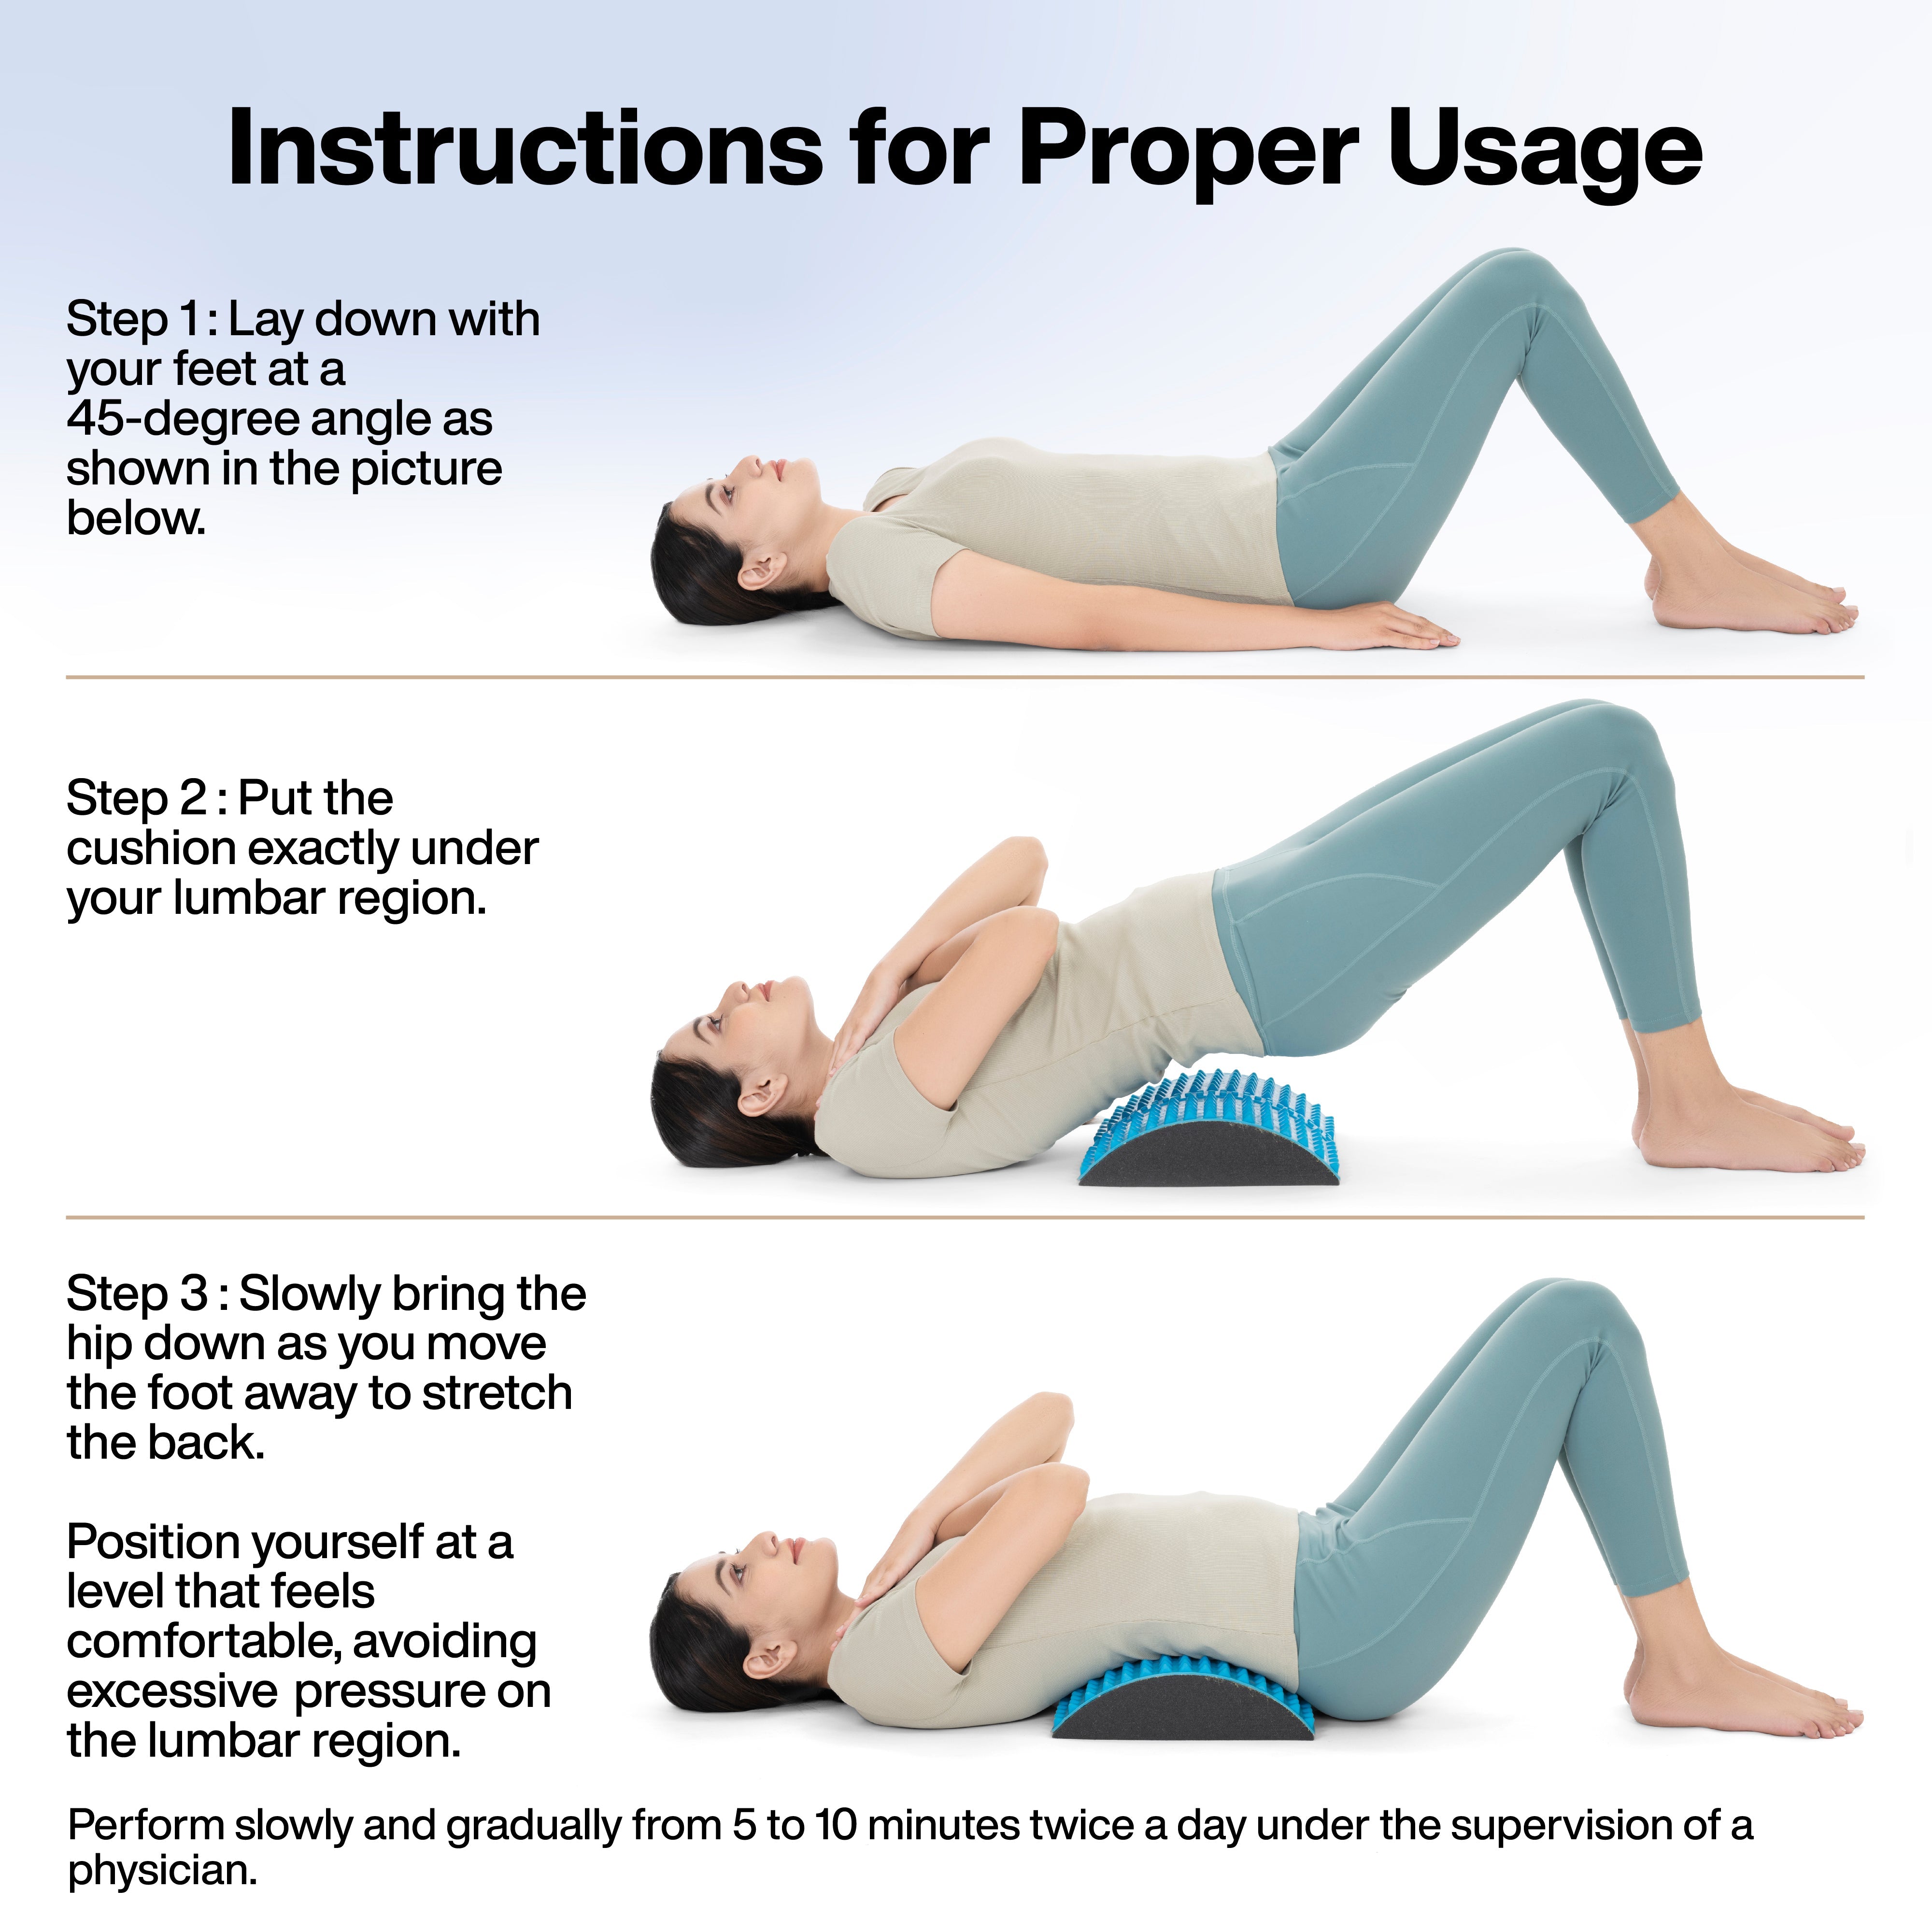
Align the Arch With Your Lower Back
Sit on the floor facing the device. Place the curved arch just above your hips so it targets the lumbar spine, where most people carry tension. The peak of the curve should sit at the base of your spine.
Start at the Lowest Height Setting
On adjustable models, begin with the lowest setting. Your hips and knees should bend at roughly 90 degrees when you lie back. If your legs feel strained or your back arches too sharply, lower the height.
Test for Stability
Press down on the stretcher with both hands. If it wobbles or slides, reposition it or place it on a non-slip mat for better grip.
Get On the Stretcher Safely
Lower Yourself Slowly
From a seated position, place your hands on the floor behind you. Lean back gently, guiding your spine onto the curve. Let your lower back settle first, then let your mid and upper back follow.
Support Your Head and Neck
If your head dangles or feels strained, slide a small pillow or rolled towel underneath. Keep your neck neutral, not cranked backward. Proper alignment prevents neck strain and boosts comfort.
Choose the Best Leg Position
Try both options to see what feels right:
Bent Knees, Feet Flat
- Most beginner-friendly
- Reduces lower back tension
- Easier to control pressure
Legs Straight Out
- Increases stretch intensity
- Engages hamstrings
- May feel tighter, so use only if comfortable
Keep your shoulders flat and relaxed on the floor to stay balanced.
Adjust for Comfort and Support
Secure Straps If Your Model Has Them
Fasten hip or shoulder straps snugly but not tight. They should stabilize your body without restricting breathing or pinching your skin.
Set the Right Intensity
Begin with minimal arch height or tension. You want a light stretch, not discomfort. As your flexibility improves over weeks, gradually raise the setting.
Breathe Deeply Throughout
Inhale slowly through your nose, expanding your ribs. Exhale fully, releasing tension with each breath. Deep breathing tells your muscles to relax and deepens the stretch.
Perform the Stretch

Hold for 5–15 Minutes
Beginners: Start With 5 Minutes
- Use once daily
- Focus on relaxation, not depth
Intermediate: Build to 10–15 Minutes
- Use 1–2 times daily
- Maintain steady breathing
Advanced: Up to 20 Minutes
- Only after several weeks of consistent use
- Never push into pain
Add Gentle Movement (Optional)
Once you’re comfortable, try subtle motions to deepen the stretch:
Side-to-Side Hip Rock
- Gently shift hips left and right
- Loosens lower back and hips
- Keep movements small and controlled
Light Spinal Twist
- Slowly drop both knees to one side
- Hold for 10 seconds, return, repeat on the other side
- Releases mid-back tension
Avoid jerky or forceful motions at all times.
Exit the Stretcher Safely
Release Tension First
If your model has straps or a mechanical crank, loosen them before moving. Sudden pressure shifts can strain muscles.
Roll to One Side
Do not sit up straight from the arched position. Instead:
1. Bend your knees
2. Use your arms to roll slowly onto your side
3. Pause for a few seconds
This protects your spine from abrupt loading.
Sit Up Gradually
Push yourself up using your arms while keeping your back rounded. Avoid locking your lower back. Sit quietly for 10–20 seconds to let your body adjust.
Move Gently Afterward
Walk slowly, stretch your hamstrings, or do a few shoulder rolls. Light activity helps maintain mobility and prevents stiffness from returning.
Build a Consistent Routine
Choose Your Best Time of Day
| Time of Day | Benefits |
|---|---|
| Morning | Wakes up the spine, improves posture for the day |
| Evening | Relieves tension from sitting, promotes relaxation |
Aim for 1–2 sessions daily. Consistency delivers the best long-term results.
Progress Gradually Over Time
- Weeks 1–2: 5-minute sessions, lowest setting
- Weeks 3–6: Increase to 10–15 minutes, moderate intensity
- Month 2+: 15–20 minutes, as comfort allows
Most users notice improved flexibility and reduced stiffness within 2–4 weeks.
Track Your Progress
Keep a simple log with:
– Date and time
– Duration and intensity
– Pain level before and after (1–10 scale)
– Any changes in posture or mobility
This helps you spot patterns and fine-tune your routine.
Maximize Long-Term Benefits

Combine With Core Strengthening
A stretcher opens your spine, but strong muscles support it. Add exercises like:
– Planks
– Bird-dogs
– Glute bridges
Strong core and glutes reduce future back strain.
Improve Daily Posture
Carry what you learn on the stretcher into your day:
– Sit with shoulders back and spine tall
– Avoid slouching at your desk
– Take standing breaks every 30 minutes
The stretch reminds your body what good posture feels like.
Stay Hydrated
Water keeps spinal discs plump and flexible. Dehydrated discs compress more easily. Aim for 8–10 glasses daily.
Pair With Other Stretches
Add these after your session:
– Child’s pose: stretches lower back
– Seated forward bend: lengthens hamstrings
– Cat-cow: warms up the spine
A full routine prevents muscle imbalances.
Troubleshoot Common Issues
“It Feels Uncomfortable at First”
This is normal. Your body isn’t used to the arch.
Fix: Reduce height, shorten time, and warm up better. Discomfort should fade in 1–2 weeks.
“My Lower Back Hurts”
You may be over-arching or misaligned.
Fix: Reposition the stretcher higher on your back (just below ribs) or use bent knees. Reduce intensity.
“My Neck Feels Strained”
Your head is likely tilting back too far.
Fix: Add a small pillow or towel under your neck. Keep chin slightly tucked.
“I Feel Dizzy When Getting Up”
Blood pressure shifts can cause lightheadedness.
Fix: Roll to your side and pause for 15 seconds before sitting up.
“The Stretch Isn’t Working”
You might not be using it consistently or combining it with poor posture.
Fix: Stick to daily use and improve sitting and standing habits. Results build over time.
Choose the Right Stretcher for Your Needs

Match Device to Your Goals
| Need | Best Stretcher Type |
|---|---|
| Lower back pain | Arched back stretcher with adjustable height |
| Tight muscles | Foam roller or massage-enabled model |
| Severe compression | Inversion table (with doctor approval) |
| Travel use | Foldable, portable design |
Key Features to Look For
- Adjustable arch height: allows progression
- Durable materials: supports full body weight
- Non-slip base: prevents shifting
- Neck support: improves comfort
- Heat or vibration: enhances relaxation (optional)
Avoid cheap models that collapse under pressure.
Maintain Your Device Properly
Clean After Each Use
Wipe down the surface with a damp cloth and mild soap, especially if shared. Let it air dry completely before storing.
Inspect for Wear Monthly
Check straps, hinges, and foam. Replace if:
– Straps are frayed
– Frame wobbles
– Foam is cracked or flattened
A damaged stretcher can be unsafe.
Store in a Cool, Dry Place
Keep it away from direct sunlight, which degrades foam and plastic. Fold portable models as instructed by the manufacturer.
Frequently Asked Questions About Back Stretcher Pillows
Can a back stretcher pillow help with lower back pain?
Yes. Regular use decompresses the spine and stretches muscles, directly addressing lower back discomfort and stiffness.
How often should I use a back stretcher pillow?
For best results, use it 1–2 times daily. Start with 5–10 minute sessions and gradually increase duration as tolerance builds.
Are back stretcher pillows safe?
Yes, when used correctly. Start with gentle stretches, listen to your body, and consult a healthcare professional if you have pre-existing conditions.
How do I know if I’m using it correctly?
Correct usage shows up as proper alignment with the lower back, a sensation of gentle stretching without significant discomfort, and the ability to relax deeply into the device.
Can I use a back stretcher pillow for upper or mid-back pain?
Yes. While primarily designed for the lower back, stretchers can improve overall spinal health and flexibility, benefiting the mid and upper back as well.
How long does it take to see results?
Some relief may be felt immediately. However, cumulative benefits typically develop over several weeks, with optimal results often seen after 1–2 months of regular use.
Key Takeaways for Using Your Back Stretcher Pillow
A back stretcher pillow works best when you start slow, prioritize safety, and stay consistent. Focus on proper alignment, gentle progression, and listening to your body. Pair your stretching routine with core strengthening, good daily posture, and hydration for lasting results. Your next step is simple: set up your space, warm up your muscles, and try your first 5-minute session today. With regular use, your back stretcher becomes more than a quick fix. It becomes a long-term investment in a more flexible, pain-free life.