How to Make a Euro Pillow: Quick Steps
If you’ve ever admired the plush, layered look of a luxury hotel bed, the secret likely lies in the euro pillow. These large, square decorative pillows add depth and elegance to any bedding ensemble. Learning how to make a euro pillow is a budget-friendly alternative to buying expensive shams, and it gives you full control over size, fabric, and finish. Whether you’re repurposing old linens or starting fresh, this project delivers professional results with basic sewing skills.
You’ll learn multiple construction methods, discover pro tips for crisp corners and durable seams, and avoid common pitfalls like floppy edges or misaligned zippers. With standard dimensions at 26″ x 26″, euro pillows are simple to size, but small adjustments can make a big difference in fit and appearance. Let’s build a pillow that is both beautiful and built to last.
Choose Your Euro Pillow Size
Standard vs. Large Dimensions
The most common euro pillow size is 26 inches by 26 inches, designed to fit a matching insert for a full, structured look. For larger beds or a bolder statement, a 28″ x 28″ version offers extra presence. When scaling up, increase all measurements by 2 inches, which applies to seam allowances, flanges, and back panels.
Insert Fit Tips
Use a 26-inch insert for a 26-inch cover to achieve a tight, supportive fit. A snug cover prevents sagging and gives a professionally styled appearance. For extra plumpness, double-stuff the insert or choose a slightly oversized form. Avoid loose fits unless aiming for a relaxed, rumpled aesthetic.
Bed Styling Placement
On a King bed, arrange three euro shams; on Queen or Full beds, use two. Place them in front of sleeping pillows and behind accent cushions to create a layered, hotel-style look. This hierarchy adds dimension and visual comfort to your bedroom design.
Pick the Right Fabric and Tools
Best Fabrics for Euro Pillows
Cotton, linen, and lightweight upholstery fabrics work best. Linen delivers a high-end, textured finish with its natural slubby weave. For cost savings, repurpose old king-sized fitted sheets, since one sheet yields enough fabric for three 26″ shams.
Essential Sewing Supplies
Gather these before starting:
- Rotary cutter, L-ruler, and self-healing mat (or sharp scissors)
- Sewing machine with zipper foot and standard presser foot
- Invisible zipper (20–21 inches long)
- Matching thread, fabric clips, and pins
- Iron and starch for crisp pressing
- Turning tool (chopstick or blunt point)
Prep Fabric for Accuracy
Press fabric flat before cutting. Starching helps maintain grain alignment. If using a fitted sheet, remove all elastic with a seam ripper. Finish raw edges with a zigzag stitch or serger to prevent fraying during construction.
Cut Fabric to Exact Measurements
Standard Cut Sizes
For a 26″ finished pillow with 5/8″ seam allowance:
- Front panel: 27.25″ x 27.25″
- Back panels (envelope): Cut one 35″ x 25″, then split into two 17.5″ x 25″ rectangles
For a 28″ pillow, add 2 inches to all dimensions.
Flanged Sham Cutting Formula
Use this equation:
Cut Size = Finished Size + Seam Allowance + (2 × Flange Width)
Example: 26″ pillow + 1.25″ seam + (2 × 2.5″) flange = 32.25″ square
Grain Alignment Matters
Ensure warp and weft run the same direction on all pieces. Misaligned grain causes twisting and uneven seams. Mark top edges with chalk to keep orientation consistent.
Make an Envelope Closure Sham
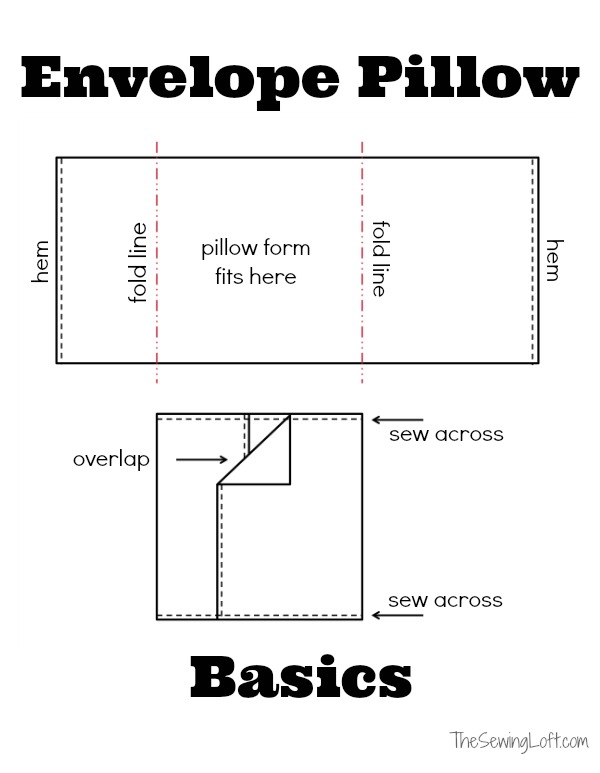
Hem the Back Panels
For each back panel:
- Fold one vertical edge ½” toward wrong side, press.
- Fold again ½” to encase raw edge.
- Pin or clip in place.
- Stitch with straight stitch ¼” from inner fold.
- Backstitch at start and end.
Use basting stitches instead of ironing if fabric resists folding.
Assemble the Envelope
- Lay front panel right side up.
- Place first back panel right side down, aligning outer edges. Hemmed edge faces center.
- Place second back panel on opposite side, also right side down.
- Overlap hemmed edges by 3–4 inches in center.
- Pin all four sides securely.
Sew the Perimeter
- Use 5/8″ seam allowance.
- Sew all around with straight stitch.
- Pivot at corners: lower needle, lift foot, turn fabric 90°, continue.
- Backstitch at beginning and end for durability.
Finish and Press
- Trim excess fabric to ¼” and clip corners diagonally.
- Zigzag stitch inside seam to prevent fraying.
- Turn right side out through envelope opening.
- Push out corners with a chopstick.
- Press seams flat with hot iron.
Install an Invisible Zipper Closure
Cut and Mark Panels
Cut two 29″ x 29″ squares for a 28″ finished sham (includes ½” seam per side). Mark zipper placement by drawing a basting line 4 inches from each end of one top edge.
Attach the Zipper
- Place panels right sides together. Baste along marked line.
- Press seam open.
- Lay invisible zipper face down on seam, centered.
- Pin in place.
- Use zipper foot, needle on left, and stitch along basting line.
- Repeat on second side.
- Remove basting stitches.
- Leave zipper open before sewing remaining sides.
Complete the Pillow
- With zipper open, pin remaining three sides, right sides together.
- Sew with 5/8″ seam allowance.
- Finish raw edges with zigzag stitch.
- Turn right side out through zipper.
- Push out corners and press.
Build a Flanged Euro Pillow

Choose Flange Width
- 1.5″ flange: Crisp, stands upright, minimal support needed.
- 2.5″ flange: Luxurious but prone to flopping, so it requires stabilization.
Stabilize Wide Flanges
Cut iron-on interfacing or buckram strips slightly wider than flange width. Apply to back of face fabric edges before assembly. This adds body and prevents sagging.
Sew and Topstitch
- Assemble front and back with 5/8″ seam.
- Turn right side out and press.
- Measure 2.5″ from outer edge all around.
- Mark line with painter’s tape on machine bed or fabric pen.
- Stitch through all layers along line to secure flange.
Add a Topstitched Frame Detail
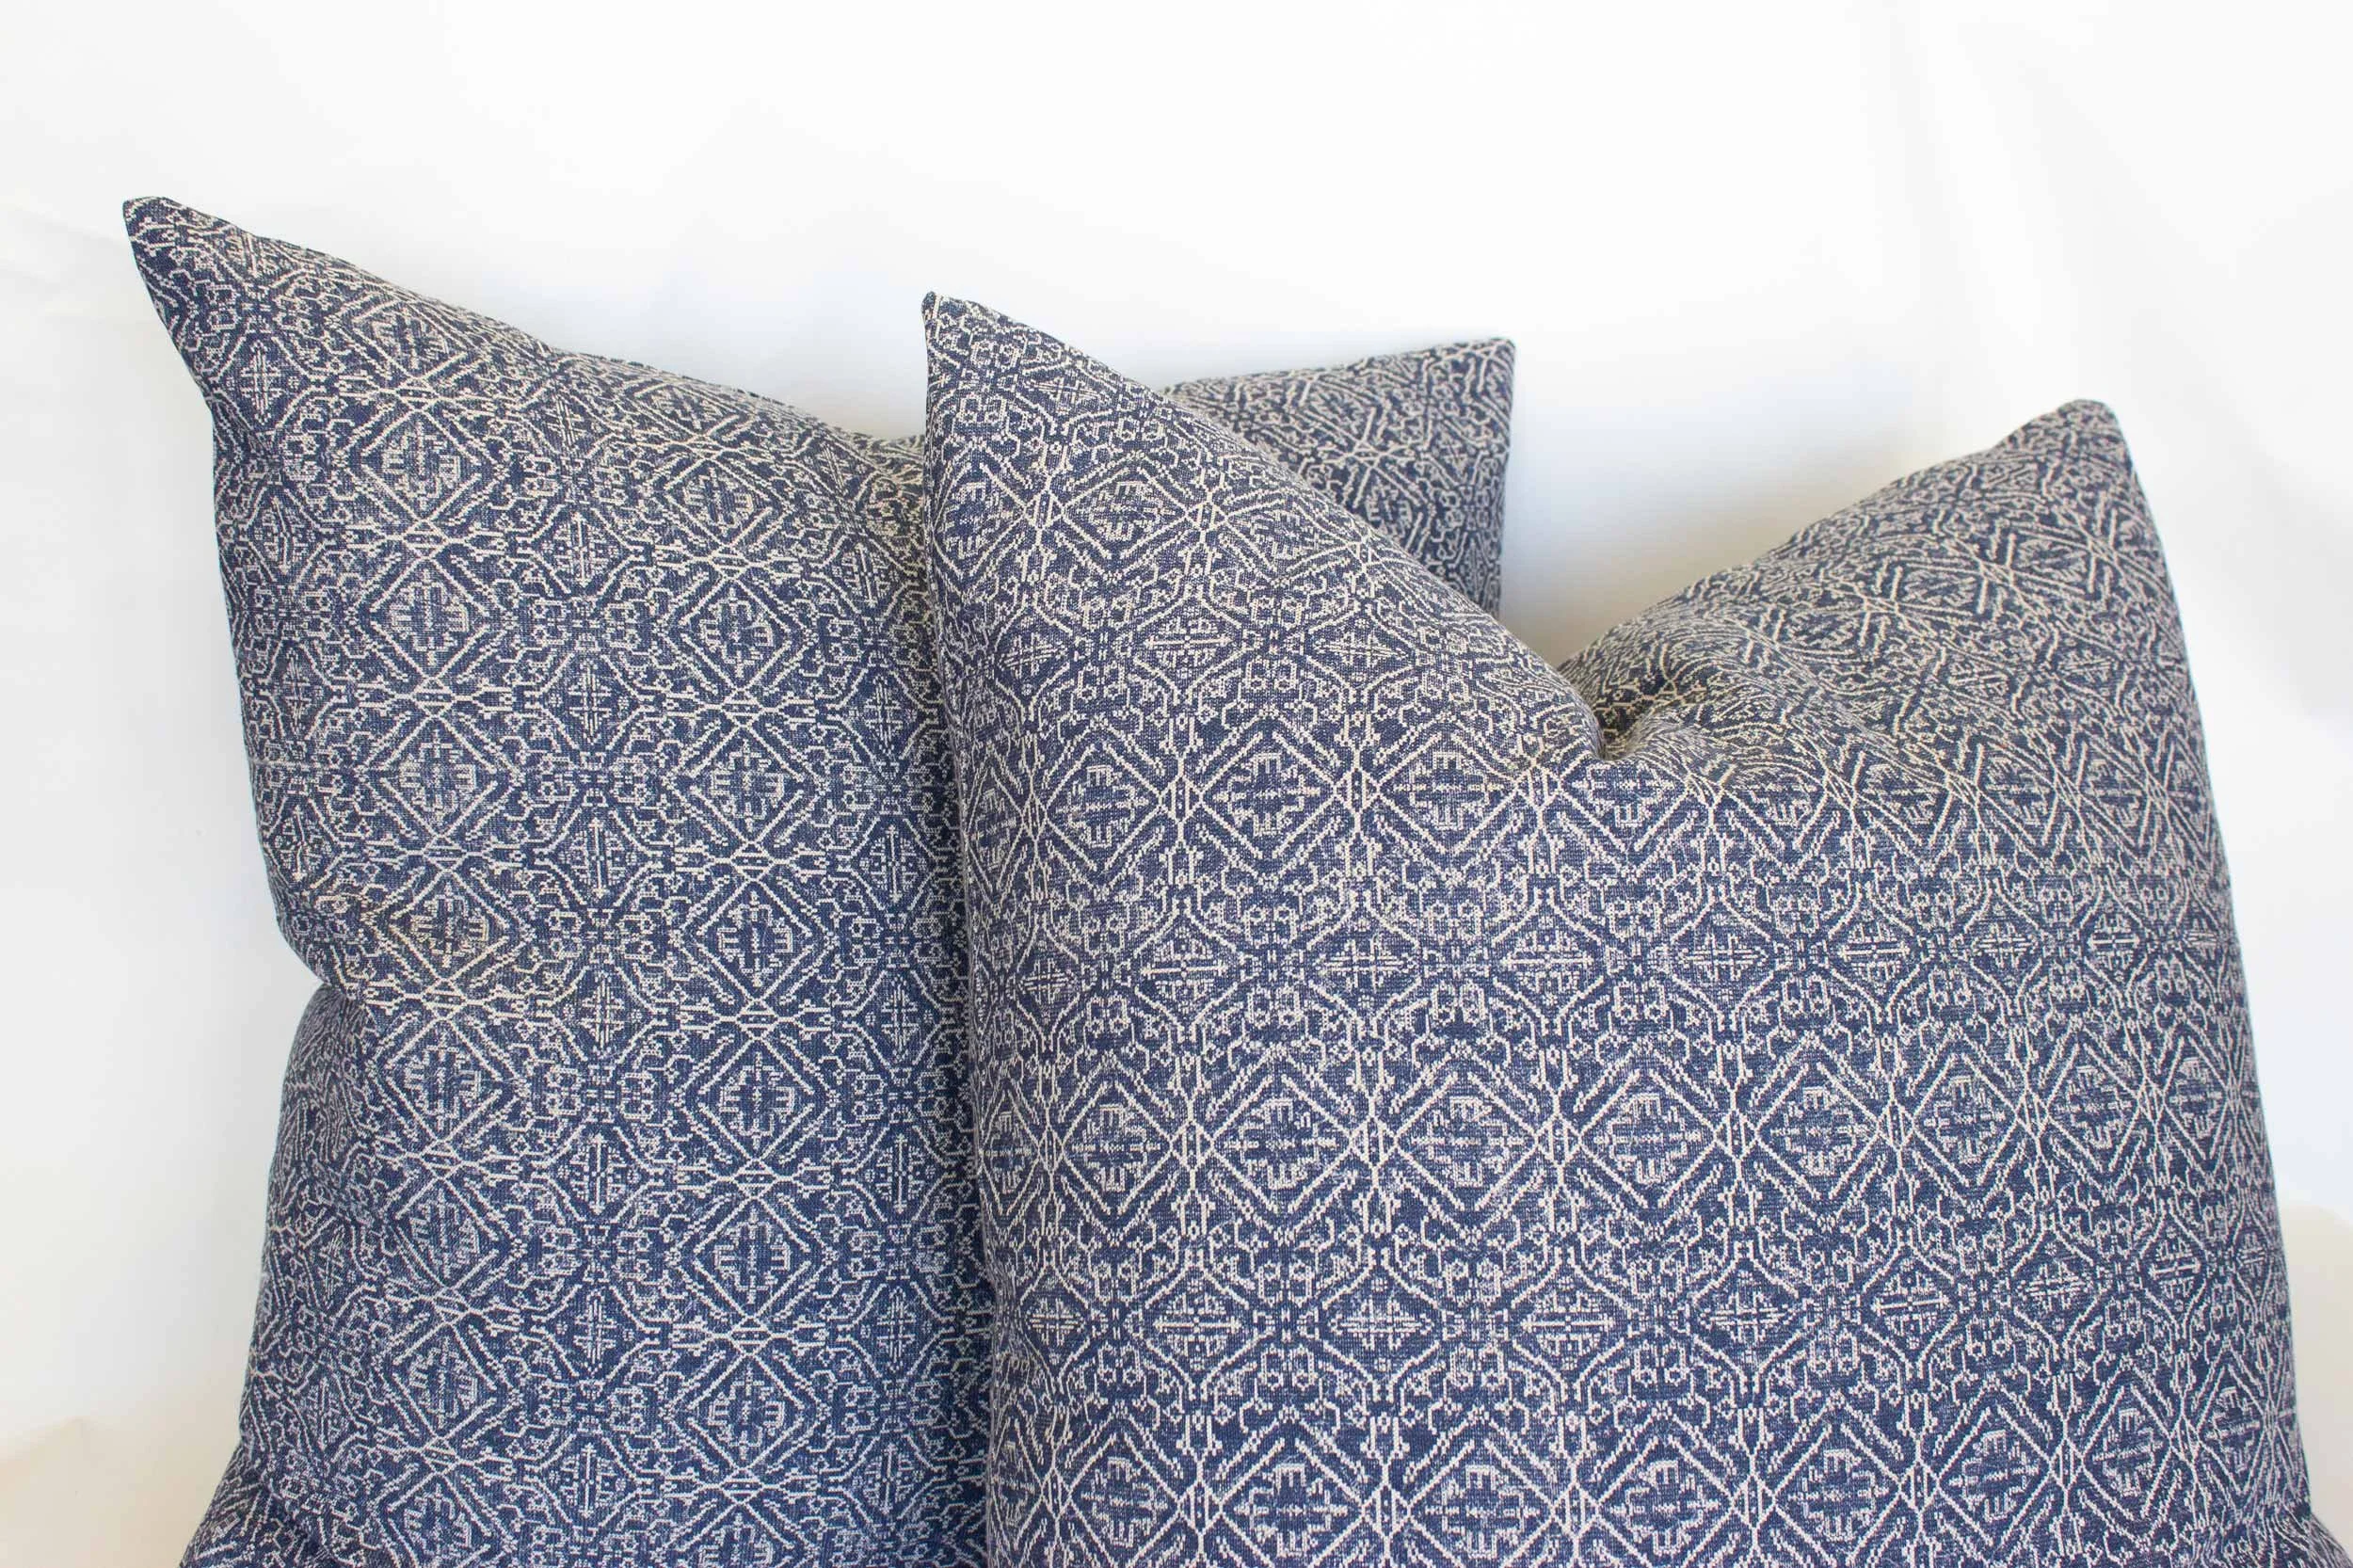
Create the Frame Effect
- Make a basic sham with envelope or zipper.
- On front panel, measure 2 inches from each edge.
- Mark a square frame with a friction pen or washable marker.
- Stitch along marked line with straight stitch.
- Press with hot iron; friction pen marks disappear with heat.
This frame adds a tailored look without extra fabric bulk.
Try a Pleated Back Design

Cut and Fold
Cut two 25″ squares for a 24″–26″ finished pillow. On the back piece:
- Fold vertically in half, wrong sides together.
- Stitch ¼” from fold on both sides to create a center tuck.
Assemble with Opening
- Place front and back right sides together.
- Pin and sew around, leaving 6-inch opening at bottom.
- Trim corners diagonally (not too close to stitches).
- Turn right side out.
- Insert pillow form.
- Hand-sew opening closed with blind stitch.
This subtle pleat adds texture and luxury, especially in linen.
Fix Common Issues Fast
Stop Flanges from Flopping
Large flanges lose shape. Fix by:
- Applying interfacing before sewing
- Reducing flange width to 1.5″
- Using stiffer fabric like cotton duck
Get Sharp Corners Every Time
- Trim corners diagonally before turning
- Pivot with needle down when sewing
- Use chopstick or turning tool to push out points
- Press seams flat after turning
Handle Thick or Fuzzy Fabrics
- Skip trimming inside seams, since too much bulk removal weakens stitches
- Use basting stitches instead of ironing hems
- Sew slowly with sharp needle (size 90/14)
Optimize Fit and Longevity
Adjust for Tight or Loose Look
- Tight fit: Cut fabric exactly to size + seam allowance
- Loose drape: Add 1 inch to width and length before cutting
- Plump corners: Use correct insert size or double-stuff
Prevent Fraying and Wear
- Finish all raw edges with zigzag stitch or serger
- Apply fray check liquid near zippers and corners
- Wash pillow (cover + insert) with two tennis balls to maintain fluffiness
Save Money and Time
- Repurpose king sheets for near-zero material cost and high-end fabric
- One pair of shams takes 1.5 hours or less
- Monogram for a custom touch; place design at bottom for balance
Frequently Asked Questions About Euro Pillows
What is the standard size for a euro pillow?
The standard euro pillow size is 26 inches by 26 inches. A larger variation at 28″ x 28″ is also common, especially for King beds. When scaling up, add 2 inches to all linear measurements including seam allowances and back panels.
What fabric works best for making euro pillow shams?
Cotton, linen, and lightweight upholstery fabrics are ideal choices. Linen offers a luxurious, slubby texture that mimics high-end designer bedding. For budget-friendly projects, old king-sized fitted sheets can be repurposed, with one sheet yielding enough material for three 26″ shams.
How do I prevent flanges from flopping over?
Large flanges (over 2 inches) tend to lose their shape. Apply iron-on interfacing or buckram strips to the back of the face fabric edges before assembly. Alternatively, reduce the flange width to 1.5 inches or use a stiffer fabric like cotton duck for natural structure.
Can I make a euro pillow without a zipper?
Yes, the envelope closure method eliminates the need for zippers entirely. This technique uses two overlapping back panels with hemmed inner edges that create a 3–4 inch overlap in the center. The pillow is inserted through this opening, making it easy to remove for washing while maintaining a clean, seamless appearance.
How long does it take to sew a euro sham?
A pair of euro shams can typically be completed in 1.5 hours or less with basic sewing skills. The envelope method is generally faster, while invisible zipper installations and flanged designs require additional time for precision and topstitching.
What insert size should I use for a 26-inch euro sham?
Use a 26-inch insert for a 26-inch cover to achieve a tight, supportive fit. For extra plumpness, consider doubling up inserts or choosing a slightly oversized form. A snug fit ensures the corners stay fully filled and the sham maintains a professional, structured appearance.
Key Takeaways for Making Your Own Euro Pillow

Making a euro pillow is a rewarding project that elevates your bedroom decor without the designer price tag. Start by choosing your preferred closure method: envelope for simplicity, invisible zipper for a seamless back, or flanged designs for added elegance. Precision matters most during the cutting and pressing stages, so measure carefully and align your fabric grain consistently.
For best results, stabilize wide flanges with interfacing, finish all raw edges to prevent fraying, and use a 26-inch insert for a 26-inch cover. Repurposing old king sheets saves money while delivering luxury-quality fabric. Grab your rotary cutter, press that fabric flat, and start with one sham to master the technique before creating a coordinated set.