How to Make a Shirt Into a Pillow
Have you ever looked at an old shirt gathering dust in your closet and wished you could turn it into something meaningful? Whether it belonged to a loved one, no longer fits, or carries a memory you can’t bear to toss, making a shirt into a pillow is a heartfelt way to preserve its story. This simple project transforms fabric with sentimental value into a cozy keepsake you can hug, display, or gift. Even better, you don’t need expert sewing skills to pull it off.
In this guide, you’ll learn two proven methods for turning a shirt into a pillow: a sewn envelope cover and a quick no-sew version. We’ll cover how to pick the right shirt, cut it accurately, assemble the pieces, and add finishing touches that make your pillow last. By the end, you’ll have everything you need to create a personalized pillow in under an hour.
Choose Your Shirt and Pillow Size

Pick the Right Shirt Type
The shirt you choose sets the tone for your finished pillow. Button-down shirts made from cotton, flannel, or denim create structured, durable pillows. Their flat panels, collars, and pockets add character, making them perfect for memory projects. T-shirts and knit shirts offer a softer, cozier feel. They’re ideal when you want to showcase a large graphic or logo. Avoid shirts with major rips or thin, worn areas unless you plan to cut around the damage.
Match Shirt Size to Pillow Form
Your shirt must be large enough to cover the pillow form with room for seams. A Men’s XL shirt (about 30″ long and 26″ wide) comfortably fits a 20″ x 20″ pillow form. Smaller shirts work well for 18″ x 18″ forms. Always measure your shirt before cutting: lay it flat and measure from shoulder seam to hem, then across the chest. If your shirt is too short, downsize your pillow form. For graphic tees, center the design in your cut and let the image size guide your final dimensions.
Select the Pillow Insert
Standard 18″ x 18″ or 20″ x 20″ pillow forms work best for most projects. These are widely available at craft stores and online. If you don’t have a form on hand, you can stuff the cover with poly-fill, old fabric scraps, or even pieces cut from another pillow. Just make sure the stuffing is firm enough to give the pillow shape without straining the seams.
Gather Tools and Materials
Essential Supplies List
You only need a few basic items to get started:
- One clean shirt (button-down or T-shirt)
- Pillow form (18″ or 20″ square)
- Fabric scissors
- Chalk or fabric marker
- Ruler or measuring tape
- Iron and ironing board
- Pins or Wonder Clips
For sewn versions, also grab:
- Sewing machine (or needle for hand stitching)
- Cotton thread (Aurifil 50 wt is a reliable choice)
- Zig-zag stitch capability for knit fabrics
For no-sew versions, also grab:
- Iron-on fusible bonding tape (Dritz Stitch Witchery Heavy Duty works well)
- Optional: pom-pom trim and fray check
Optional Upgrades for Durability
Consider using stabilizer like Shape Flex or SF101 if your shirt fabric is thin or stretchy. It adds body and prevents sagging over time. For T-shirt pillows with decorative trim, apply fray check to raw edges if you plan to wash the cover. A rotary cutter and cutting mat help achieve straight, professional cuts, especially on plaid fabrics.
Cut the Shirt Properly
Prepare the Shirt for Cutting
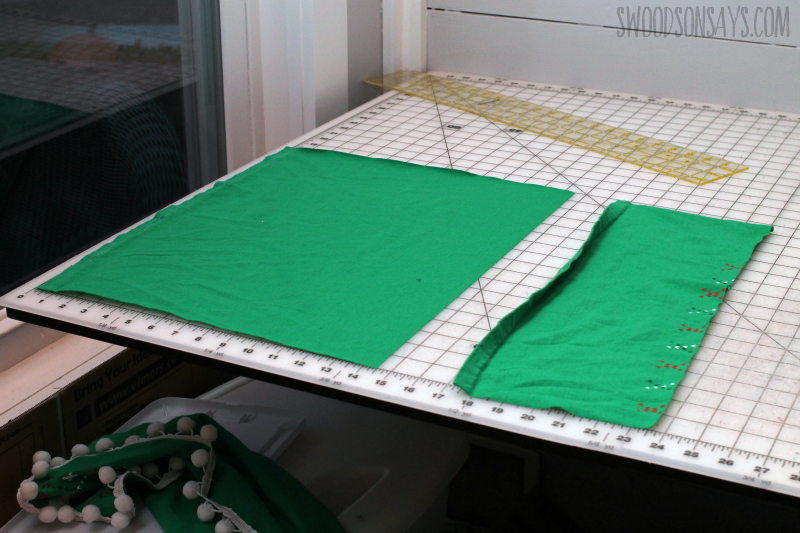
Start by ironing the shirt to remove wrinkles. This step ensures accurate cutting. For button-downs, button the front to keep the layers aligned. Lay the shirt flat on a clean surface, smoothing out any folds. If you’re using a T-shirt, cut up the side seams from the bottom to the armpits so the front and back lie flat.
Mark and Cut the Front Panel
Decide where you want the front of the pillow to appear. For memory shirts, use the chest area. It may have a pocket, monogram, or natural wear that adds character. For graphic tees, center the design. Use chalk and a ruler to mark a square that matches your pillow form size.
- For an 18″ form, cut an 18″ x 18″ square (or 19″ x 19″ for a flatter look).
- For a 20″ form, cut 20″ x 20″.
Use plaid lines as guides if your shirt has a pattern. This trick eliminates the need for measuring. Cut through both front layers at once for consistency.
Save Fabric for the Back (Envelope Method)
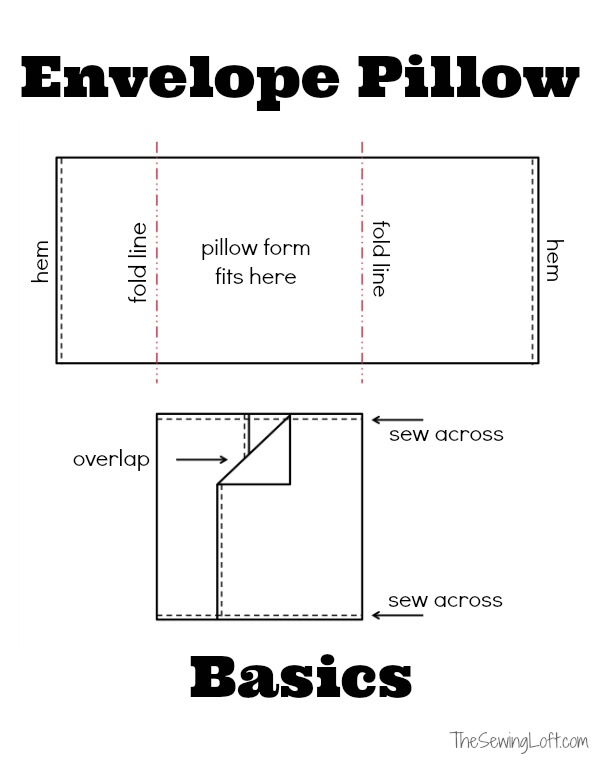
If you’re making a removable envelope cover, you’ll need two back panels. Cut:
- Top flap: 18″ wide x 7″ high (use the original bottom hem if possible)
- Bottom panel: 18″ wide x 16″ high (from the back of the shirt)
Ensure the overlap is at least 5″ when both pieces are placed together. This prevents the pillow form from slipping out. Using the shirt’s existing hem creates a clean, finished edge with no extra work.
Sewn Envelope Pillow: Step by Step
Layer and Pin the Panels
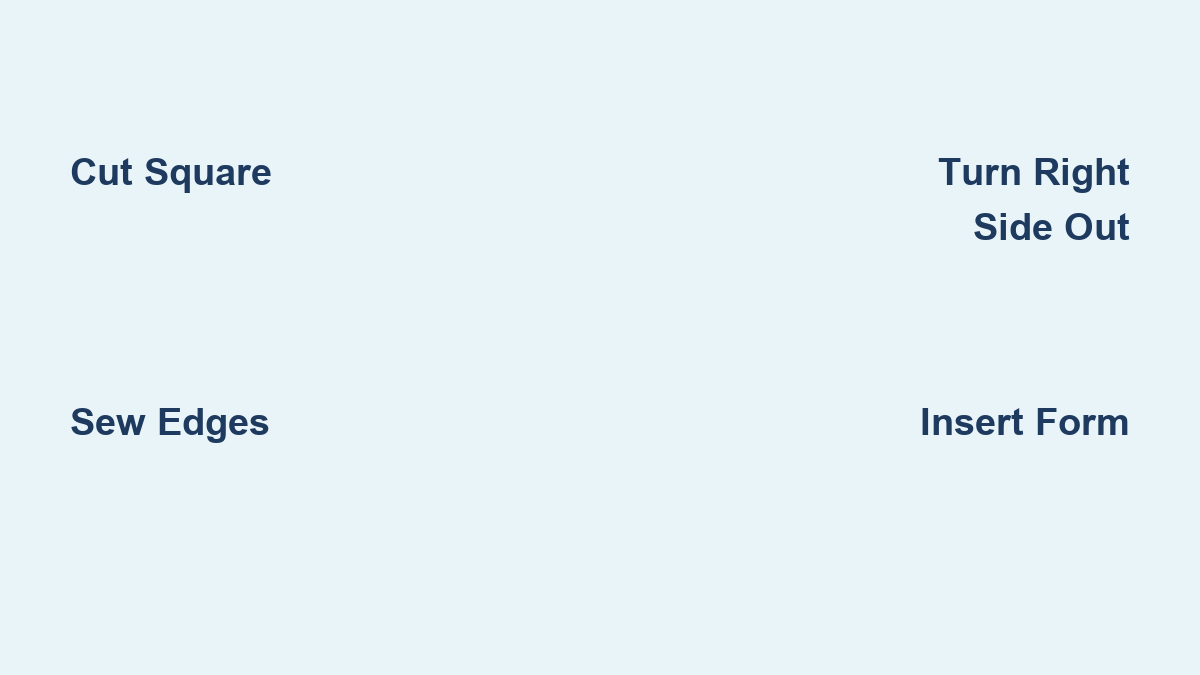
Place the larger back piece (16″ high) right side up. Lay the front panel right side down on top. Then place the smaller back piece (7″ high) right side down, overlapping the first back piece by at least 5″. The original hems should face inward, creating the envelope opening. Pin or clip all layers around the edges.
Sew the Edges with Proper Stitch
Using a 1/4″ to 1/2″ seam allowance, stitch around all four sides. For woven fabrics like button-downs, a straight stitch works fine. For knits like T-shirts, use a zig-zag stitch to allow for stretch and prevent popped seams. If you miss a spot, don’t panic. Just restitch it. The stuffing will hide small errors.
Trim Corners and Turn Right Side Out
Trim the fabric from each corner diagonally to reduce bulk. Carefully turn the cover right side out through the envelope opening. Use a chopstick or pen to push out the corners for sharp edges. Press the seams with an iron if desired.
Insert Pillow and Secure Flaps
Slide the pillow form through the envelope opening. Tuck the overlapping flaps under so they lie flat. No buttons or zippers needed. The cover stays closed by friction and overlap.
No-Sew Button-Down Pillow: Fast Method
Cut a Large Double-Layer Square
For this method, cut a square 1″ larger than your pillow form on each side (e.g., 20″ x 20″ for an 18″ form). This extra inch allows for the bond seam. Cut through both front and back of the shirt, keeping them connected, or cut separate panels. Keep buttons and pockets intact if you want them as design features.
Apply Fusible Bonding Tape
Flip the fabric so right sides are together (inside out). Place iron-on fusible tape between the layers along all four edges. Make sure the tape runs continuously with no gaps.
Iron to Seal the Edges
Set your iron to the cotton setting (no steam). Press firmly along each edge for 10–15 seconds to melt the adhesive. Move slowly and apply even pressure. Let cool completely. The fused edges now act as permanent seams.
Turn and Stuff the Pillow
Unbutton the shirt. Turn the entire piece right side out through the open front. The buttons should now be on the outside. Insert the pillow form through the buttoned opening. Button the shirt closed. The front becomes the pillow’s closure.
Add Finishing Touches
Attach Pom-Pom Trim (T-Shirt Version)
For a fun, decorative edge on T-shirt pillows, sew pom-pom trim around the front panel before assembling. Use a 1/4″ seam allowance and miter corners by folding the trim neatly at 45-degree angles. Apply fray check to the ends if washing is needed.
Preserve Pockets and Buttons
Don’t remove existing features. Pockets and buttons add charm and authenticity, especially in memory pillows. A chest pocket can become a focal point. In no-sew versions, buttons allow easy access for stuffing or cleaning.
Press for a Crisp Finish
After sewing or fusing, press the pillow cover with a warm iron. Use a wool pressing mat if available for best results. This flattens seams and gives a professional look. Avoid ironing directly on fusible tape. Use a press cloth instead.
Troubleshoot Common Issues
Fix Bulging or Gaping Backs
If the envelope back won’t stay closed, the overlap is too small. Always use at least a 5″ overlap. Ideal back panel heights are 3/4 of the total cover height, such as 16″ plus 7″ for an 18″ cover. If already assembled, restitch with wider back panels.
Correct Uneven Cuts
If edges are crooked, use plaid lines as guides next time. For solid colors, make a paper template from cardboard and trace it. A rotary cutter and mat ensure straight cuts. Minor imperfections are hidden once the pillow is stuffed.
Prevent Knit Fabric Curling
T-shirt fabric tends to stretch and curl. To stabilize, use a zig-zag stitch and consider iron-on stabilizer like Shape Flex. Pin frequently to keep layers aligned during sewing.
Ensure Strong No-Sew Bonds
If the fusible tape fails, the iron wasn’t hot enough or pressure was too light. Use a dry iron on high cotton setting and press each edge slowly. Test on a scrap first. Dritz Heavy Duty tape holds best for frequent use.
Maintain and Preserve Your Pillow
Wash Carefully to Extend Life
For sewn covers, remove the pillow form and machine wash cold on gentle cycle. Tumble dry low or air dry. For no-sew versions, spot clean when possible. Frequent washing may weaken the bond. If washing is needed, hand wash and air dry flat.
Store Seasonal Pillows Properly
Keep decorative shirts in vacuum-sealed bags or cotton storage boxes to prevent dust and moths. Label them by season (e.g., “Fall Flannel”) for easy rotation.
Repair and Refresh Over Time
If seams loosen, restitch with matching thread. Replace worn pillow forms with new inserts. You can even re-cover the same form with a different shirt for a fresh look. This trick is ideal for seasonal decor.
Frequently Asked Questions About Making a Shirt Into a Pillow
What size shirt do I need for a 20×20 pillow?
A Men’s XL shirt works best for a 20″ x 20″ pillow form. You need at least 30″ of length and 26″ of width to accommodate the front panel, back panels, and seam allowances. Smaller shirts may require you to downsize to an 18″ x 18″ form.
Can I make a pillow from a T-shirt without sewing?
Yes. Use the no-sew fusible method with iron-on bonding tape like Dritz Stitch Witchery. Cut your fabric, place fusible tape between the layers, and iron to seal the edges. This method works best for button-down shirts but can be adapted for knits with extra care.
How do I keep the envelope back from popping open?
Ensure your back panels overlap by at least 5 inches. A good rule is to make each back panel roughly 3/4 the total height of the cover. For an 18″ cover, try a 16″ bottom panel and a 7″ top flap. The friction from the overlap keeps everything secure.
What stitch should I use for T-shirt fabric?
Use a zig-zag stitch when sewing knits like T-shirts. This stitch allows the fabric to stretch without breaking the thread. A straight stitch can pop when the fabric moves. If your machine lacks a zig-zag setting, hand stitch with a flexible running stitch.
How long does it take to make a shirt pillow?
The sewn envelope method takes about 45 to 60 minutes, including cutting and pressing. The no-sew fusible method can be completed in as little as 15 minutes. Both projects are beginner-friendly and forgiving of small mistakes.
Key Takeaways for Turning a Shirt Into a Pillow
Turning a shirt into a pillow is more than a craft. It’s a way to honor memories, reduce waste, and personalize your space. Choose the sewn envelope method if you want a washable, reusable cover that lasts for years. Choose the no-sew fusible technique if you want a quick 15-minute project with a functional button closure. Either way, the result is a soft, meaningful pillow that tells a story.
Start with one shirt, follow these steps, and you’ll soon be making pillows for gifts, decor, or keepsakes. Each one will be stitched with sentiment and made to last.